Eyes are the part of any drawing that people look at first. A face can have a lopsided nose, slightly uneven lips and crooked eyebrows, and most people will not notice because they are looking at the eyes. Getting the eyes right makes everything else feel right, which is why drawing eyes well is one of the most valuable skills in any drawing toolkit, and also why it can feel so frustrating when the eyes on a face come out flat, uneven or lifeless.
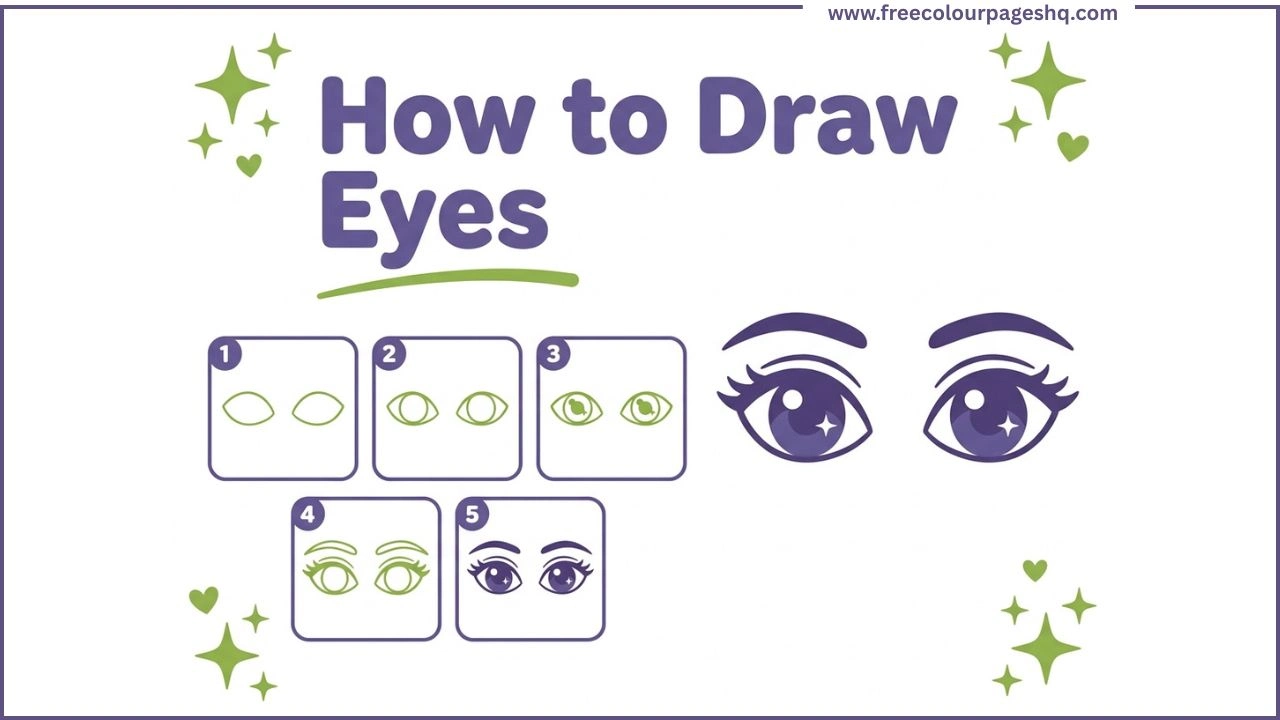
The good news is that cartoon eyes use a very small number of shapes and details, and once those shapes are understood the process becomes reliable and repeatable. This tutorial shows how to draw a pair of cute cartoon eyes step by step in five stages. The method produces two symmetrical eyes with almond outlines, iris circles, pupils, sparkle highlights, eyelids, eyelashes and eyebrows. It works for drawing eyes for kids, for anime-style eyes, for character illustration and for adding eyes to any animal or cartoon face. All you need is a pencil, an eraser and something to colour with at the end.
What You Need
A pencil and eraser for the early steps. Fine-tipped markers or coloured pencils for colouring the finished eyes. Plain white paper works perfectly.
How to Draw Eyes Step by Step
Step 1 — Draw Two Almond Eye Shapes
Start in the center of the page and draw two almond shapes side by side with a small gap between them. Each almond has a pointed corner on the inner side and a slightly more rounded corner on the outer side. Both shapes should sit on the same horizontal line and be the same size.
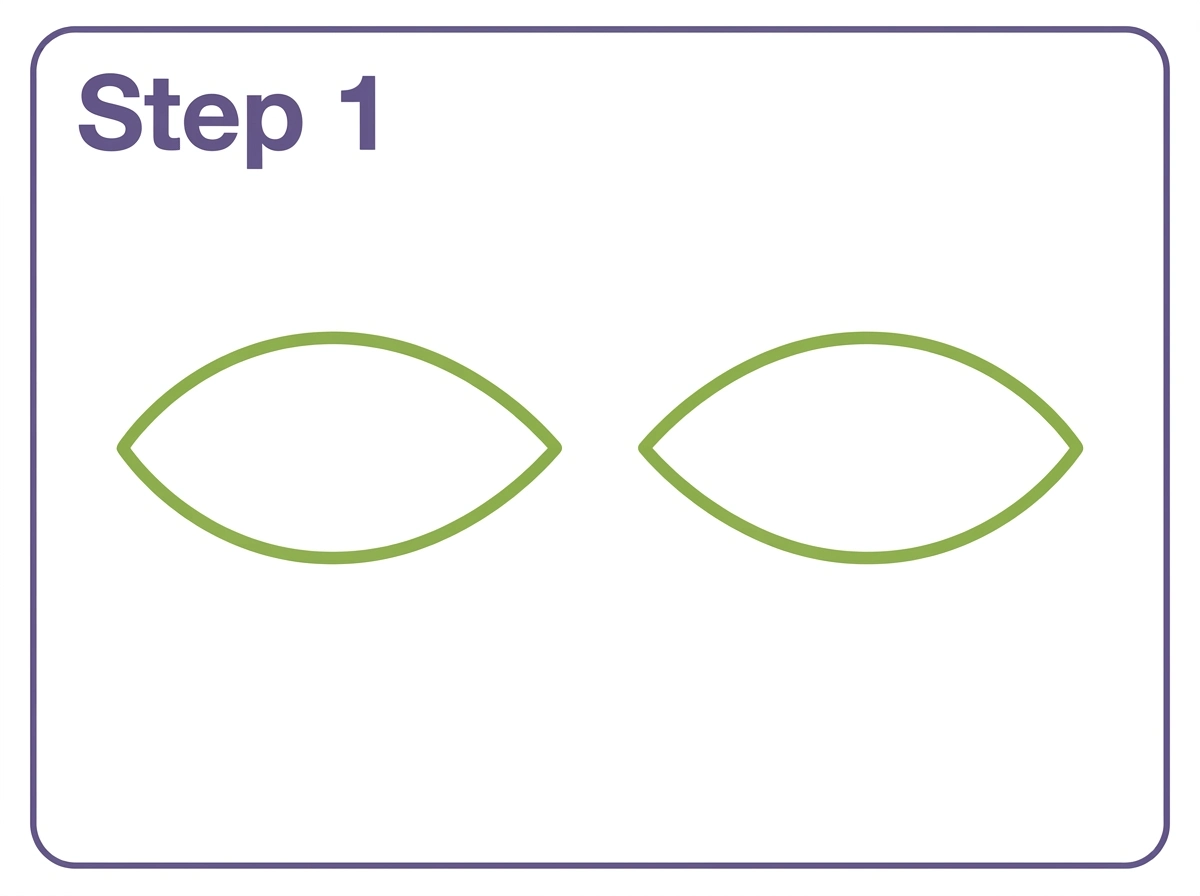
Drawing both eyes at the same time from the start, rather than finishing one eye before starting the other, is the key habit that produces symmetrical results. Any adjustment made to one eye can be immediately mirrored in the other while the shapes are still fresh.
The gap between the two eyes matters. A gap roughly equal to the width of one eye produces balanced proportions for a cartoon face. A wider gap produces an innocent, surprised expression. A narrower gap produces an intense, focused look.
Step 2 — Draw the Iris Circles
Inside each almond shape, draw a large circle for the iris. The iris circle should be large enough that the top of the circle sits behind the upper eyelid line and the bottom of the circle just touches or slightly overlaps the lower eyelid line. This partial hiding of the iris behind the eyelid is one of the details that makes drawn eyes look natural rather than staring.
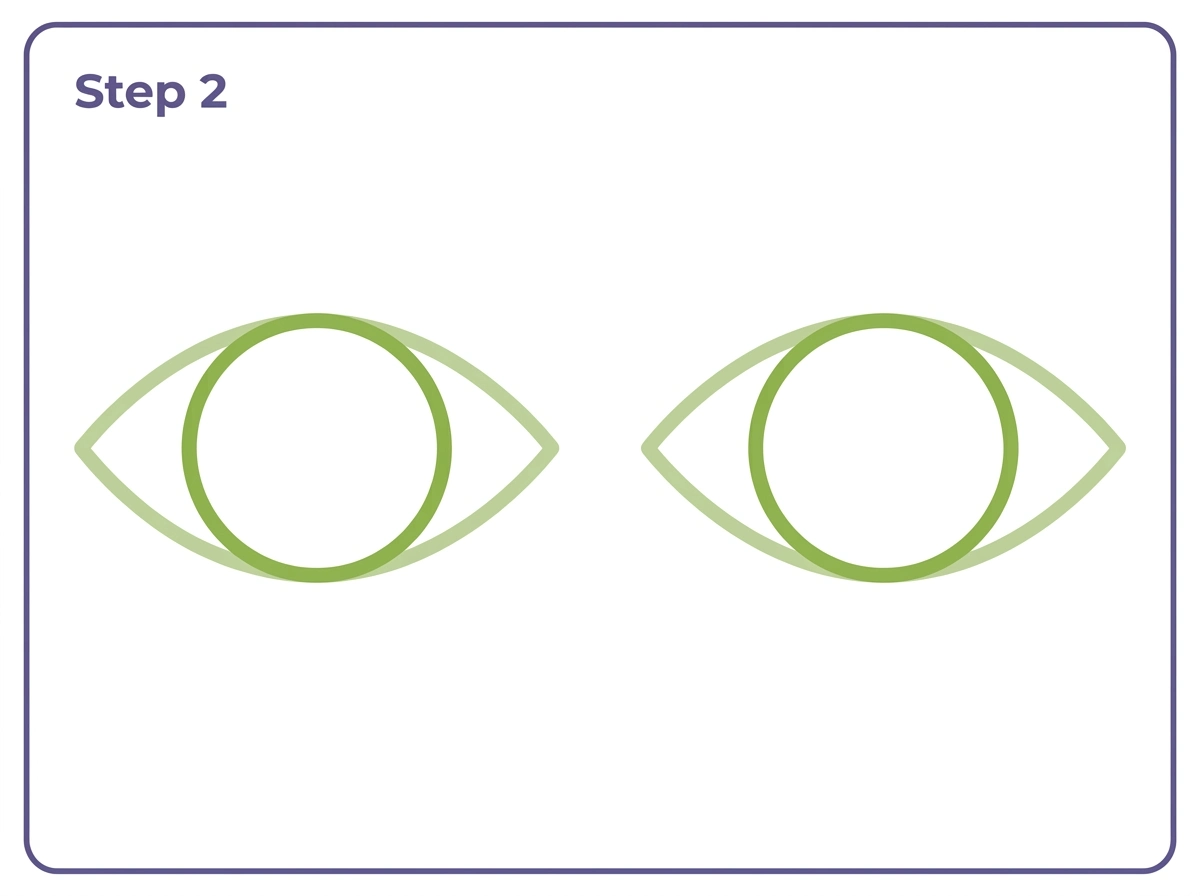
Both iris circles should be the same size and positioned at the same height within their respective almond shapes. Spend a moment checking that the two irises are genuinely symmetrical before moving to the next step, because asymmetrical irises are one of the most noticeable problems in finished eye drawings and much easier to fix at this stage than later.
Step 3 — Add Pupils and Sparkle Highlights
Inside each iris circle, draw a smaller circle for the pupil. Position the pupil in the center of the iris for a forward-looking gaze. Place both pupils at exactly the same position within each iris because misaligned pupils create the impression that the character is looking in two different directions at once.
Inside each pupil, leave a small white oval dot unfilled near the upper left area. This is the sparkle highlight, and it is the single most important detail in making drawn eyes look alive. Without the sparkle the eyes look flat and dull regardless of how well the rest of the drawing is executed. With the sparkle, even a very simple eye shape reads as bright and expressive.
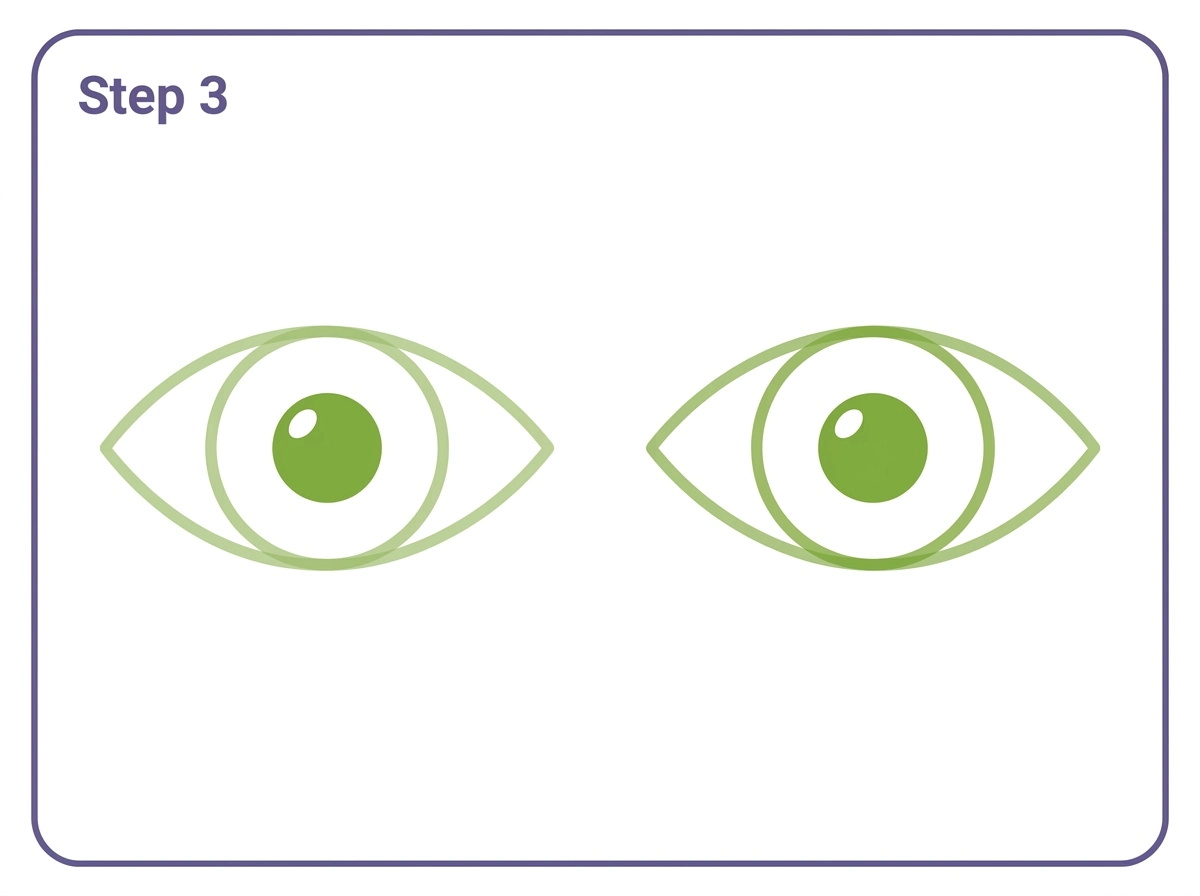
For cute eyes and kawaii eyes, make the sparkle highlight very large relative to the pupil. A sparkle that takes up a third or more of the pupil area produces the characteristic shiny, wide-eyed look that defines kawaii character design.
Step 4 — Add Eyelids, Eyelashes and Eyebrows
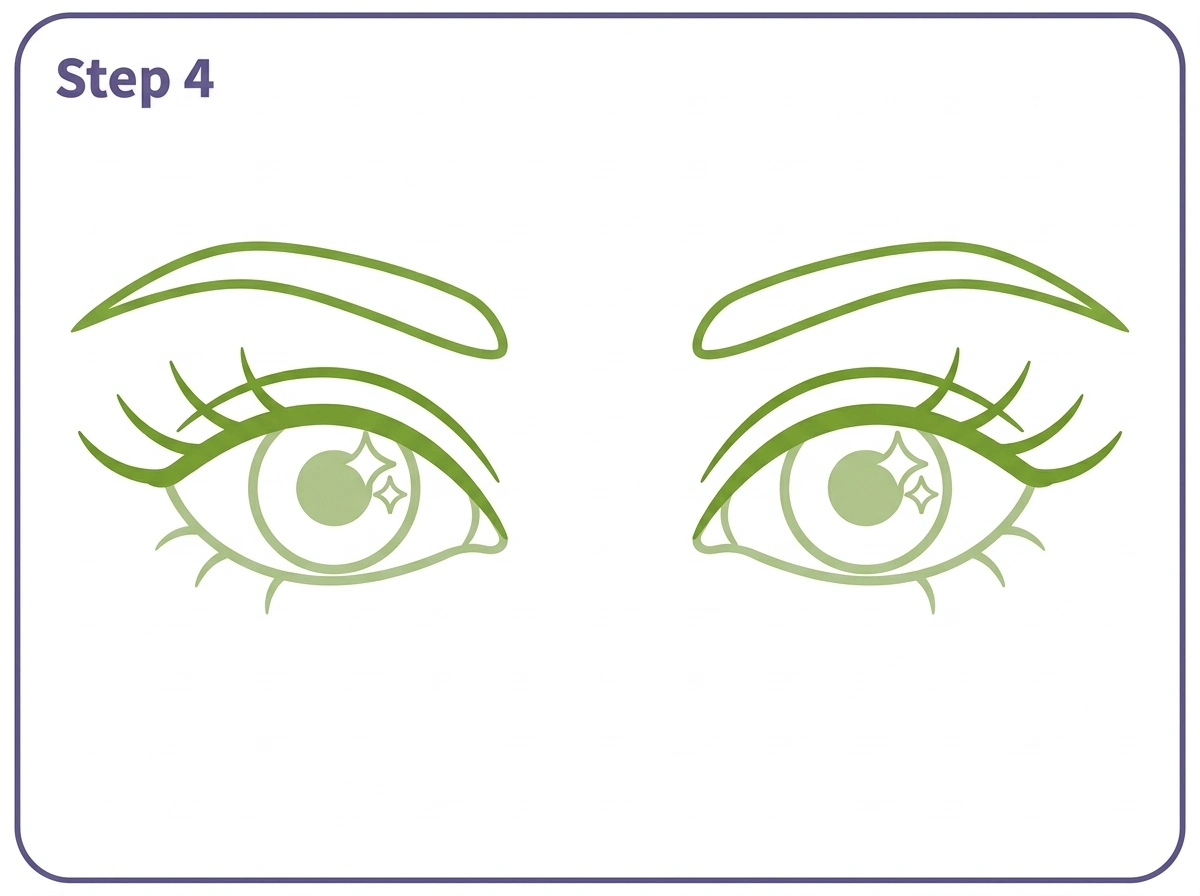
Draw a slightly thicker curved line just above the existing upper almond outline to create the upper eyelid. This doubled upper line gives the eyelid a sense of thickness and depth that a single thin line cannot achieve.
Along the upper eyelid edge, add five or six short curved eyelash lines fanning upward and outward. The lashes at the outer corner should be the longest and the ones at the inner corner the shortest. This fanning pattern follows the natural growth direction of real eyelashes and produces a more graceful result than lashes of equal length placed evenly.
Add two or three shorter lashes along the lower eyelid edge as well, pointing downward.
Above each eye, draw an arched eyebrow. The eyebrow should begin just above the inner corner of the eye, arch slightly upward in the middle and taper to a point at the outer end. The gap between the eye and the eyebrow affects the expression significantly. A wider gap produces a relaxed, open expression. A gap that is very small or where the brow is angled sharply downward produces a fierce or concerned expression.
Step 5 — Colour the Eyes
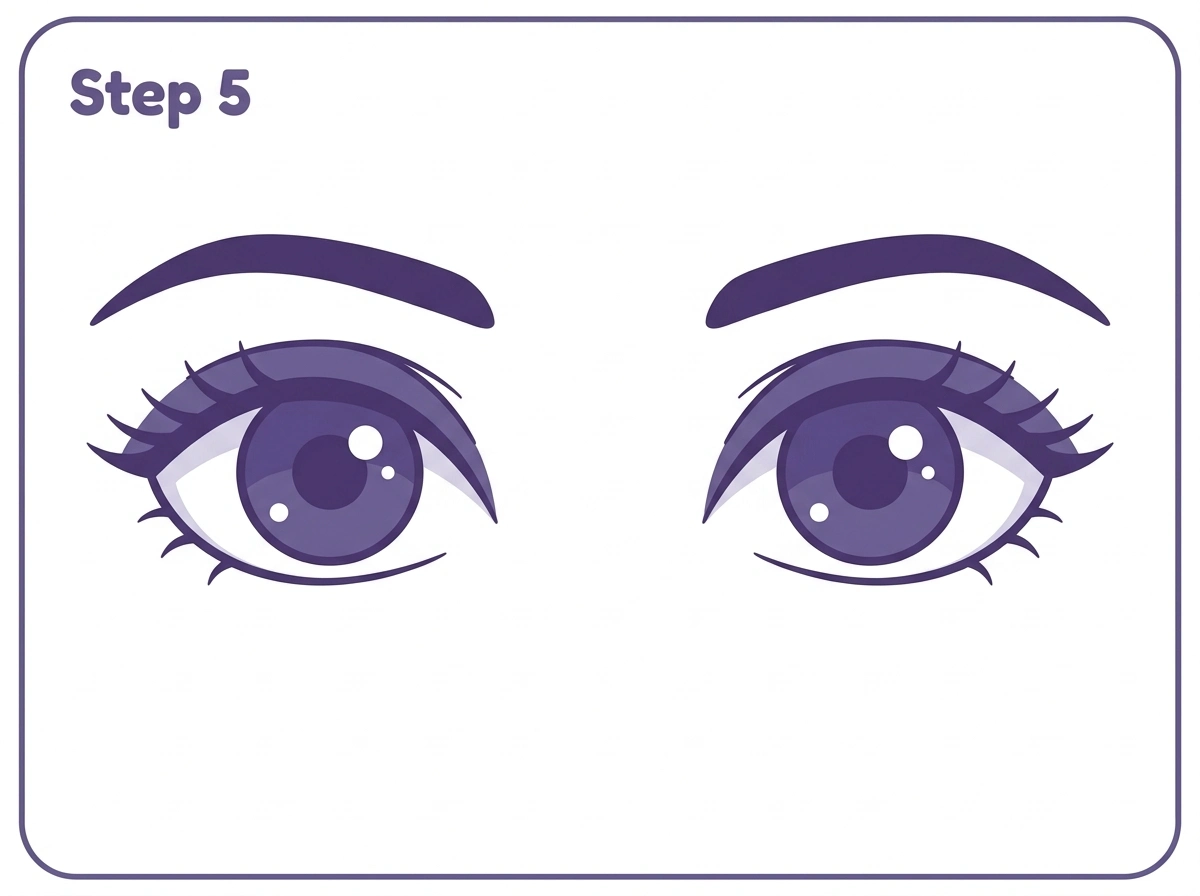
The eyes are now fully drawn and ready to colour. The iris is the primary colour decision, and it has a significant impact on the character’s overall personality.
Brown eyes use warm amber or chocolate tones with a darker ring around the outer edge of the iris. Blue eyes use a mid-blue for the iris with a slightly lighter center near the pupil. Green eyes use a warm olive or bright grass green. Grey eyes use a cool neutral tone. Hazel eyes combine warm brown and green in the same iris.
For a cartoon eye, a single flat colour for the iris works well. For a more detailed eye, a gradient from lighter at the center to slightly darker at the outer ring gives the iris more depth.
The eyelashes and eyebrows are typically drawn in dark brown or black for natural hair colours and can be adjusted to match any character’s hair colour. The white of the eye surrounding the iris is left as white paper or given the faintest warm cream tone to suggest the sclera without making the eye look unnatural.
How to Draw Anime Eyes
Anime eyes share the same basic construction as the cartoon eyes in this tutorial but with specific proportions and details that define the anime style. Anime girl eyes are typically very large relative to the face, with iris circles that fill almost the entire almond shape and sparkle highlights that are large, elaborate and sometimes multiple in one eye.
Manga eyes, which are the print version of anime eyes, use the same construction but are drawn in black and white. The iris tones are created through hatching and crosshatching rather than colour, with the pupil left solid black and the iris showing fine radial lines from the pupil outward.
For cute anime eyes, make the almond shape shorter and rounder than a standard cartoon eye, increase the iris size to fill nearly the entire shape, and use a large complex sparkle highlight that includes a large oval, a smaller circle and sometimes a star shape all within the same pupil.
Anime boy eyes and male anime eyes are typically narrower and less rounded than female anime eyes. The almond shape is more elongated, the iris is slightly smaller relative to the almond, and the eyelashes are fewer and less prominent. The eyebrow sits closer to the eye and may be slightly straighter rather than arched.
Chibi eyes take the kawaii proportions even further. The entire face of a chibi character may be dominated by the eyes, with each eye as large as the nose and mouth combined. The almond shape is very round and wide, the iris fills it almost entirely and the sparkle highlights are prominent.
How to Draw Eyes on a Face
Placing eyes correctly on a face is as important as drawing the eyes themselves. The most common mistake beginners make is placing the eyes too high on the head. On a realistic human face, the eyes sit roughly halfway between the top of the skull and the chin. Most people place them in the upper third, which produces a face that looks too large in the forehead area.
For a cartoon face, the eyes typically sit slightly higher than the halfway point, around sixty percent of the way up the face. This is because cartoon faces are often drawn without showing the full height of the skull above the hairline, making the visible face portion shorter than a realistic one.
The horizontal position of the eyes follows the same spacing guideline used in this tutorial. The gap between the two eyes is approximately equal to the width of one eye. The outer corners of the eyes align approximately with the outer edges of the nostrils directly below.
Drawing light guide lines before placing the eyes, a horizontal line for the eye level and a vertical center line, makes symmetrical eye placement significantly easier.
How to Draw Simple Eyes for Kids
Simple eyes for young children reduce the construction to its essential elements. Draw two plain oval shapes side by side as the eye openings. Inside each oval, draw a circle for the combined iris and pupil, left as a solid dark shape. Add a single white dot inside each dark circle as the sparkle. Finish with two curved eyebrow lines above.
This five-element version, oval, circle, dot, oval, circle, dot, plus eyebrows, produces recognisable eyes that children aged four to seven can manage independently. It is also the construction used in many simple animal face drawings, which makes it a genuinely foundational drawing skill.
How to Draw Cat Eyes
Cat eyes are the most distinctive animal eye in drawing because of the vertical oval pupil that appears in normal indoor light. Draw the almond shape, then draw the iris circle inside it, then draw a tall narrow vertical oval as the pupil rather than the round circle used for human eyes. Add the sparkle highlight in the upper left area as usual.
The overall almond shape for a cat eye is more pointed at both the inner and outer corners than a human eye, giving it a more angular, sharper quality. The eyelashes on a cartoon cat eye are optional but whisker-like longer lashes at the outer corner suit the character.
How to Draw Dog Eyes
Dog eyes are rounder than cat eyes and have a warmer, more earnest quality that reflects the dog’s reputation for open emotional expression. Draw the almond shape slightly rounder and less pointed at the corners than the human version. The iris is a warm brown in most breeds, and the pupil is a round circle like the human version rather than the vertical oval of a cat.
The sparkle highlight in a dog eye is often drawn slightly larger than in a human eye, which contributes to the puppy-dog expression that makes dog character illustrations so appealing. Large, prominent sparkle highlights in warm brown eyes produce the characteristic look that is described as puppy dog eyes in everyday language.
How to Draw Girl Eyes and Boy Eyes
Girl eyes in cartoon style typically use the full construction from this tutorial, including thick upper eyelids, prominent fanned lashes and arched eyebrows. The iris is large relative to the almond shape and the sparkle highlights are prominent.
Boy eyes in cartoon style use a narrower almond shape with fewer and shorter lashes. The eyebrow sits slightly closer to the eye and may be straighter and slightly thicker than the arched girl eyebrow. The iris is slightly smaller relative to the almond shape.
These are conventions of cartoon style rather than rules. Many character designers deliberately mix these conventions, giving a male character long lashes or a female character straight brows, to create a specific visual effect.
Eye Expression Guide
The basic eye shape from this tutorial can be adjusted to produce different expressions without changing the fundamental construction.
Happy eyes use the standard construction but add a slight upward curve to the lower eyelid line, suggesting the squinting that accompanies a genuine smile.
Serious eyes reduce the gap between the eyebrow and the upper eyelid, bringing the brow slightly lower without making it angry. The effect is focused and attentive.
Surprised eyes widen the almond shape, making it rounder, and raise the eyebrows higher above the eyes with a larger gap between brow and lid.
Tired eyes drop the upper eyelid down to cover the upper portion of the iris, so about a third of the iris is hidden. The eyebrow remains at normal height.
Angry eyes angle the inner ends of the eyebrows sharply downward, producing the distinctive V-shaped brow angle associated with anger. The almond shape itself stays the same.
Drawing Tips for Better Eyes
The sparkle highlight makes more difference than any other single detail. If a pair of drawn eyes looks flat, adding or enlarging the sparkle highlight is the first adjustment to make before changing anything else.
Symmetry comes from drawing both eyes simultaneously rather than completing one before starting the other. Every time a new element is added, add it to both eyes before moving to the next element.
The position of the pupil within the iris controls where the character appears to be looking. A pupil positioned centrally looks directly at the viewer. A pupil shifted slightly toward the inner corner looks toward the other character in a scene. A pupil positioned at the very edge of the iris looks to the side.
For cute eyes and kawaii eyes, the three most important adjustments are: larger iris relative to almond, larger sparkle highlight relative to pupil and slightly shorter distance from almond top to almond bottom, making the eye wider rather than taller.
Printable Eye Outline PDF
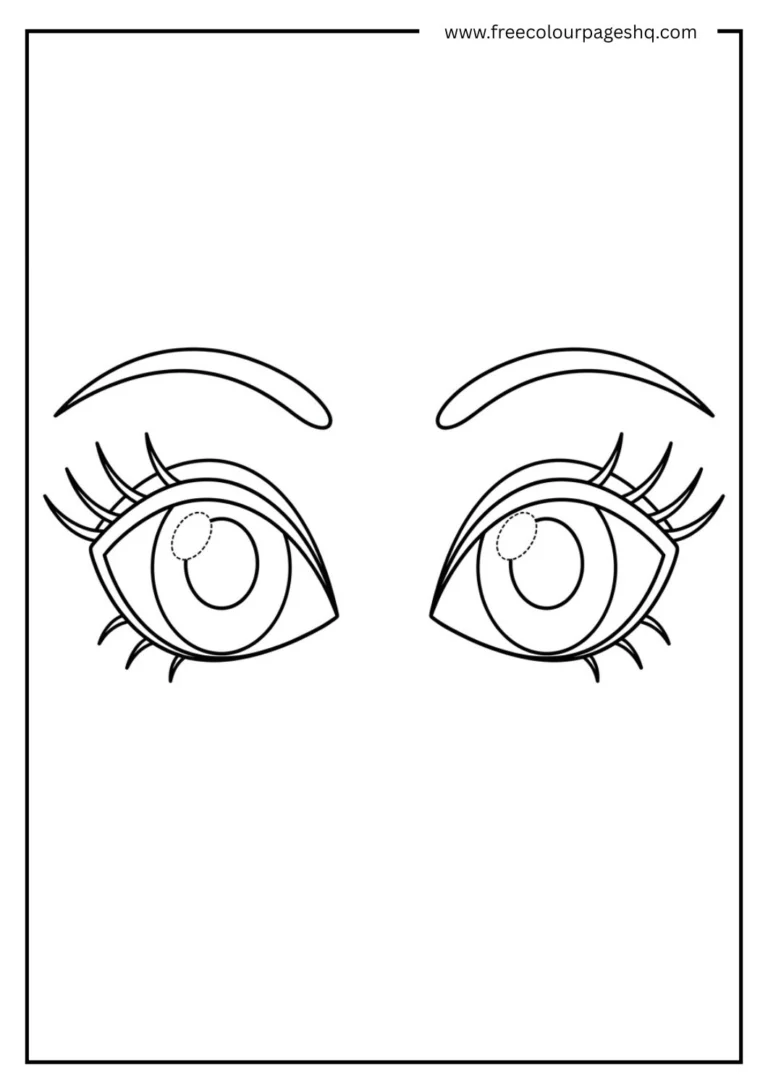
A printable eye outline based on the finished Step 5 design is available as a free download below. Use it as a colouring reference, a practice template or a guide for positioning eyes on character faces.
Explore more Free Printable Coloring Collections
Looking for more engaging activities? Check out these free printable coloring pages fun for kids, useful for teachers, relaxing for adults, and inspiring for designers.
FAQ
What is the easiest way to draw eyes?
Draw two almond shapes side by side. Inside each, draw an iris circle. Inside each iris, draw a pupil circle and leave a small white dot for the sparkle. Add a thick upper eyelid line, short eyelash lines fanning upward and a curved eyebrow above. This five-element construction produces recognisable eyes at any age level.
How do you draw eyes step by step for beginners?
Start with both almond shapes at the same time to keep them symmetrical. Add iris circles in both eyes, then pupils and sparkle highlights in both eyes, then eyelids and lashes in both eyes. Doing both eyes together at each stage produces more balanced results than completing one eye before starting the other.
How do you draw cute eyes?
Use slightly rounder almond shapes, make the iris circle very large relative to the almond, use a large prominent sparkle highlight that takes up a significant portion of the pupil, and add small rosy circles on the cheeks nearby. These four adjustments push any basic eye drawing into cute or kawaii territory.
How do you draw anime eyes?
Use the same almond and iris construction as the basic cartoon eye but with a larger iris relative to the almond, more elaborate sparkle highlights that may include multiple shapes, and fewer but more stylized lash lines. Anime girl eyes use rounded almonds and prominent lashes. Anime boy eyes use narrower almonds with minimal lashes.
How do you draw simple eyes for kids?
Draw two oval eye openings. Inside each, draw a solid dark circle. Leave a white dot in each dark circle. Add two curved eyebrow lines above. This four-element version is achievable for children aged four and above and produces recognisable cartoon eyes every time.
How do you make drawn eyes look alive?
The sparkle highlight is the most important element. A white dot left in the upper area of the pupil creates the impression of light reflecting off a glossy surface, which the brain reads as aliveness. Without it, eyes look flat. With it, even very simple eye shapes look bright and expressive.