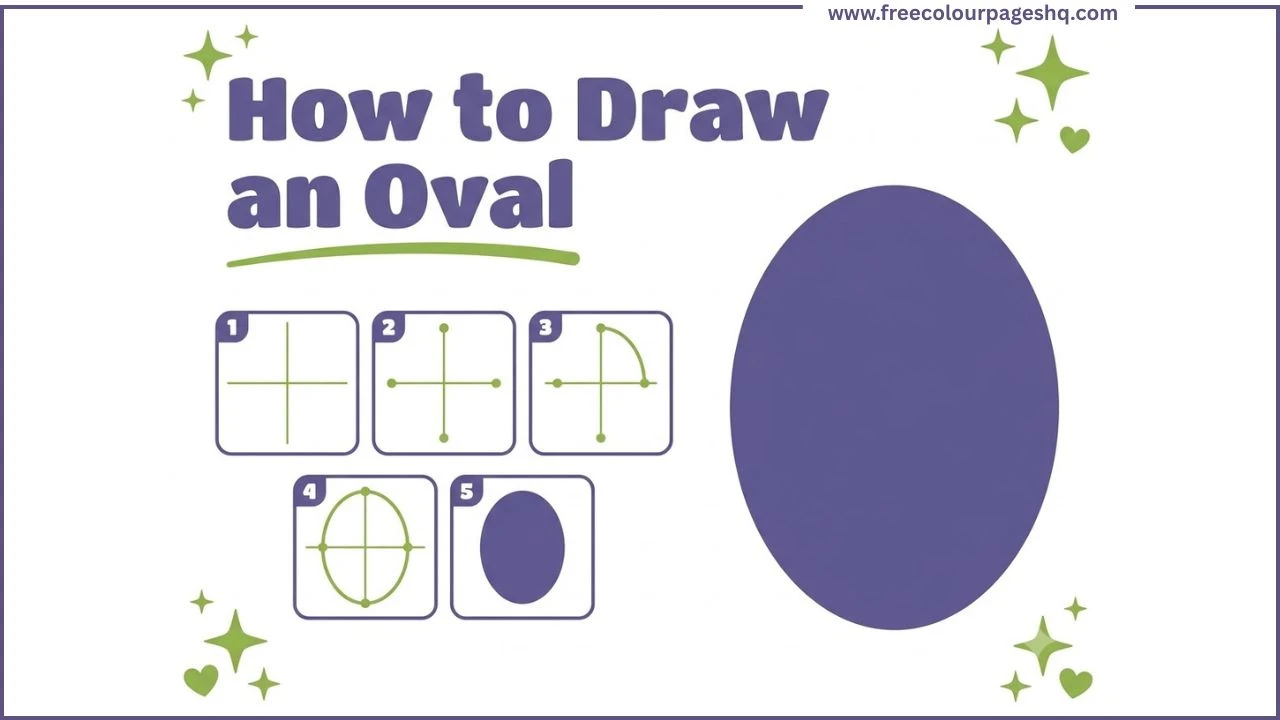
Most people learn to draw a circle before they draw an oval. The circle has a pleasing mathematical perfection to it. An oval feels harder because there is no single center point to anchor the compass and no simple rule like “the same distance in every direction.” But ovals show up everywhere in drawing. Every face in profile is roughly an oval. Every egg, every leaf, every car body, every eye is built on oval proportions. Learning how to draw an Oval freehand is one of the most practically useful skills in all of drawing.
This tutorial covers three methods: the simple cross guide method for beginners and casual drawing, the two-circle compass method for precision work and the freehand practice approach for building muscle memory. Each has a different use case and all three are worth knowing.
What Is an Oval
An oval is a closed curved shape wider in one direction than the other. It has no corners, no straight edges and no fixed distance from its center to its edge. It is similar to an ellipse but the term oval is generally used more loosely. An egg shape is an oval. So is a running track, a rugby ball seen from the side, the opening of a ring and the outline of a human face.
The key difference from a circle is that an oval has two axes of different lengths. The longer axis is called the major axis. The shorter axis is called the minor axis. These two axes cross each other at right angles at the center of the oval. This is the basis for the cross guide method below.
Method 1 — Cross Guide Method for Beginners
This is the simplest freehand oval method and works well for drawing, art and general use.
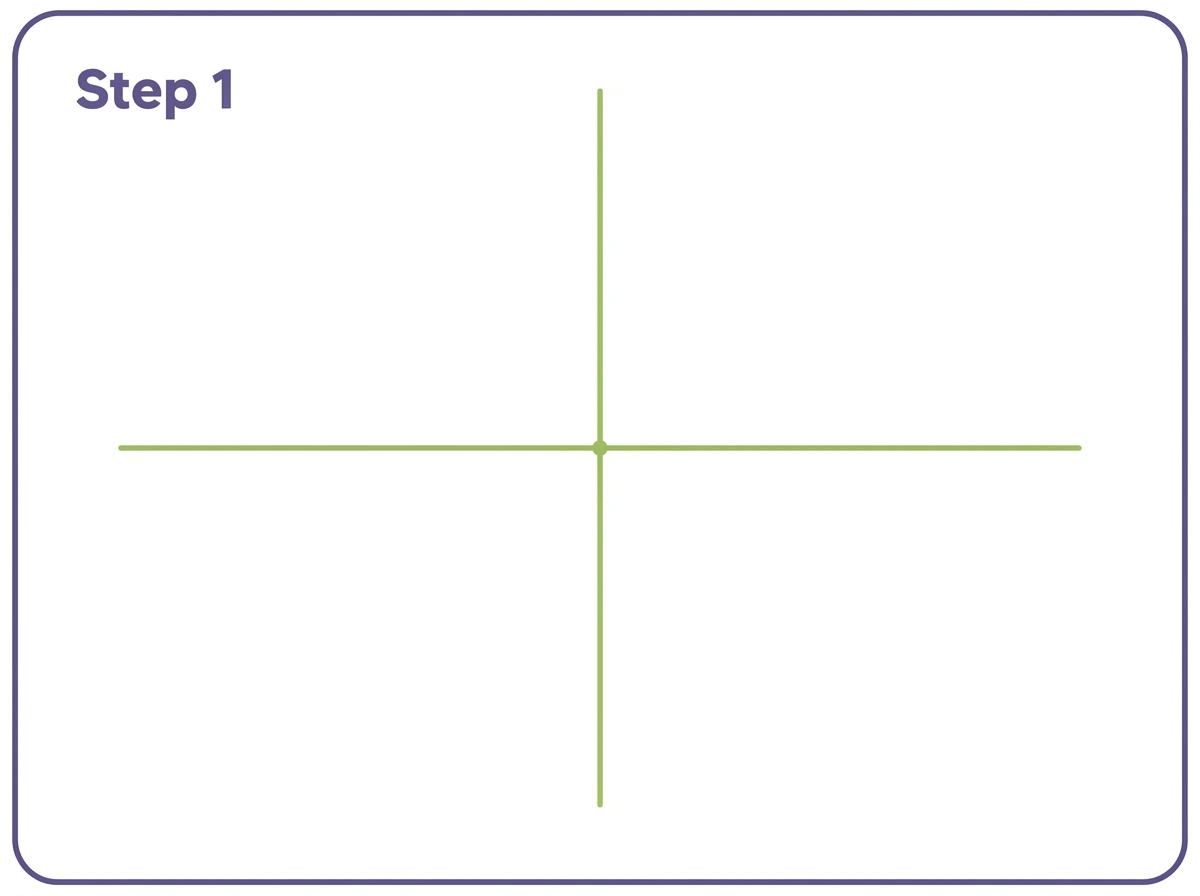
Step 1 — Draw Two Crossed Lines
Draw a horizontal line and a vertical line crossing each other at their midpoints. These two lines will become the major axis and minor axis of the oval.
The horizontal line should be longer than the vertical line if you want a wide oval. The vertical line should be longer if you want a tall oval. The ratio between the two lengths determines the proportions of the finished oval.
For a standard wide oval, make the horizontal line about twice as long as the vertical line. For a face-shaped oval, make the vertical line slightly longer than the horizontal.
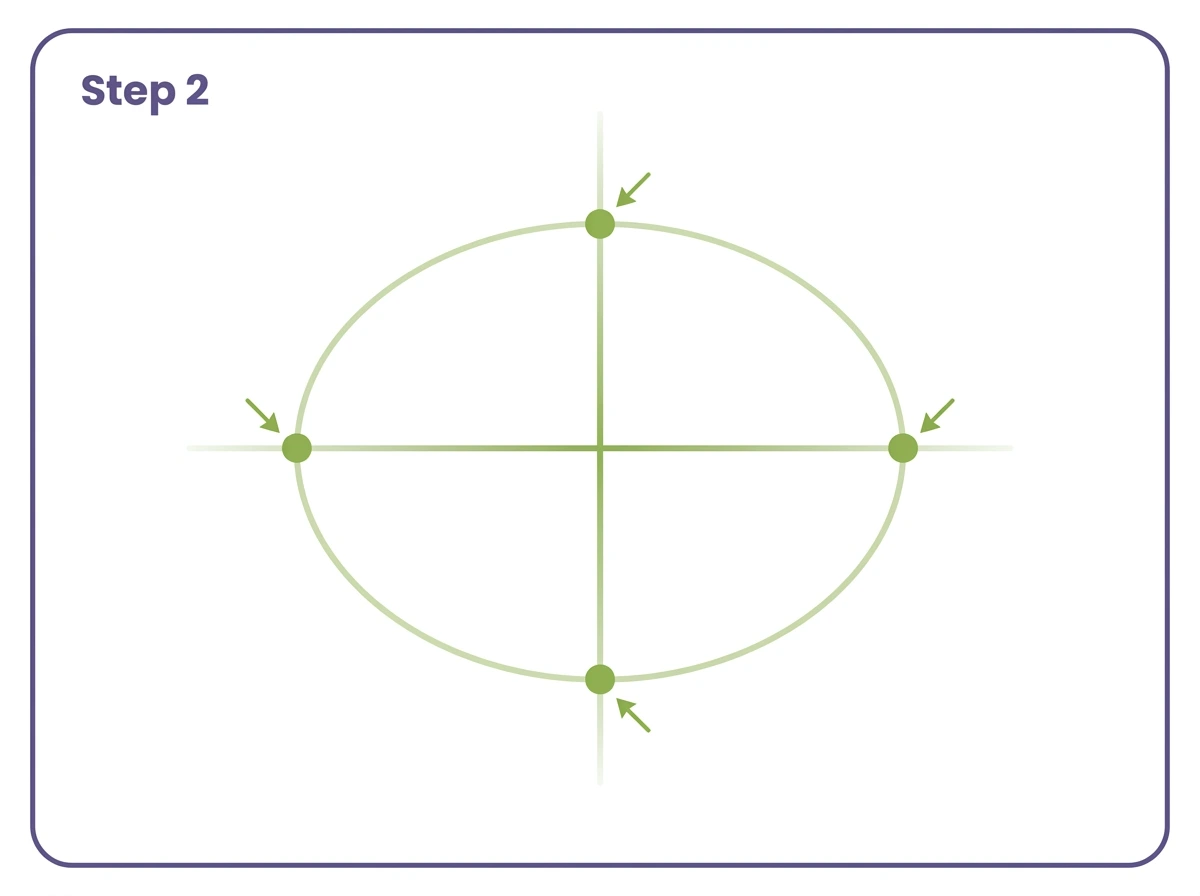
Step 2 — Mark Four Outer Points
Make a clear dot at the end of each of the four line arms. These four dots are the turning points of the oval curve. The left and right dots are the widest points. The top and bottom dots are the tallest points.
The oval will pass through all four of these dots. Every part of the curved path between dots is what you control in the next step.
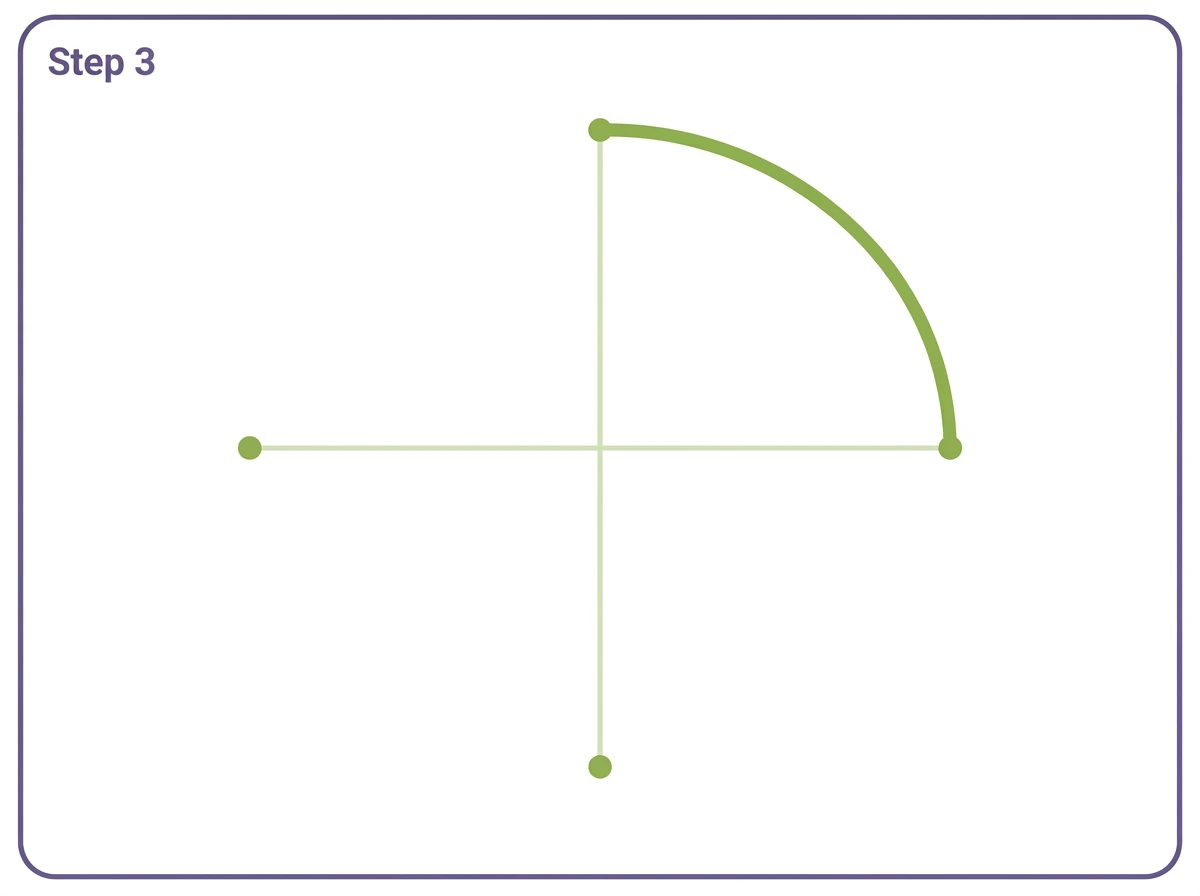
Step 3 — Draw the First Curved Arc
Starting at the top dot, draw a smooth curved arc toward the right dot. The arc should curve gently outward away from the center of the cross, reaching its furthest point from center roughly halfway between the two dots.
This is the quarter of the oval from twelve o’clock to three o’clock on a clock face. The curve should feel like a small section of a very large circle rather than a sharp bend.
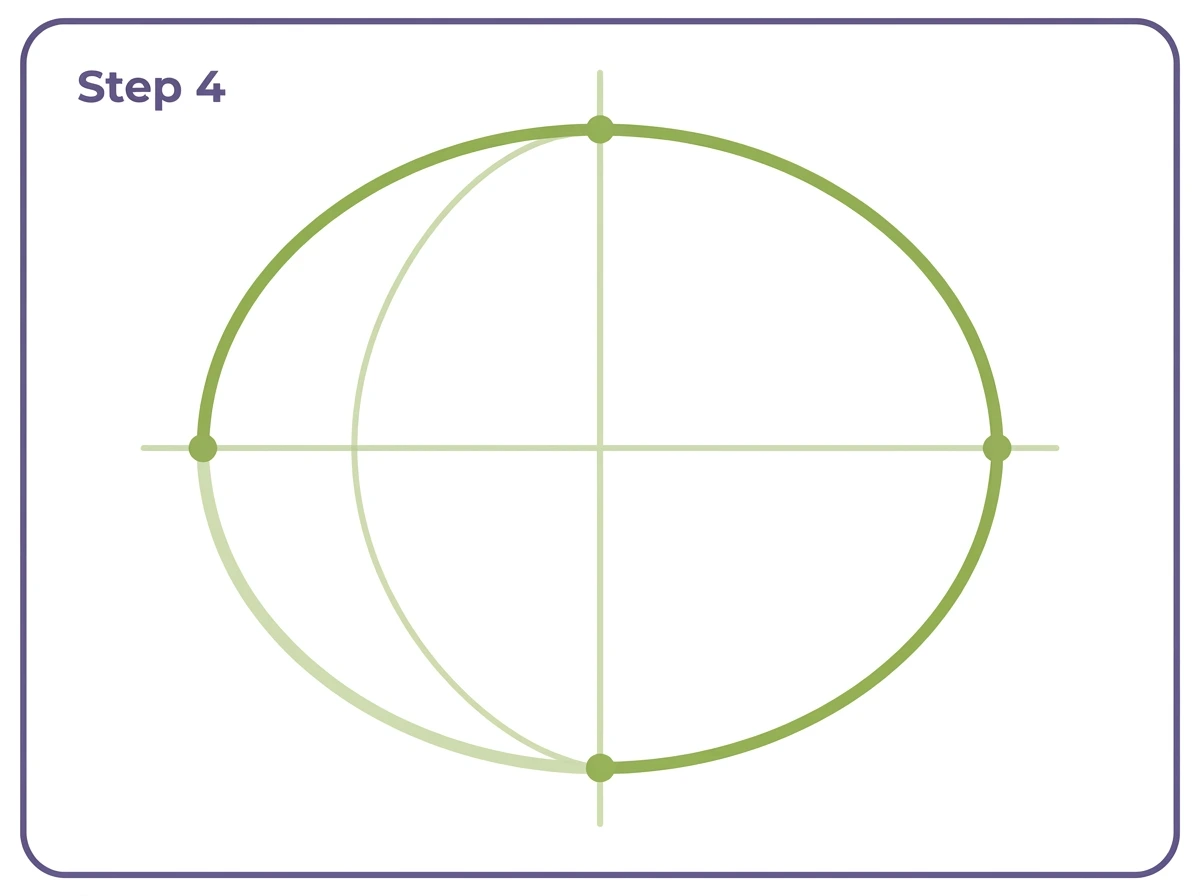
Step 4 — Complete All Four Arcs
Continue the curve from the right dot down to the bottom dot. Then from the bottom dot to the left dot. Then from the left dot back to the top dot where the first arc began.
Each arc passes through one outer dot and curves outward between the two dots it connects.
When all four arcs are connected, erase the cross guide lines. What remains is a clean oval outline.
Step 5 — Erase and Refine
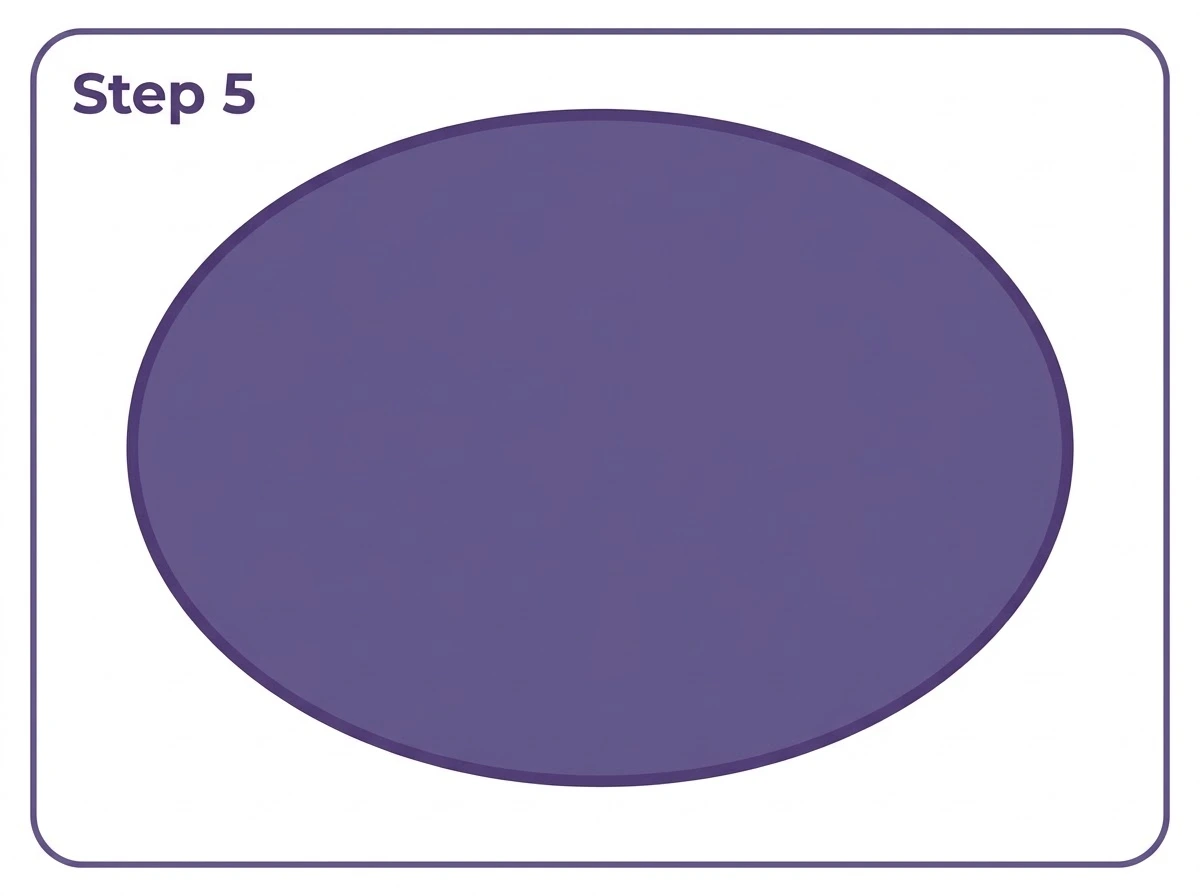
With the guide lines erased, look at the oval as a complete shape. Check that no section is noticeably flatter or more pointed than the rest. Adjust any area that looks uneven.
The finished oval is ready to use as the starting point for a face, an eye, a body, a vehicle or any other oval-shaped subject.
Method 2 — Two-Circle Method Without a Compass
This method produces a more precise oval using only a pencil and eraser. It is slightly more involved than Method 1 but produces a more geometrically accurate result.
Draw two circles the same size side by side, touching each other at one point in the middle. The distance between the centers of the two circles determines the width of the finished oval. Wider spacing produces a more elongated oval. Closer spacing produces a rounder one.
From the bottom of the left circle, draw a smooth curve downward and inward toward the center, then continue to the bottom of the right circle mirroring the first curve. This bottom arc forms the lower half of the oval.
The top of the two circles forms the upper half naturally. Erase the interior parts of both circles that fall inside the finished oval shape. The four arcs of the two circles, minus the interior overlapping sections, combine to produce the oval.
This method is particularly useful when an oval needs to have a specific width-to-height ratio and when the cross guide method produces slightly uneven results.
Method 3 — How to Draw an Oval with a Compass
When precise geometric accuracy is needed, a compass produces a much more reliable oval than freehand methods.
Draw a horizontal center line the length of your desired oval. Divide this line into three equal sections using a ruler. Mark four points: the two ends of the full line and the two interior division points.
Set the compass to the length of one third of the line, which is the length of one section. Place the compass point on the left interior division point and draw a circle. Without changing the compass width, move to the right interior division point and draw a second circle. The two circles will cross each other above and below the center line.
Mark the two intersection points above and below as reference points. These become the centers for the end arcs of the oval.
Adjust the compass to the distance from each intersection point to the far end of the center line. Use these new measurements to draw the end arcs, connecting the circles into a complete oval. Erase all construction lines.
This method is the most technically demanding of the three but produces a geometrically perfect oval every time. It is the method used in woodworking, architectural drafting and geometric illustration.
How to Draw an Oval Without a Compass
If no compass is available, the string method produces a surprisingly accurate oval without any drawing instruments.
Draw a horizontal center line and mark its midpoint. Pin two small nails or use two thumb tacks on the center line at equal distances from the midpoint. The further apart the pins, the more elongated the oval. Place them close together for a rounder result.
Tie a loop of string that, when stretched taut over both pins, reaches the desired height of the oval at the top. Place a pencil inside the loop, pull the string taut and draw around the two pins while keeping the string taut against the pencil.
The pencil traces an oval because the sum of the distances from the pencil to each pin point remains constant throughout the drawing motion. This is actually the geometric definition of an ellipse, and the string method is how jewelers, woodworkers and stonemasons have produced accurate ovals for centuries before computer-aided design existed.
How to Draw an Oval Face
Drawing an oval face follows the cross guide method but with specific proportions.
Make the vertical line longer than the horizontal line. The face oval is taller than it is wide in most adult face proportions. Draw the four arcs as described in Method 1 but make the lower arc slightly more pointed than the upper arc, because a face is slightly more tapered at the chin than at the forehead. This gives the face oval a characteristic subtle asymmetry between the top and bottom.
The eyes sit on the horizontal center line of the face oval, not in the upper half where most beginners place them. The nose sits halfway between the eyes and the chin. The mouth sits halfway between the nose and the chin.
These positioning rules apply within the oval shape that the cross guide method produces, which is why understanding the oval construction is directly connected to drawing faces well.
How to Draw an Oval Head
A head drawn from the front or three-quarter view uses a rounded oval as its foundation. A head in profile uses a more elongated oval with the back of the head showing a full curved arc and the front extending into the face and chin.
For a front-view head, draw a slightly vertical oval using the cross guide method. The top of the oval is where the skull curves above the hairline. The bottom of the oval is the chin. The horizontal center line marks the eye level position.
For a three-quarter view head, the oval is turned slightly so the vertical center line is no longer perfectly centered but shifted toward the near side. This rotation communicates the angle of the head.
How to Draw an Oval Freehand
Freehand oval drawing is a skill that improves with specific practice rather than general drawing practice.
The most effective freehand oval practice is drawing ovals quickly in a single continuous motion rather than building them from separate arcs. Set a piece of paper on a desk and draw a small oval without lifting the pencil. Then draw a slightly larger oval around it. Then a slightly larger one again. Work outward from the smallest to the largest in a single session.
Draw the ovals faster than feels comfortable. Speed reduces the tendency to correct mid-curve, which is what produces the flat sections and bumpy transitions that characterise slow freehand ovals. A fast oval drawn with committed strokes looks more natural than a slow oval drawn with hesitant ones.
The wrist-pivot method works well for small ovals. Lock the wrist and rotate from the forearm. The elbow-pivot method works for medium ovals. The shoulder-pivot works for large ovals. Using the wrong pivot for the size of oval produces uneven results.
How to Draw an Oval in Illustrator and Photoshop
In Adobe Illustrator, the Ellipse tool draws ovals. Select the tool, click and drag on the canvas to draw an oval interactively. Hold Shift to constrain the shape to a circle. Hold Alt to draw from the center outward rather than from corner to corner.
For a specific size oval in Illustrator, click once on the canvas without dragging. A dialog box opens asking for width and height values. Enter the measurements and click OK.
In Photoshop, the Ellipse tool works identically for drawing oval selections and oval shapes. For the Elliptical Marquee selection tool, the same drag method creates an oval selection area that can be filled, stroked or used as a mask.
In Photoshop Elements, the Ellipse selection tool also allows drawing ovals with width and height constraints visible in the Options bar.
Where Ovals Appear in Drawing
Understanding the oval is foundational because it appears as the basis for so many common drawing subjects.
Every human face is roughly oval when viewed from the front. Eyes are small ovals set within that larger oval. The iris of the eye is a circle seen straight on but becomes an oval when the eye looks to the side.
Bodies in simplified figure drawing use overlapping ovals for the head, chest, pelvis and limbs. The oval is the building block of the basic figure skeleton before any muscles or clothing are added.
Fruits and vegetables are mostly oval. Apples, pears, potatoes, mangoes, tomatoes and peaches are all variations on an oval base shape. Drawing fruit convincingly is largely an exercise in oval proportion.
Vehicles in cartoon drawing use ovals for wheels, headlights, tyres and the rounded corners of body shapes. Even the windows on a cartoon car are typically ovals.
Water ripples expanding from a point are ovals because a circle seen at an angle becomes an oval in perspective. Drawing convincing ripples depends on understanding that all the ripple ovals share the same center and the same degree of flattening from the viewing angle.
Common Mistakes in Oval Drawing
The most common error is making one side of the oval flat. This happens when the arc on one side loses confidence and straightens out rather than continuing its curve. The fix is to check both sides of the oval for symmetry before finalising the outline.
The second most common mistake is making the ends of the oval too pointed. The oval should feel rounded at all four turning points where the arcs change direction. A pointed end makes the shape look more like a lemon than an oval.
Drawing the oval too slowly produces bumpy transitions between the four arcs. The natural wrist and arm movement that produces a smooth curve requires a certain minimum speed. Practising the freehand ovals quickly, as described above, trains the muscle memory for smooth transitions.
Printable Oval Outline PDF
A printable oval outline based on the finished Method 1 design is available as a free download below. Use it as a colouring page, a drawing reference or a tracing template for practising oval proportions.
Explore more Free Printable Coloring Collections
Looking for more engaging activities? Check out these free printable coloring pages fun for kids, useful for teachers, relaxing for adults, and inspiring for designers.
FAQ
What is the easiest way to draw an oval?
Draw a horizontal and a vertical line crossing at their midpoints. Mark the end of each arm with a dot. Connect the four dots with smooth curved arcs that bow outward from the center. Erase the cross guide lines. This four-arc method is reliable for any skill level and any oval proportion.
How do you draw a perfect oval without a compass?
The two-circle method produces a close-to-perfect oval without a compass. Draw two equal circles touching at one point. Use the outer arcs of both circles for the top, connect them with a smooth bottom arc. Erase the interior sections. Alternatively, the string-and-pins method produces a geometrically accurate oval using only a pencil and string.
How do you draw an oval freehand?
Draw ovals quickly in a single continuous motion rather than building them from careful separate arcs. Practice drawing ovals at speed, working from small to large on the same page. Use the wrist pivot for small ovals, elbow pivot for medium, shoulder pivot for large. Speed and committed strokes produce smoother curves than slow careful ones.
What is the difference between an oval and an ellipse?
An ellipse has a precise mathematical definition: the set of points where the sum of the distances to two focal points is constant. An oval is a more general term for any rounded closed shape wider in one direction than the other. All ellipses are ovals but not all ovals are geometrically perfect ellipses. For drawing purposes the distinction rarely matters.
How do you draw an oval face?
Draw a vertical oval taller than it is wide using the cross guide method. Taper the bottom arc slightly more than the top arc to suggest the chin. The horizontal center line marks the eye level position. Eyes sit on this line, not above it. Nose halfway between eyes and chin. Mouth halfway between nose and chin.
How do you draw an oval in Illustrator?
Select the Ellipse tool. Click and drag on the canvas for an interactive oval. Hold Shift to constrain to a circle. Click once without dragging to open a size dialog for precise measurements. Hold Alt while dragging to draw from center outward.