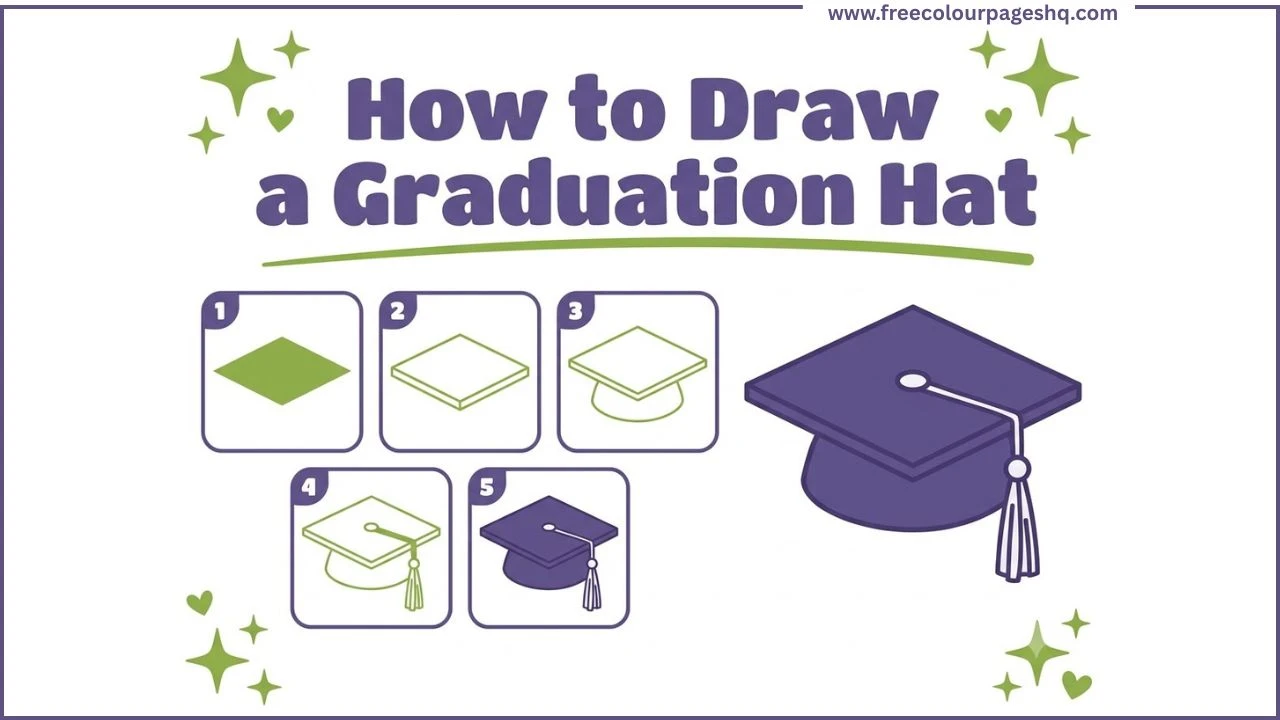
The graduation hat, officially called a mortarboard, is one of those drawings that looks complicated until you break it down into its actual shapes. A diamond on top. A dome below. A cord and tassel hanging to the side. That is genuinely all it is. Once those three elements are in place the drawing is done.
This tutorial shows how to draw a graduation hat step by step in five stages. It works for kids, beginners, and anyone who wants to draw one for a card, a school project, or just for fun.
What You Need
A pencil, an eraser and something to colour with at the end. A ruler helps keep the diamond edges straight in Step 1 but is not essential.
How to Draw a Graduation Hat Step by Step
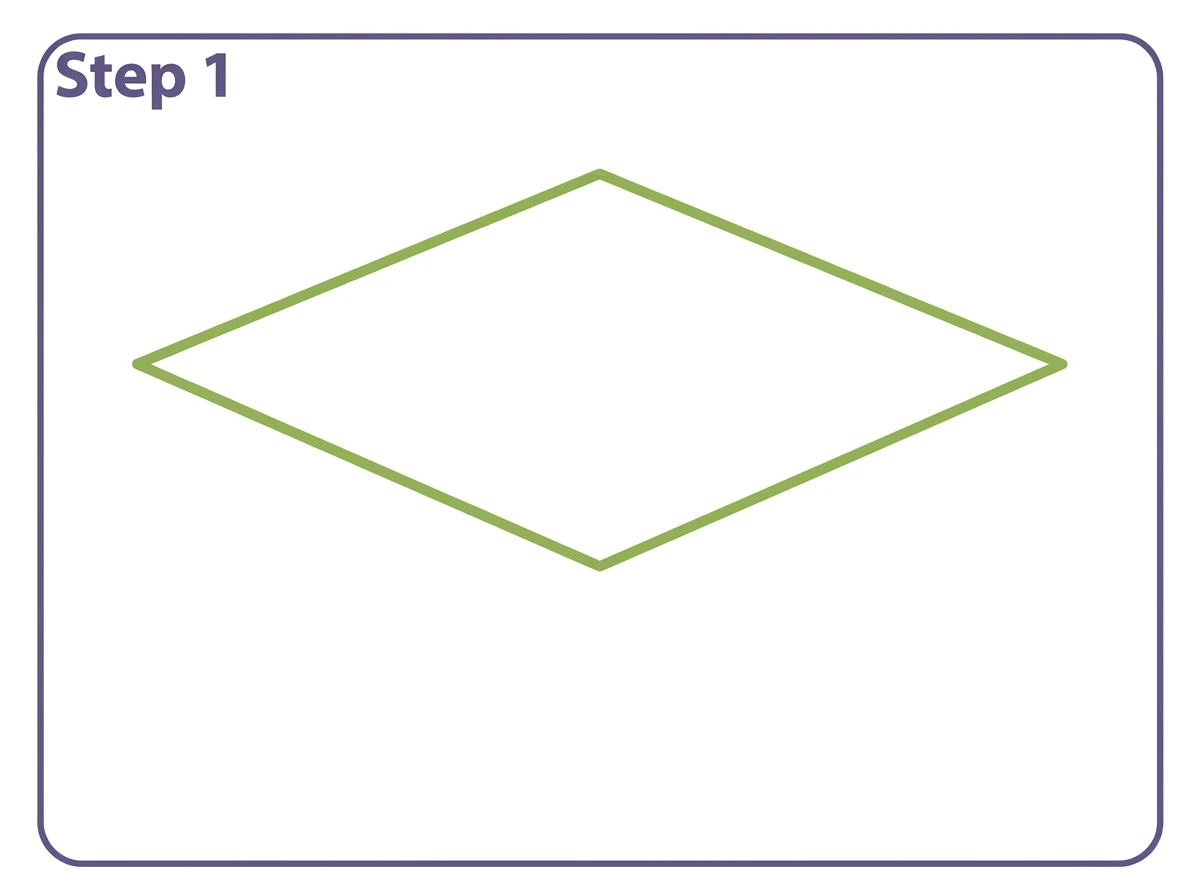
Step 1 — Draw the Diamond Top Board
Start near the upper center of the page. Draw a flat diamond or rhombus shape. The left and right corners stretch out horizontally and the top and bottom corners are closer together vertically.
This is the mortarboard, the flat square top of the graduation hat seen from a slight angle. Making it wider than it is tall gives it the correct perspective.
Draw the sides lightly at first. Adjust the four corners so both sides are symmetrical before moving on.
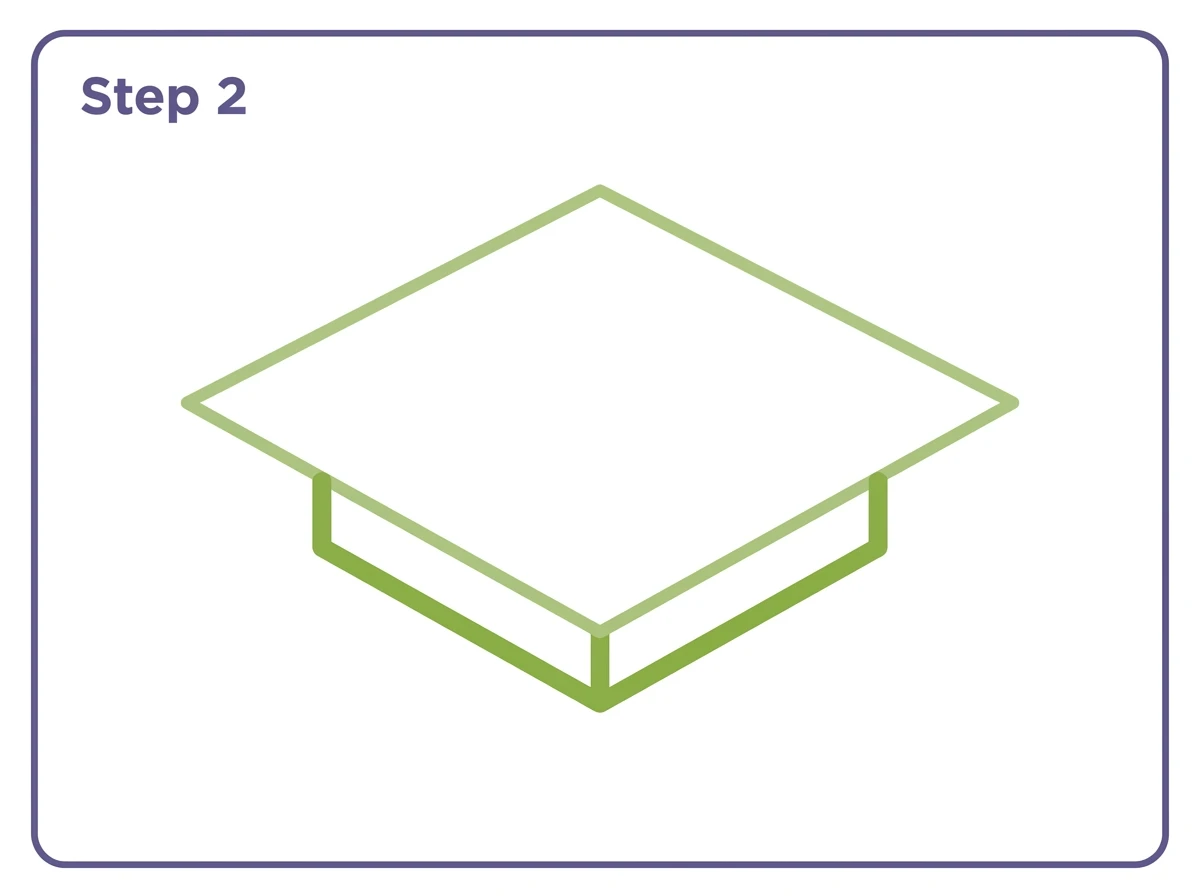
Step 2 — Add the Depth Edge Lines
Below the front two edges of the diamond, draw parallel lines offset slightly downward. Connect them at the front corner with a short vertical line.
This small addition gives the flat diamond immediate three-dimensional depth. The gap between the diamond edge and the offset line below it represents the thickness of the board.
It is a small detail but it is the detail that makes the hat look like a solid object rather than a flat shape.
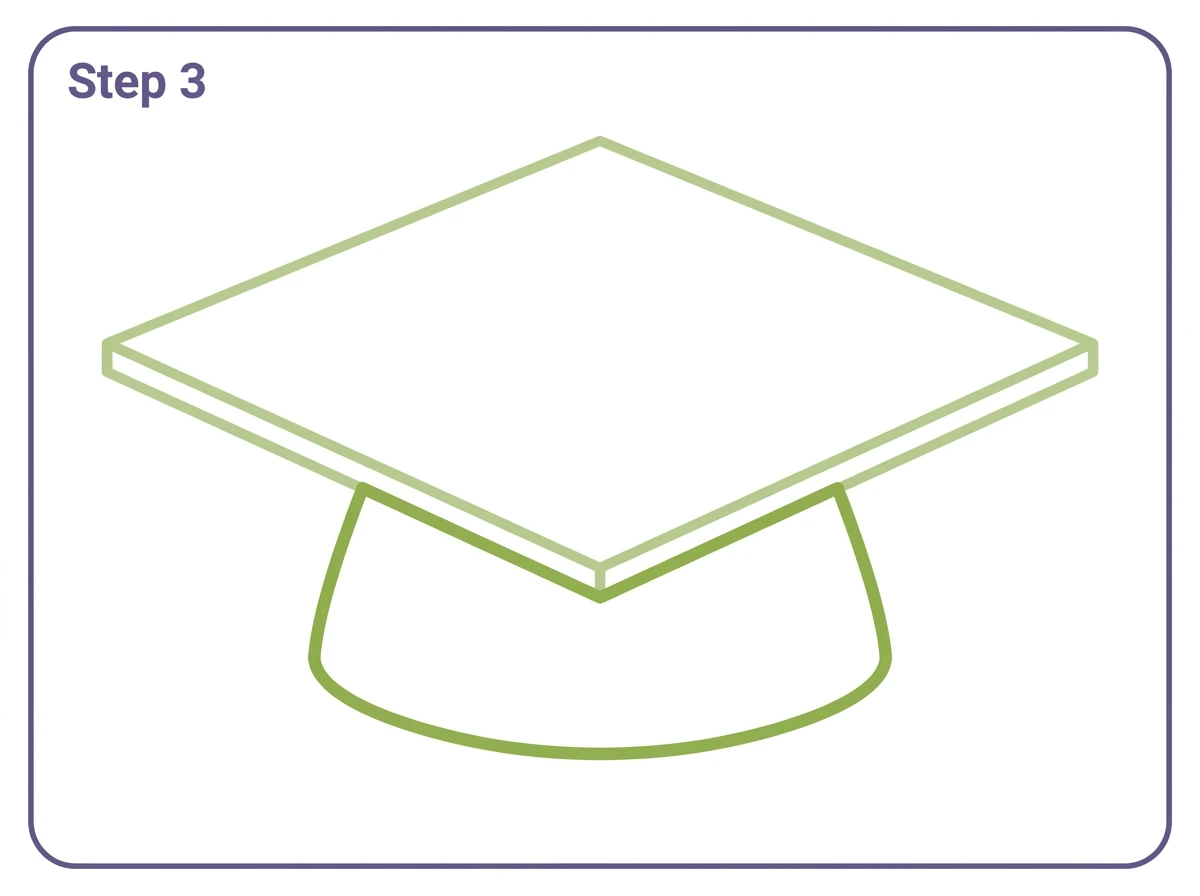
Step 3 — Draw the Rounded Cap Base
Below the bottom corner of the diamond, draw two short lines descending and spreading slightly outward. Connect them with a wide shallow curved dome shape.
This is the fabric skull cap that the mortarboard sits on top of. It is wider than it is tall and connects naturally to the underside of the diamond board above.
The cap base should be slightly narrower than the full width of the diamond. If it is too wide the hat looks unbalanced.
Step 4 — Add the Button, Cord and Tassel
At the very center of the diamond top, draw a small circle for the button. This is where the tassel cord attaches.
From the button, draw a thin cord line extending to one corner of the diamond, then continuing downward alongside the cap base and hanging freely below it.
At the end of the hanging cord, draw a small gathered knot shape. Below the knot, draw multiple thin strand lines hanging downward in a loose fan. The strands are roughly the same length and hang with a gentle natural curve.

The tassel traditionally starts on the right side before graduation and moves to the left when the diploma is received. This is one of the most recognisable moments of any graduation ceremony.
Step 5 — Colour the Drawing
Graduation hats are most commonly black with a gold or yellow tassel. Black is the traditional academic colour and most recognisable.
For a school-coloured version, use whatever colour your school uses. The board, cap base and cord can all match. The tassel is often a contrasting colour, typically gold, silver or a second school colour.
Fill the board and cap base with your chosen colour. The depth edge lines along the front face of the board can be left slightly lighter to suggest the dimension. The tassel strands can be a warmer colour than the hat body.

How to Draw a Graduation Hat Easy for Kids
For a very simple version that young children can manage, skip Steps 2 and 4 and draw just the diamond, the dome cap and a single cord with a small tassel bundle.
This three-element version takes under five minutes and is immediately recognisable as a graduation hat.
How to Draw a Graduation Hat and Scroll
A diploma scroll alongside the hat completes the classic graduation image.
Draw the scroll as a horizontal cylinder shape to the side of the hat. The left and right ends of the cylinder are shown as curved oval shapes suggesting the rolled edges of the paper. A ribbon or tie line wraps around the center of the scroll and ties in a small bow. Two short curved lines on the front face of the scroll suggest the rolled paper edge visible at the top and bottom.
The scroll and hat together produce the most complete and recognisable graduation drawing, suitable for cards, decorations and keepsakes.
Tips for a Better Graduation Hat Drawing
The most common mistake is making the cap base too wide. It should be noticeably narrower than the full horizontal width of the diamond above. When the cap base is too wide the hat looks top-heavy and unstable.
The tassel strands look better with slight variation in length rather than all the same length. The outer strands can be very slightly shorter than the center strands, suggesting a natural drape.
A shadow underneath the diamond board where it sits above the cap base, just a thin darker area below the front depth edge, immediately makes the drawing look more three-dimensional without requiring advanced shading skills.
Printable Graduation Hat Outline PDF
A printable graduation hat outline based on the finished Step 5 design is available as a free download below. Print it and use it as a colouring page for a graduation party, a classroom activity or a keepsake project.
Explore more Free Printable Coloring Collections
Looking for more engaging activities? Check out these free printable coloring pages fun for kids, useful for teachers, relaxing for adults, and inspiring for designers.
FAQ
What is the easiest way to draw a graduation hat?
Draw a flat wide diamond for the mortarboard top. Add parallel depth lines below the front two edges. Draw a curved dome cap base below the diamond. Add a center button, a hanging cord and tassel strands. This five-step method works for all ages.
How do you draw a graduation hat for kids?
Draw a wide diamond, a small dome below it and a simple cord with a tassel bundle. Three shapes is all that is needed for a recognisable graduation hat that young children can draw independently.
How do you draw a graduation hat and scroll?
Draw the completed graduation hat first. Beside it draw a horizontal cylinder for the diploma scroll with curved oval ends and a ribbon tied at the center. The scroll and hat together create the classic complete graduation drawing.
What colour is a graduation hat?
Traditional graduation hats are black with a gold tassel. Many schools use their own colours. The hat body, cap base and cord are typically the same colour and the tassel is a contrasting colour such as gold, silver or a second school colour.