There is a particular quality to water that makes it one of the most satisfying and most frustrating subjects in all of drawing. Satisfying because when it works it looks genuinely alive, the surface moving in a way that makes the whole image feel real. Frustrating because water has no fixed shape, no clear outline and no single correct colour. It is entirely made of what it contains and reflects.
Ripples are the most approachable part of drawing water. They have a clear structure. A stone drops. Waves expand outward in concentric oval rings. The rings get further apart and lower as they travel away from the impact point. The center, where the stone hit, has the most detail. The outer edges fade into the flat water surface. Once that structure is understood, drawing water ripples becomes a manageable drawing problem rather than an impossible one.
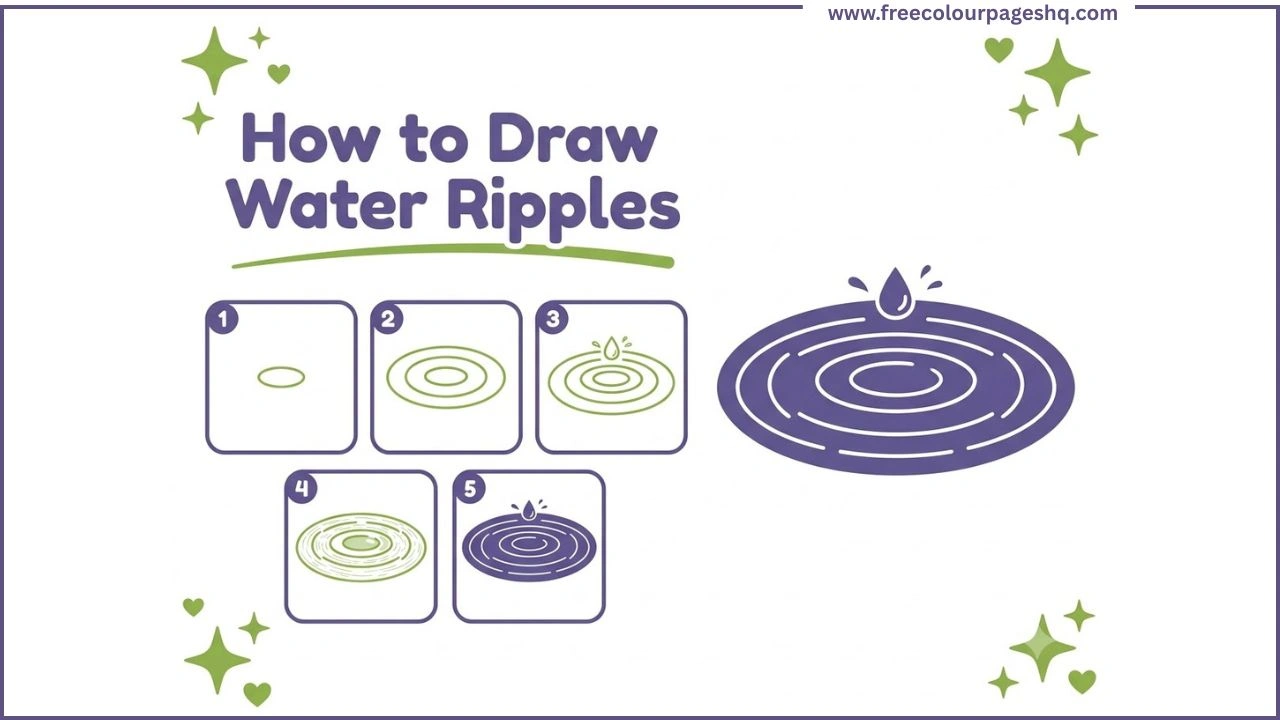
This tutorial shows how to draw water ripples step by step in five stages. It works for pencil, pen, digital drawing and any other medium. All you need to begin is a pencil and a piece of plain white paper.
What Makes Water Ripples Look Real
Before starting the drawing it helps to understand what water ripples actually are. When an object hits a water surface it displaces the water outward in all directions simultaneously. This creates a series of wave peaks and troughs spreading concentrically from the impact point. Each ring is a raised crest of water followed by a trough and then the next crest.
In a drawing this translates to a series of concentric oval or elliptical rings. They are ovals rather than circles because the viewer looks at a water surface from an angle rather than directly from above. A circle seen at an angle becomes an oval, and the lower the viewing angle the flatter and wider the oval becomes.
Three things determine how convincing a water ripple drawing looks. First, the perspective consistency of the ovals. All the rings should share the same center point and the same degree of flattening. Second, the spacing. Ripple rings spread further apart as they travel outward, so the gaps between rings should increase from the center to the edge. Third, the contrast. The impact point at the center has the strongest tonal contrast. The outer rings are progressively lighter and less distinct.
How to Draw Water Ripples Step by Step
Step 1 — Draw Two Overlapping Circles as Guide Shapes
Start in the center of the page and draw a small center dot marking the impact point. Around this dot draw a small flattened oval ring. This first ring is the most important single element in the drawing because it establishes the perspective angle that every subsequent ring must match.
The oval should be noticeably wider than it is tall. A good starting proportion is about three times as wide as it is high. If the first ring looks too circular the whole composition will appear to be viewed from directly above rather than from the natural eye-level angle at which we see most water.
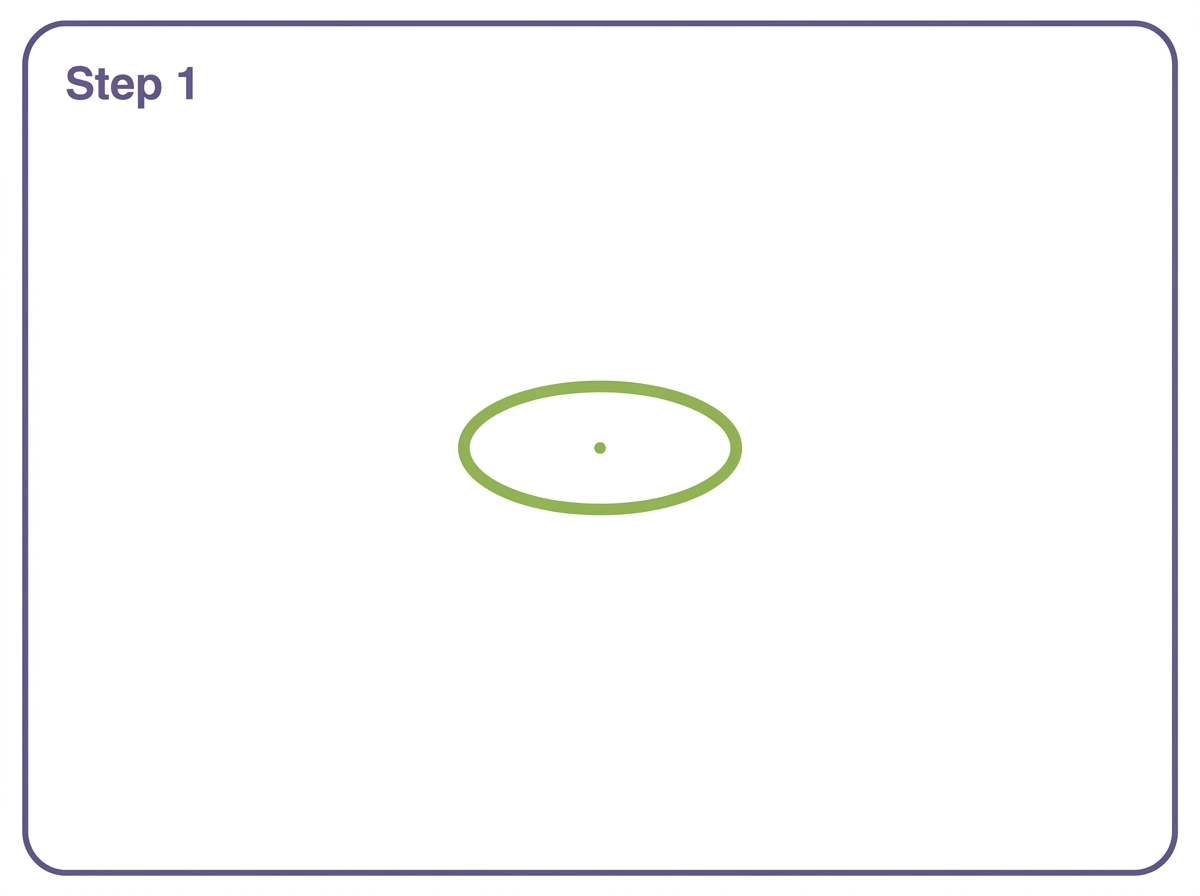
Draw this ring lightly. The early steps of a water ripple drawing benefit from light construction lines because adjustments are much easier to make before the rings are committed to as final lines.
Step 2 — Add Expanding Oval Rings
Draw two more oval rings around the first, each one larger than the previous. Use the same center point and the same flattening proportion as the first ring.
The key decision at this step is the spacing between rings. The first and second rings should have a small gap between them. The second and third rings should have a slightly larger gap. Each successive gap increases slightly as the rings spread outward. This increasing spacing is the detail that most beginners miss and it is the detail that makes the difference between ripples that look mechanical and ripples that look like real water.
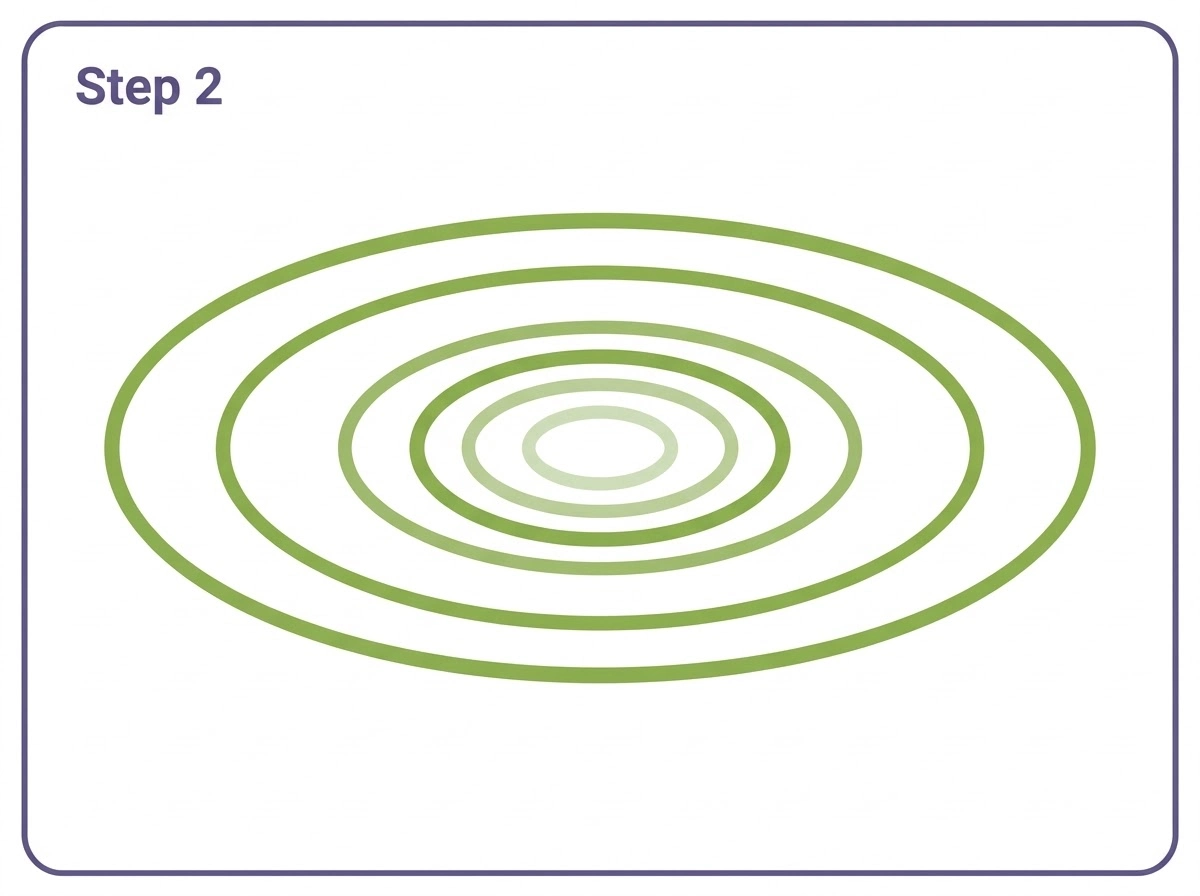
Keep all rings light at this stage. The tonal contrast between the rings will be added later.
Step 3 — Add the Water Droplet and Splash Detail
At the center impact point, draw a small water droplet shape above the surface. The droplet is a teardrop form with the pointed end facing downward toward the water and a rounded top. This is the water that has been thrown upward by the impact, the crown of splash that appears for a fraction of a second after a raindrop or stone hits still water.
Around the base of the droplet, add three or four very short radiating lines suggesting the splash crown at the moment of impact. A tiny crown ring at the very center, smaller than the innermost oval ring, completes the impact area.
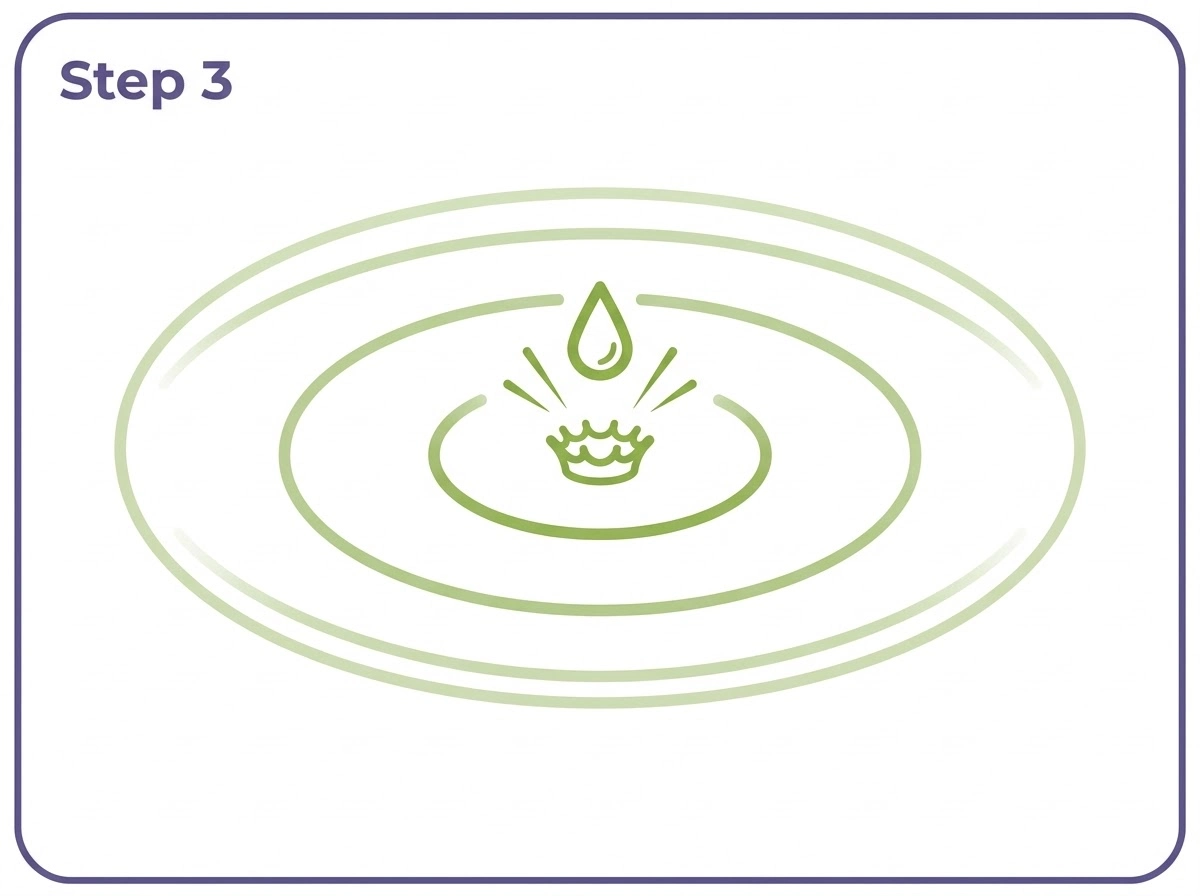
The droplet and splash lines give the drawing its narrative. Without them the concentric rings could be any kind of concentric pattern. With them the drawing tells a specific story about a specific moment.
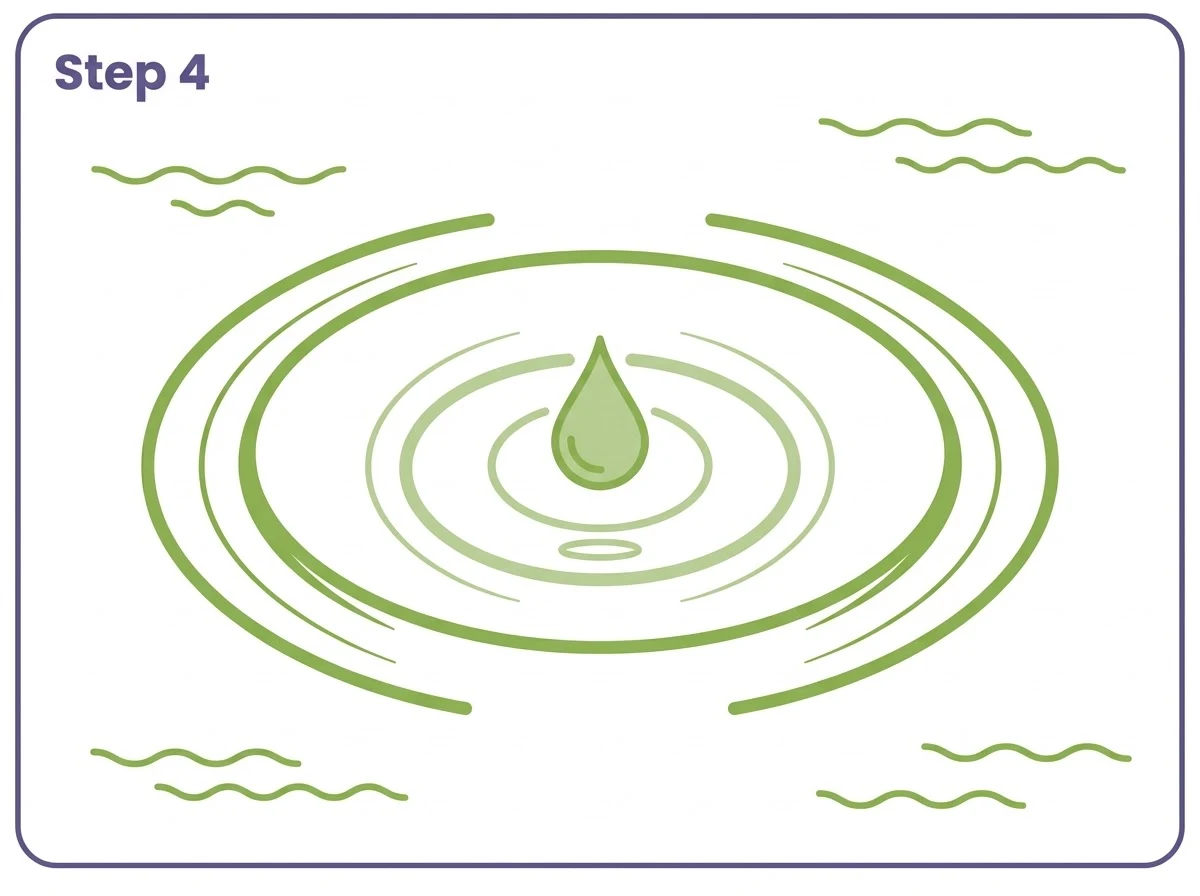
Step 4 — Add Secondary Lines and Surface Texture
Between the main concentric rings, add thinner secondary curved lines suggesting the troughs between the wave crests. Each main ring represents a raised wave peak. The secondary lines between them suggest the depressed trough following each peak.
In the corners and edges of the composition beyond the outermost ring, add two or three short horizontal wavy lines suggesting the flat undisturbed water surface. These lines do not need to be concentric with the rings. They are simply gentle horizontal strokes that suggest the water extending beyond the ripple area.
Add a small elongated oval highlight at the very center of the impact point just below the droplet base. This bright spot represents the light reflecting off the agitated water surface at its most disturbed point.
Step 5 — Colour the Drawing
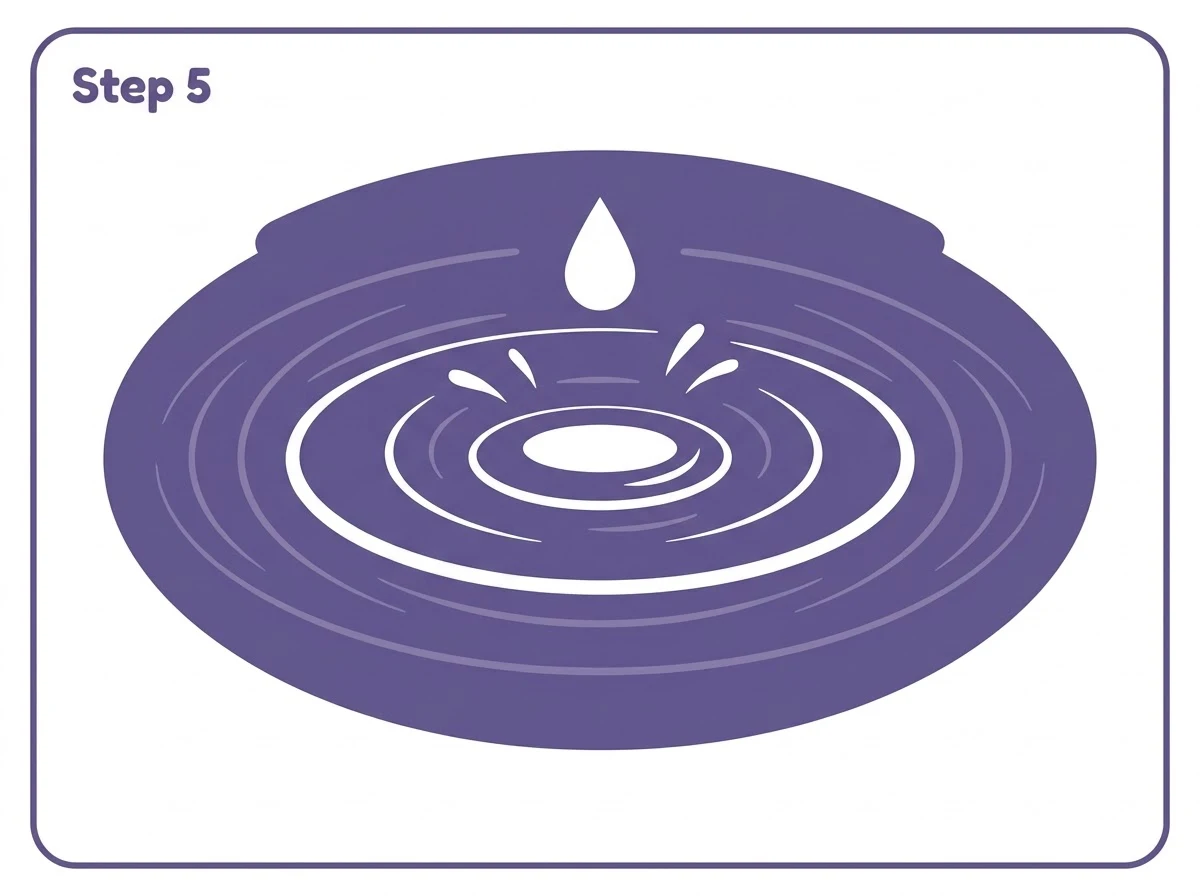
The most important colour decision in a water ripple drawing is not which blue to use. It is where to put the white.
The raised crests of the ripple rings catch the most light and are therefore the lightest tonal areas. The troughs between the rings are in relative shadow and are therefore darker. The flat water surface beyond the outer rings is a middle tone.
In practical terms for a coloured pencil or digital approach: leave the ring lines themselves as white or very light. Fill the areas between rings with a medium blue. Darken the areas between the inner rings where the shadows are deepest. Lighten progressively toward the outer edges as the ripple energy dissipates.
The water droplet is shown as white against whatever tone is behind it. The elongated center highlight is the brightest white in the composition.
How to Draw Water Ripples with Pencil
Drawing water ripples with pencil is primarily an exercise in tonal value rather than line. The approach differs from the step-by-step method above in one important way: pencil drawings build form through shading rather than through outlined shapes.
Start with light oval guide lines as described in Steps 1 and 2. Then instead of filling areas with colour, use pencil shading to establish the darker trough areas between rings. Shade from the center outward, with the darkest tones in the innermost trough areas and the shading becoming progressively lighter as it moves toward the outer rings.
The ring crests are left as the white of the paper. Using a kneadable eraser to lift graphite from the ring areas after initial shading is one of the most effective techniques for realistic pencil water ripples. The eraser removes graphite to reveal white, which is cleaner and brighter than simply avoiding those areas when shading.
For the water surface beyond the outer rings, a very light horizontal hatching using the side of a soft pencil suggests the flat surface without competing with the ring detail at the center.
The water droplet in a pencil drawing is shown as a white shape lifted with an eraser from a slightly darker background, with a thin pencil outline to give it definition.
How to Draw Water Ripples in Digital Art
Drawing water ripples in digital art, whether in Procreate, Photoshop, SAI or any other application, follows the same structural principles as pencil or pen drawing but offers specific advantages at the colouring stage.
The most useful digital technique for water ripples is working on separate layers. Draw the oval ring structure on one layer. Add the water droplet on a second layer. Add the colour fills on a third layer set below the line layers. This arrangement allows adjustments to any element without affecting the others.
For Procreate specifically, the Symmetry function is useful for ensuring that the oval rings are genuinely concentric and consistent. Set up a radial symmetry guide with the center at the impact point before drawing the rings.
In Photoshop, the Ellipse shape tool set to stroke-only with no fill produces perfectly proportioned oval rings. Draw the first ring and then scale copies of it outward from the same center point. The increasing spacing between rings is achieved by scaling each successive ring slightly more than proportional. The Filter menu also contains a Ripple distortion filter that can apply a water surface texture to existing artwork.
For SAI users, the water ripple effect works particularly well with the Pen tool using a pressure-sensitive line weight. The rings drawn with lighter pressure at their edges than at their crossing points suggests the natural fading of ripple energy away from the impact center.
How to Draw Ripples on Still Water vs Moving Water
Still water ripples and moving water ripples are drawn differently because the physics are different.
In still water, like a pond or a calm lake, ripples spread as perfect concentric ovals from a single impact point. The rings are regular and symmetrical. This is the type of ripple drawing described in the five-step tutorial above.
In moving water, like a river or a stream with current, ripples are distorted by the flow. The rings are elongated downstream and compressed upstream, creating an asymmetrical pattern. To draw moving water ripples, start with the same oval construction but distort the rings slightly so they are more elongated on one side than the other. The elongated side indicates the direction of water flow.
In very slow-moving water the distortion is subtle. In faster-moving water the rings may be almost entirely swept downstream, appearing as elongated arcs rather than full ovals.
Drawing Water Reflections Within Ripples
One of the most visually interesting elements of water ripple drawing is the way reflections are distorted by the ripple surface. A flat reflection of a tree, a sky, or a shoreline that would appear as a clean mirror image in still water becomes fragmented and wavy in rippled water.
The key principle is that each ripple ring acts as a tiny angled mirror. The reflection is not distorted randomly. It is displaced in specific directions depending on which part of the ring is facing which direction. The practical result is that reflections in rippled water appear as stretched, fragmented versions of the original subject, broken into irregular horizontal strips that are lighter on the crests and darker in the troughs.
For a simplified cartoon drawing like the tutorial above, the reflection detail can be suggested by a few irregular horizontal stripes visible in the darker areas between the rings. For a more realistic drawing, the reflection fragments are more carefully observed and rendered.
Common Mistakes in Water Ripple Drawing
The most frequent mistake is making all the rings the same distance apart. Real ripples spread outward at an accelerating rate, meaning the gaps between rings increase from center to edge. Evenly spaced rings look mechanical and planned rather than natural and physical.
The second most common mistake is making the rings too circular. Looking at water from eye level rather than from directly above produces quite flat ovals. Many beginners make their ripple ovals only slightly flatter than circles, which places the imaginary viewpoint almost directly overhead. A viewpoint about fifteen to thirty degrees above the water surface produces the most naturalistic ripple oval proportions.
The third mistake is giving equal weight to all ring lines. The innermost rings near the impact point should be the strongest, most clearly defined lines in the drawing. The outermost rings should be the faintest, almost merging with the surrounding water surface.
Tools and Materials for Water Ripple Drawing
For pencil drawing, an H or HB pencil for the initial construction lines and a 2B or 4B pencil for the final shading works well. A kneadable eraser is particularly useful for lifting graphite to create highlights on ring crests.
For pen and ink drawing, a fine-tipped drawing pen in the 0.3 to 0.5mm range produces clean ring lines. Stippling, applying a dense pattern of tiny dots, works very well for the darker trough areas and can suggest the texture of agitated water surface without using crossed hatching lines.
For digital drawing, a pressure-sensitive drawing tablet produces the most natural-looking line weight variation. If working without a tablet, reducing the size of the drawing and zooming in allows more precise control with a mouse.
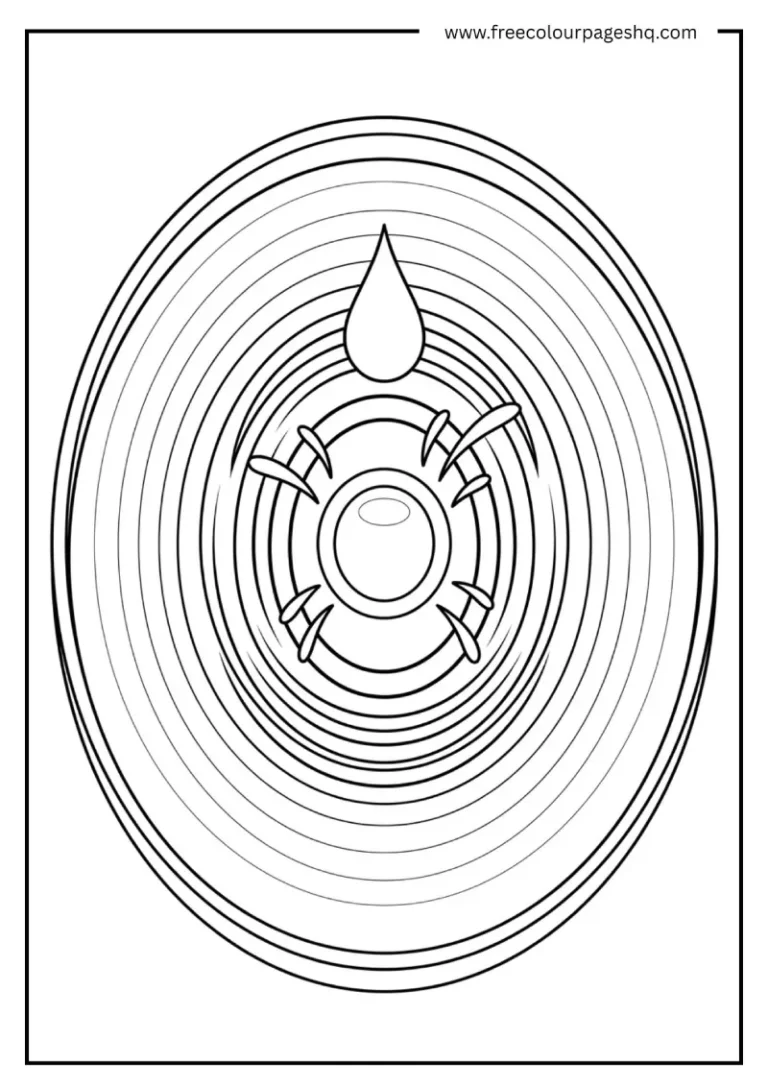
Printable Water Ripple Outline
A printable water ripple outline based on the finished Step 5 design is available as a free download below. Print it and use it as a colouring reference, a drawing guide or a practice template for experimenting with different colour approaches to water.
Explore more Free Printable Coloring Collections
Looking for more engaging activities? Check out these free printable coloring pages fun for kids, useful for teachers, relaxing for adults, and inspiring for designers.
FAQ
What is the easiest way to draw water ripples?
Start with a small center dot for the impact point. Draw a small flat oval around it. Add two more larger flat ovals around the first, increasing the gap between each ring. Add a small teardrop droplet above the center point and a few short splash lines around the base. Add a highlight oval at the very center. The five steps in this tutorial produce a clear and convincing water ripple in under fifteen minutes.
How do you draw water ripples with a pencil?
Start with light oval guide lines. Use pencil shading to fill the trough areas between rings with darker tones, leaving the ring crests as the white of the paper. Use a kneadable eraser to lift graphite from ring areas after initial shading for clean bright highlights. Add light horizontal hatching beyond the outer rings to suggest the flat water surface.
How do you draw water ripples in Procreate?
Set up a radial symmetry guide with the center at the impact point. Draw flat oval rings on separate layers using the symmetry to keep them consistent. Add the droplet on a separate layer above. Colour the water area on a layer below the line layers using a medium blue with darker tones in the trough areas between rings and white highlights on the ring crests.
How do you make water ripples look realistic?
Three things matter most. The ovals must be flat rather than circular to correctly represent the viewing angle. The spacing between rings must increase from center to edge. The innermost rings must be the strongest and the outermost rings the faintest. These three principles, consistent perspective, increasing spacing and graduated tonal strength, are what separate realistic water ripples from a pattern of concentric shapes.
What makes water ripples oval rather than round?
Water ripples are circular in real life but appear oval in drawings because we view a water surface from an angle rather than from directly above. A circle seen at an angle becomes an ellipse. The lower the viewing angle, the flatter the ellipse. All the rings in a water ripple drawing must share the same degree of flattening to maintain consistent perspective.
Can water ripples be drawn in any medium?
Yes. The structural principles of concentric flattened ovals with increasing spacing and decreasing contrast apply to pencil, pen and ink, watercolour, digital drawing in Procreate or Photoshop, and any other drawing medium. The technique for achieving tonal contrast differs between mediums but the underlying structure is the same.