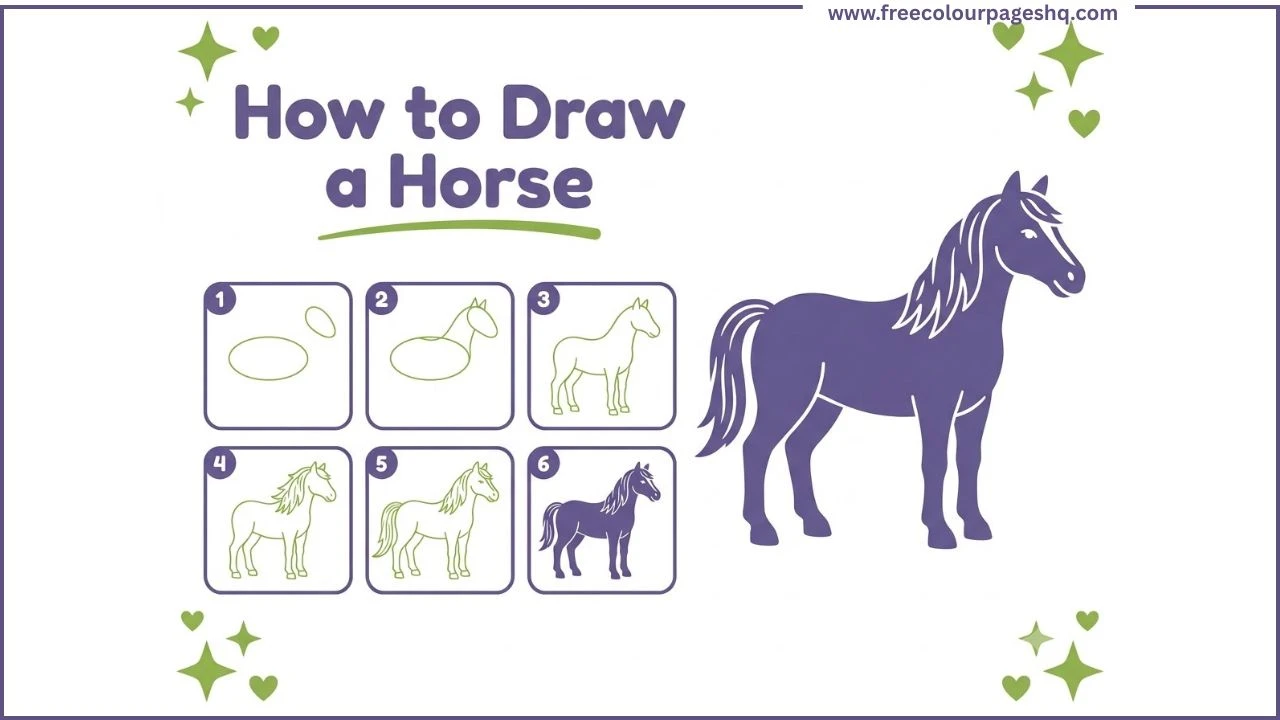
Horses are one of the most requested drawing subjects and one of the most genuinely difficult. This is not a discouraging observation. It is an honest one. The reason horses feel hard to draw is specific and fixable. Their proportions look simple until you are actually on paper. The legs have joints that bend in directions beginners do not expect. The neck connects to the body at an angle that changes everything about whether the horse looks right or looks like a melting furniture arrangement.
The good news is that once the underlying structure is understood, drawing a horse becomes a manageable sequence of decisions rather than a mysterious skill reserved for naturally talented artists. This tutorial shows how to draw a horse step by step in six stages using two oval guide shapes and a series of connecting lines that build the complete horse form before any final outlines are committed to. It works for complete beginners, for kids in all school years, and for anyone who has tried and failed to draw a horse before and wants a method that actually works.
What You Need
Pencil and eraser for all six steps. The guide shapes drawn in the early steps are meant to be erased. Drawing them lightly from the beginning makes the erasing clean and the final result significantly better. Coloured pencils, crayons or markers for the finished drawing.
How to Draw a Horse Step by Step
Step 1 — Draw the Body and Head Guide Ovals
Start in the center of the page and draw a large horizontally oriented oval for the horse body. This oval represents the main barrel of the horse, the chest and ribcage section. Draw it lightly.
Above and to the upper left of the body oval, draw a second smaller oval for the horse head. The head oval should be roughly one third the size of the body oval. Leave a gap between the two ovals. This gap is where the neck will go.
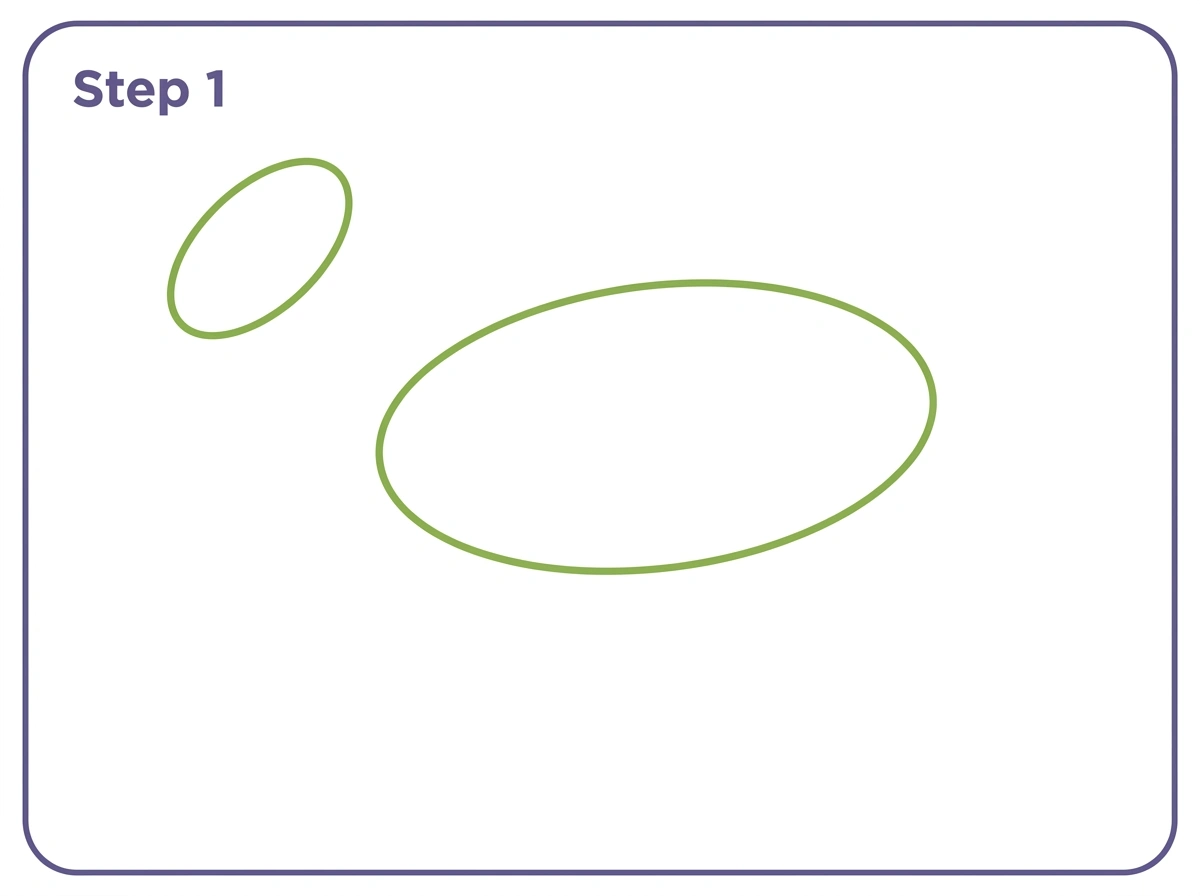
These two guide shapes are the most important elements in the entire drawing because they establish the proportions and the angle before any final lines are drawn. A horse with a body oval that is correctly placed relative to the head oval will look right. A horse where these two shapes are wrongly proportioned or wrongly positioned will look wrong regardless of how carefully the details are added later.
Step 2 — Draw the Neck, Ears and Smooth Outline
Using the two guide ovals as reference points, draw a smooth flowing neck connecting the head to the body. The neck is thicker at its base where it meets the shoulder area of the body oval and slightly narrower at its upper end where it meets the head. Draw the neck as two curved lines, one for the front of the neck and one for the back, meeting the body and head at natural angles.
Add two small pointed triangle ear shapes on top of the head oval. Horse ears are upright and alert, similar to cat ears but slightly more rounded at the tips.
Refine the head oval into a more horse-shaped form. The horse’s muzzle area extends forward from the head oval, slightly elongated compared to a simple oval. The jawline beneath curves back toward the neck connection.
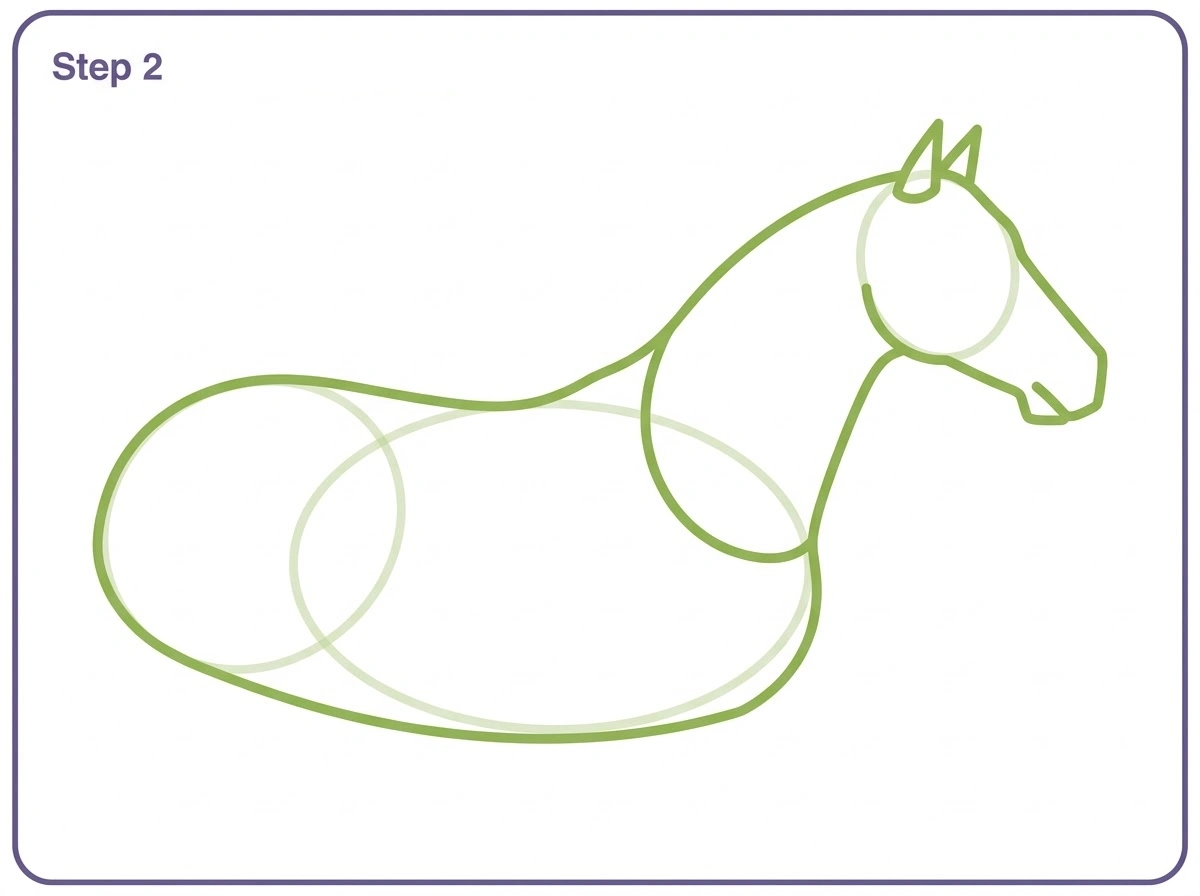
Draw the back line of the horse from the neck connection across the top of the body oval. This line dips slightly in the middle, the saddle region, and peaks at the withers, which is the highest point of the shoulder area. This slight dip and rise in the back line is the detail that most immediately distinguishes a convincing horse outline from a generic animal shape.
Step 3 — Draw the Four Legs and Hooves
Add four legs below the body oval. This is the step that most beginners find most challenging, and the key is to take each leg one at a time rather than trying to place all four simultaneously.
The two front legs extend downward and very slightly forward from the front of the body oval. Each front leg has a subtle knee joint where the leg bends very slightly. Below the knee the lower leg is straight and narrow, ending in a small rectangular hoof shape.
The two back legs extend downward from the rear of the body oval. Horse back legs have a more pronounced joint angle than the front legs. The hock joint, equivalent to the human heel, juts backward noticeably. Below the hock the lower leg angles forward again before ending in the hoof. This Z-shaped back leg profile is the most characteristic and most commonly misdrawn element of horse anatomy.
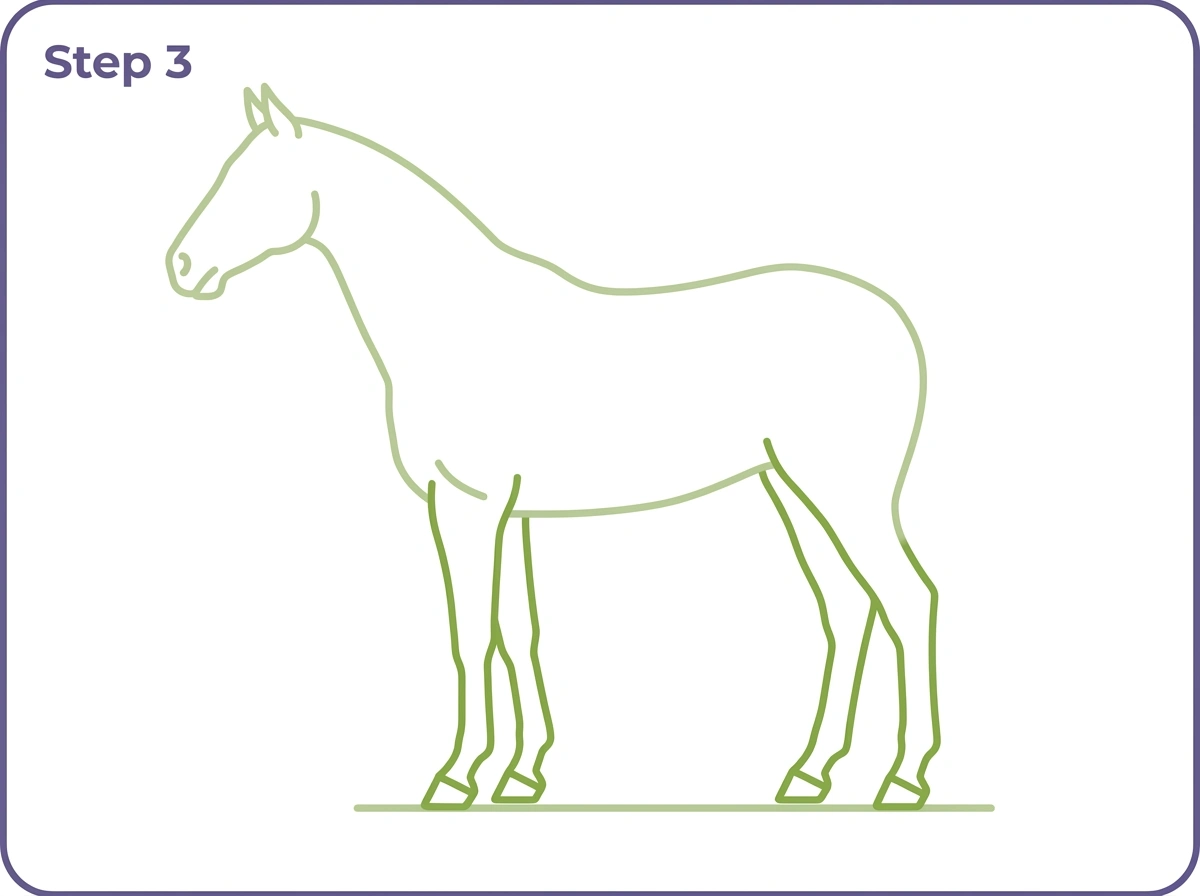
Draw the near-side legs, the ones closest to the viewer, with solid lines. The far-side legs are visible slightly behind the near-side legs and can be indicated with slightly lighter lines to suggest the depth.
Step 4 — Draw the Flowing Mane
Along the top of the neck from between the ears to where the neck meets the body, draw a flowing mane. The mane falls to one side of the neck rather than sitting symmetrically on top. It is drawn as a series of flowing curved lines suggesting thick hair with a natural movement and weight to it.
Begin with a forelock, the section of mane that falls between the ears down onto the forehead. Then continue the mane along the crest of the neck, the hair falling in natural waves to one side.
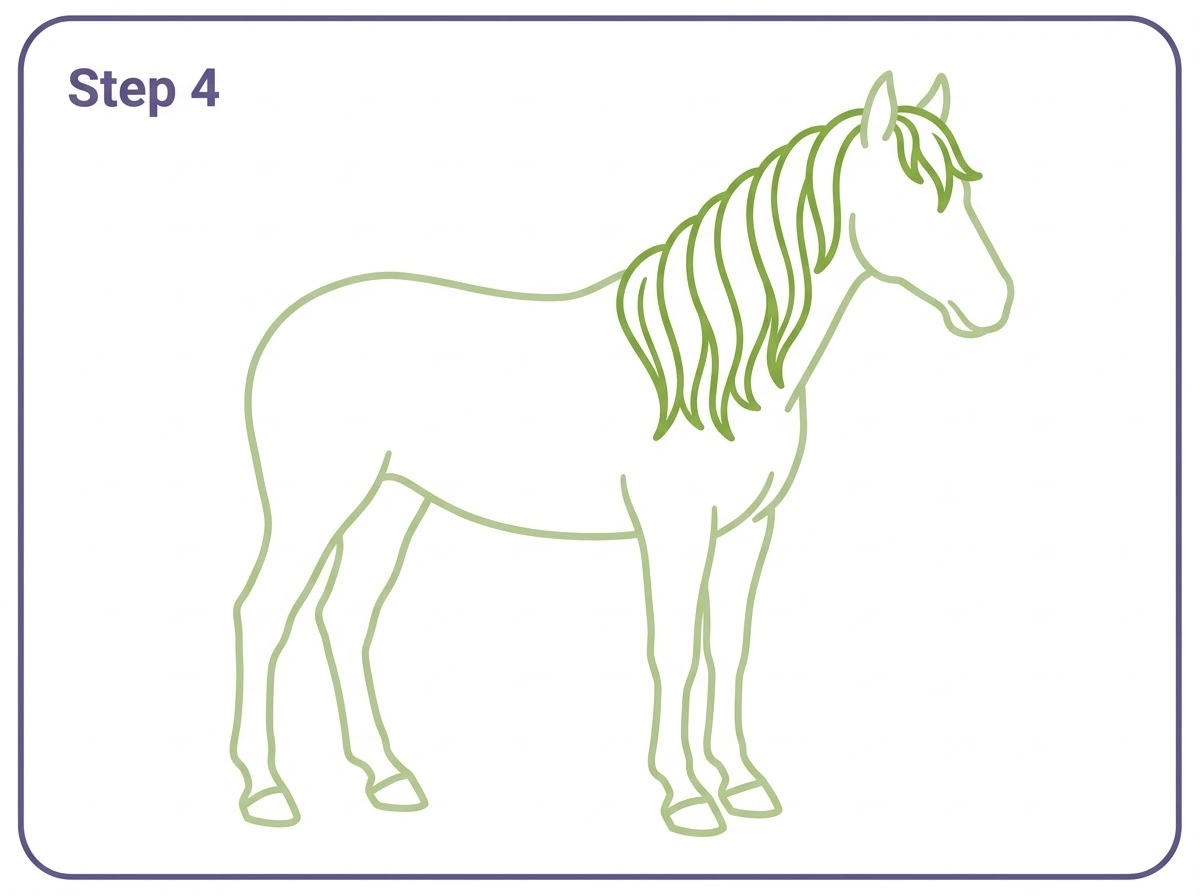
The mane is the feature that most transforms the horse drawing from a recognisable animal into something that looks genuinely horse-like rather than generic. Two or three flowing strand lines within the main mane shape add dimension and movement without requiring fine detail work.
Step 5 — Draw the Tail and Face Details
At the rear of the body, draw a long flowing tail extending downward and slightly outward from the rump. Like the mane, the tail is drawn as multiple flowing parallel lines suggesting the weight and movement of thick hair. The tail should be approximately as long as the body height for a standing horse in a natural pose.
On the head, add a small round eye in the upper portion of the head shape with a tiny sparkle dot. A small rounded oval nostril near the tip of the muzzle and a short curved mouth line below complete the face details and give the horse a gentle, alert expression.
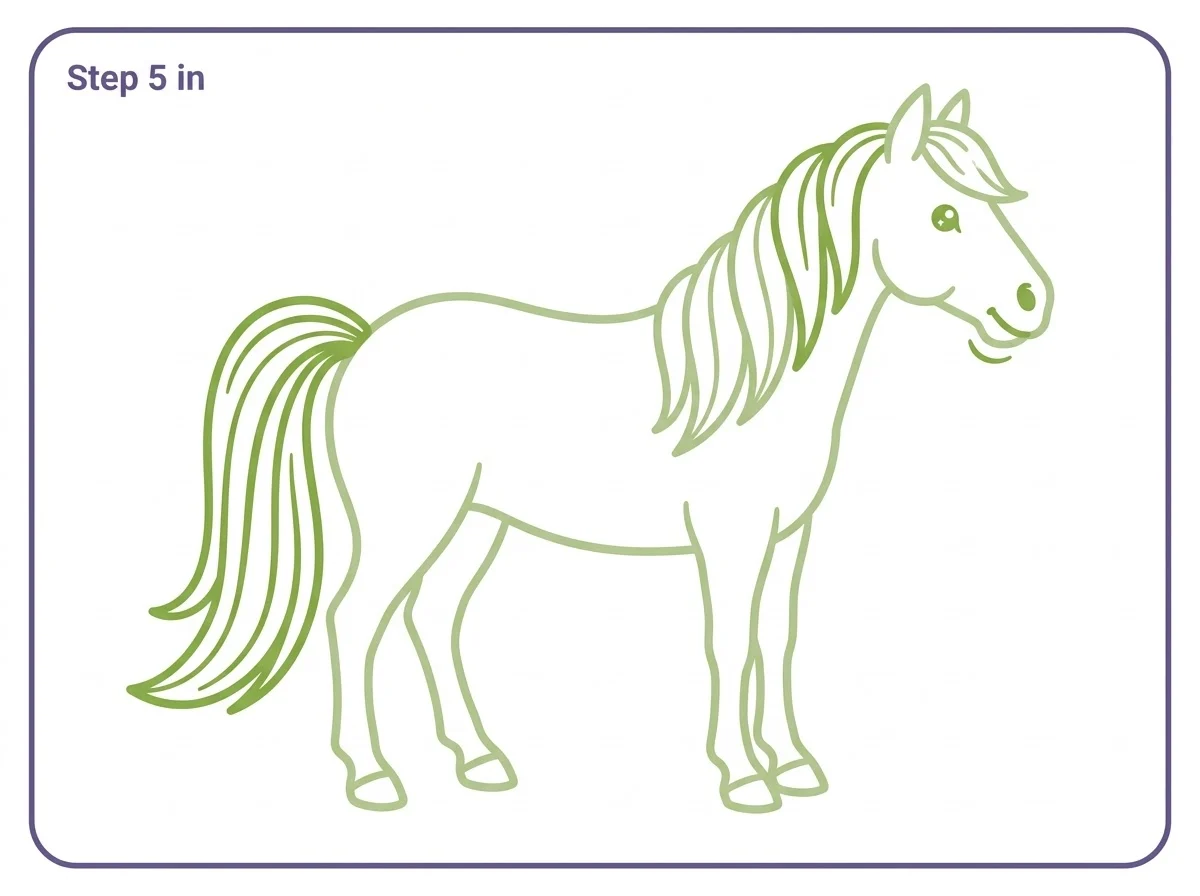
Erase all visible guide oval lines at this stage. The final horse outline should stand clean without any of the construction shapes showing through.
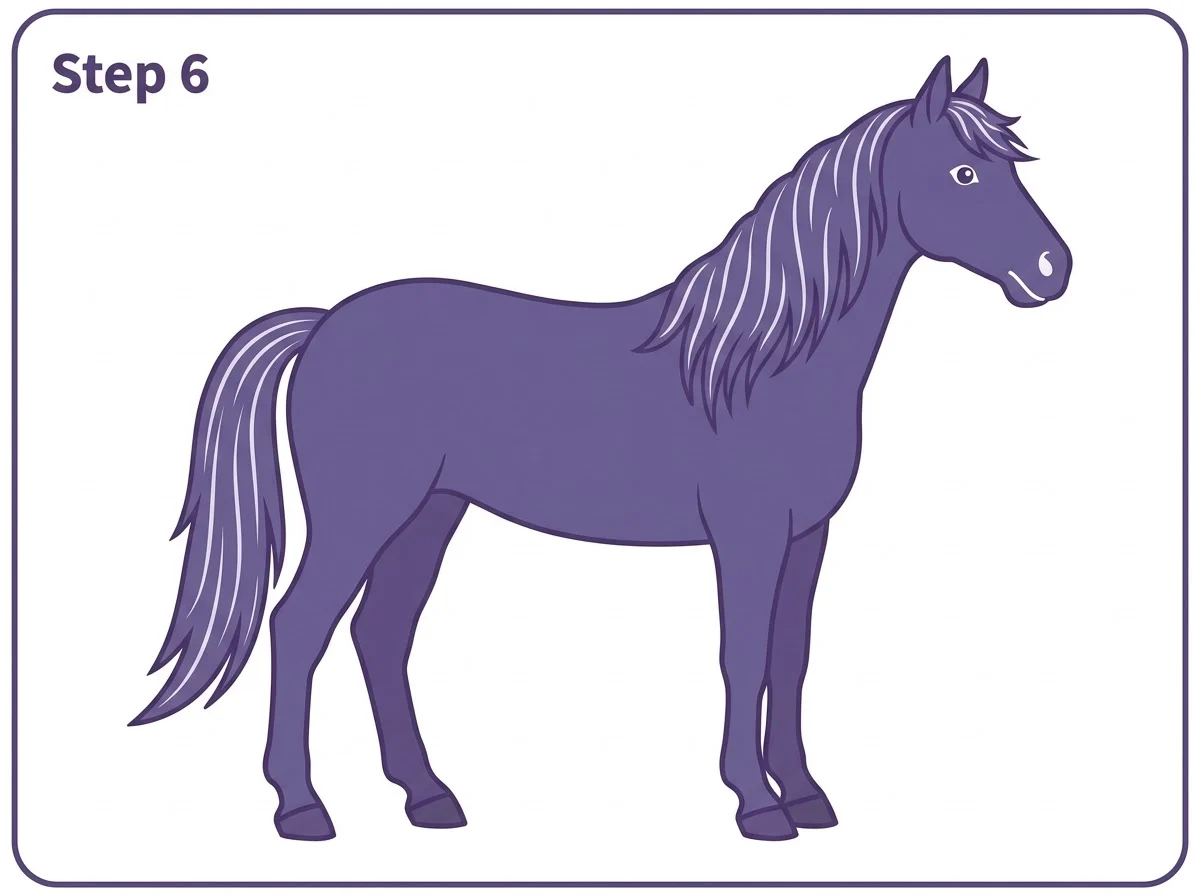
Step 6 — Colour the Drawing
The horse is now fully drawn and ready to colour. Horse coat colours cover an enormous range, giving this step a very wide set of creative options.
A bay horse uses warm reddish brown for the body with black for the mane, tail, lower legs and ear tips. A chestnut horse uses rich reddish orange throughout including the mane and tail. A grey horse uses pale grey with a slightly darker grey for shading and a white or cream mane and tail. A palomino uses golden yellow for the body with a cream or white mane and tail. A black horse uses deep black throughout with subtle dark blue highlights suggesting the coat’s natural sheen.
The eyes are warm amber or brown on most horses. The hooves are dark grey or black on most coat colours, lighter on horses with white legs.
How to Draw a Horse Head
The horse head alone is one of the most popular standalone drawing subjects in the horse category. A horse head portrait requires understanding a few specific proportions that differ from most other animals.
A horse’s head is long relative to its width. The distance from the forehead to the tip of the muzzle is significantly greater than the width of the head. The eyes are positioned quite far back on the head, roughly above the midpoint of the jaw. The nostrils are large and rounded, flaring significantly when the horse is excited or breathing hard.
For a simple horse head easy enough for beginners: draw a long narrow oval for the basic head shape. Add two small pointed ears at the top. Draw the muzzle as a slight outward extension at the lower front of the oval. Add the eye in the upper-middle area of the head, the nostril near the muzzle tip and the jawline curving back toward the neck.
A more detailed realistic horse head requires attention to the specific planes of the skull surface. The forehead is broad and slightly domed. The nasal bone runs straight from forehead to muzzle with very little curve. The cheekbone area below the eye is prominent. These planes create the specific surface quality that distinguishes a convincing realistic horse head from a generic animal head.
How to Draw a Running Horse
A running or galloping horse uses a dramatically different pose from the standing horse in the main tutorial. The galloping horse has all four legs off the ground simultaneously at one point in the stride, which is one of the surprising facts about horse locomotion that photography confirmed only in the late nineteenth century.
For a cartoon running horse, extend the body oval into a more horizontal elongated shape suggesting speed. Bring the front legs forward and upward and push the back legs backward, creating an open X shape with the legs rather than the downward parallel arrangement of a standing horse.
The mane and tail in a running horse blow backward from the direction of movement. This is one of the clearest visual signals of speed in a horse drawing and worth emphasising with flowing lines that extend significantly further backward than they would in a standing pose.
How to Draw a Realistic Horse
A realistic horse drawing begins with the same two-oval guide shape method used in this tutorial but pays closer attention to specific anatomical features.
The withers, the peak of the shoulder above the front legs, should be visible as a slight rise in the back line above the shoulder. The croup, the top of the hindquarters above the rear legs, is another visible high point at the rear of the back. The back between these two points dips slightly in the saddle region.
The horse’s legs are considerably finer relative to the body than they appear in simplified cartoon drawings. A realistic horse has long slim legs with clearly visible knee joints, hock joints and fetlock joints. The muscle definition in the shoulder, hindquarters and neck is visible as subtle curved forms under the coat.
For realistic pencil shading, work from light to dark, leaving the areas where the coat catches the light as the white of the paper. The darkest areas are under the belly, in the hollow behind the front leg, and under the neck. The lightest areas are the top of the back and the side of the barrel where direct light falls.
How to Draw a Cute Horse for Kids
A cute cartoon horse uses the same oval guide construction as the main tutorial but with adjusted proportions. Make the head oval larger relative to the body oval. Make the legs shorter and chubbier. Make the eyes larger with prominent sparkle highlights. Round all the forms that would be angular in a realistic horse.
A kawaii or very young cartoon horse adds oversized eyes that take up much of the face, extremely short legs and a very round compact body. This style is particularly appealing to younger children who find the realistic proportions of a horse challenging to draw.
For a baby horse or foal drawing, the proportions differ from an adult horse in specific ways. Foals have very long legs relative to their body, longer in proportion than an adult horse, which gives them their characteristic slightly wobbly newborn appearance. The head is larger relative to the body than in an adult and the mane is shorter and scruffier.
Horse Drawing Tips for All Ages
The body oval is the most important single element in the drawing. Its size, shape and orientation determine everything that follows. Spending an extra thirty seconds on the body oval, making sure it is the right size and placed in the right position on the page, is the best investment of drawing time in the whole tutorial.
Horse legs require patience. Drawing all four legs simultaneously often produces a tangled result. Drawing each leg individually, starting with the nearest front leg, then the nearest back leg, then the far front leg, then the far back leg, gives each leg its own space to be correct before the next one begins.
The mane and tail are the most forgiving elements of the horse drawing because their free-flowing nature naturally accommodates imperfection. Slightly wavy, slightly irregular flowing lines look better than perfectly smooth ones for these elements because real horse hair is not perfectly smooth.
How to Draw a Seahorse
The seahorse is included in the horse drawing category because of its name and because many children search for it while learning to draw horse-related subjects. A seahorse drawing is actually significantly easier than a horse drawing despite the shared name.
Start with an upright S-curve for the body posture. The head of the seahorse is at the top of the S with a pointed snout extending forward. The body follows the S-curve downward, the belly curving outward and the back curving inward. The tail coils in a tight spiral at the bottom. The dorsal fin on the back is a small delicate fan shape. The pectoral fins on the sides of the head near the gills are tiny and often barely visible.
The bony plated structure of the seahorse body creates a series of horizontal ridge lines along the body, which are the characteristic textural detail that makes a seahorse drawing immediately recognisable as a seahorse rather than a generic curved fish shape.
Fun Facts About Horses for Kids
Horses have been domesticated for approximately 6,000 years, making them one of the oldest working partnerships in human history. Before the invention of motor vehicles, horses were the primary mode of transportation, agriculture and military power in most of the world.
A horse’s hooves are made of the same material as human fingernails, a protein called keratin. Horse hooves grow continuously and require regular trimming by a farrier, a specialist in horse hoof care.
Horses can sleep both standing up and lying down. They have a locking mechanism in their legs called the stay apparatus that allows them to doze while standing without falling over. They need to lie down for deeper REM sleep but typically only for short periods.
A horse’s eyes are on the sides of its head, giving it a nearly 360-degree field of vision. The only areas a horse cannot see are directly in front of its nose and directly behind its tail.
The oldest horse on record was named Old Billy, a barge horse who lived in England and died in 1822 at the age of 62.
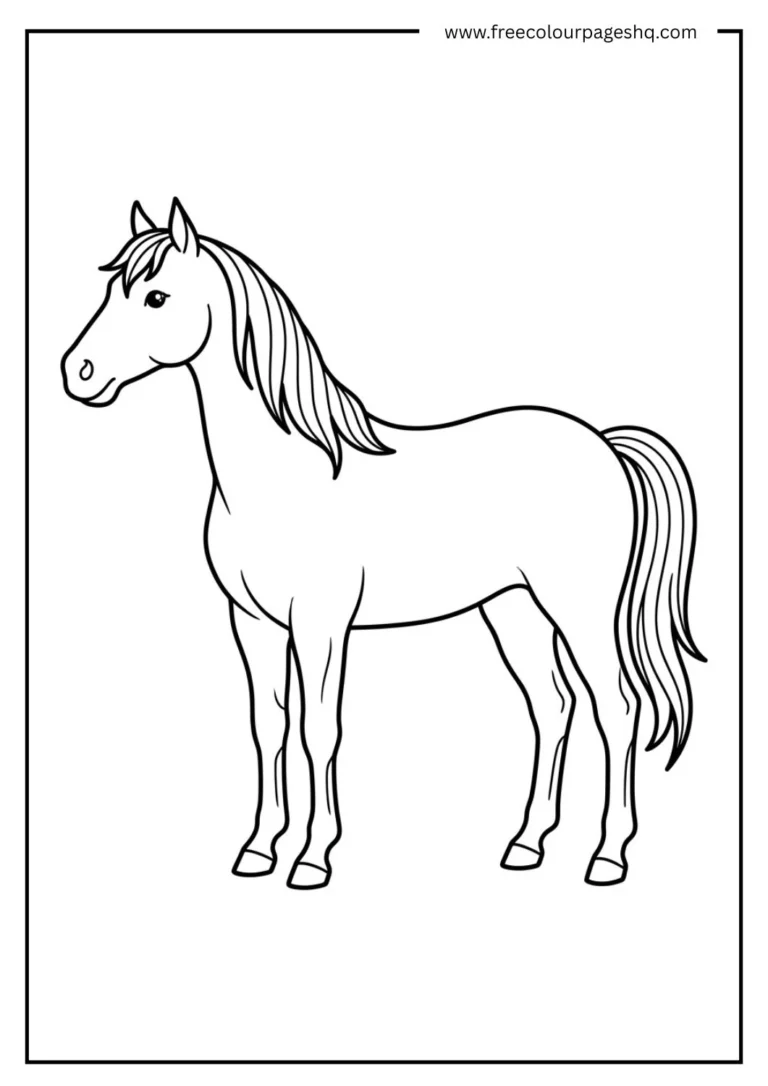
Printable Horse Outline PDF
A printable horse outline based on the finished Step 6 design is available as a free download below. Print it on plain white paper and use it as a colouring page, a drawing reference or a tracing template. The outline includes all the completed line details from the tutorial and works as a standalone colouring page.
Explore more Free Printable Coloring Collections
Looking for more engaging activities? Check out these free printable coloring pages fun for kids, useful for teachers, relaxing for adults, and inspiring for designers.
FAQ
What is the easiest way to draw a horse?
Start with a large body oval and a smaller head oval. Connect them with a curved neck. Refine the head into a horse head shape with ears. Add four legs with hooves below the body. Draw a flowing mane from between the ears along the neck and a long tail from the rear. This six-step method is the most reliable beginner horse drawing approach.
How do you draw a horse head step by step?
Draw a long narrow oval for the basic head shape. Add two small pointed ears at the top. Extend the muzzle area slightly at the lower front. Add the eye in the upper-middle area, the nostril near the muzzle tip and a curved mouth line. Add the ear detail and connect the head to the neck with two curving lines.
How do you draw a realistic horse?
Use the same two-oval guide construction as a cartoon horse but pay careful attention to the withers peak and the croup peak in the back line, the specific Z-shape of the hind legs with the hock joint, the fine proportion of the legs relative to the body, and the visible muscle definition in the shoulder and hindquarters. Work from light to dark in pencil shading, leaving highlighted areas as white paper.
How do you draw a horse for kids in Class 1 and Class 2?
Use a simplified version of this tutorial with larger guide ovals, rounder shapes and shorter legs. Give the horse large friendly eyes and a simple curved smile. Keep the mane as a simple bumpy line rather than detailed flowing strands. This version takes about ten minutes and produces a recognisable cheerful horse.
How do you draw a running horse?
Use a more elongated horizontal body oval to suggest speed. Bring the front legs forward and upward and push the back legs backward. Extend the mane and tail horizontally backward to show the wind of movement. The open X shape of the legs and the horizontal hair are the two clearest visual signals of a horse in motion.
Why is drawing a horse difficult?
Horses are difficult because their proportions are deceptively specific and their leg joints bend in ways that beginners do not expect. The back leg in particular has a reverse-angled hock joint that confuses many first-time drawers. Using guide shapes to establish proportions before drawing any final lines removes most of this difficulty.