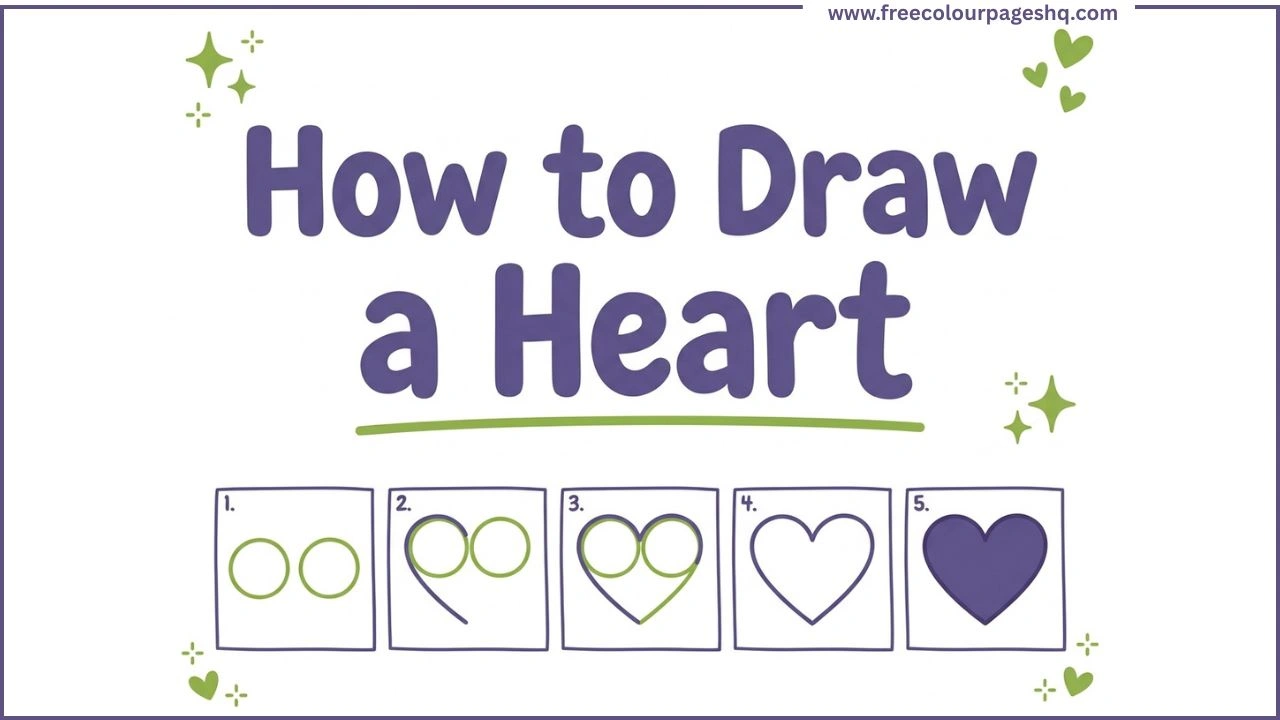
Learning how to draw a heart shape sounds straightforward until you actually try it. Two curved lines coming from the top and meeting at a point below, and somehow they never quite match. One side bulges more than the other. The top dips too sharply or not sharply enough. The bottom point comes out lopsided. Most people have experienced this at least once, usually while trying to draw a quick heart on a birthday card or a notebook margin.
The good news is that there is a simple method using two circles as guides that makes drawing a perfect heart much easier. This is the same method used in this tutorial. You draw the circles lightly as guides, use them to create the rounded upper halves of the heart, and then erase them once the heart outline is complete. The result is a clean, symmetrical heart shape every time.
This tutorial works for all ages. It is a good starting point for anyone learning how to draw a heart step by step for the first time, and it produces results that look genuinely nice even for young children who are just developing pencil control.
What You Need
Before starting, gather a pencil, an eraser, a piece of plain paper and something to color with at the end. A pencil is important for the early steps because you will be drawing guide circles that need to be erased later. Drawing those guide circles in pen or marker makes them impossible to remove cleanly.
How to Draw a Heart Step by Step
Step 1 — Draw Two Overlapping Circles
Draw two circles side by side near the top of the page. The circles should touch each other at one point in the middle, overlapping slightly where they meet. Try to keep both circles roughly the same size, because they will form the two upper rounded humps of the heart and an unequal size will make the finished heart look lopsided.
Do not worry about making the circles perfectly round. Freehand circles are never exact, and slight irregularities in the guide circles will not affect the finished heart significantly. Draw these circles lightly so they are easy to erase later.
The blue lines in the images throughout this tutorial show the new lines being added at each step.
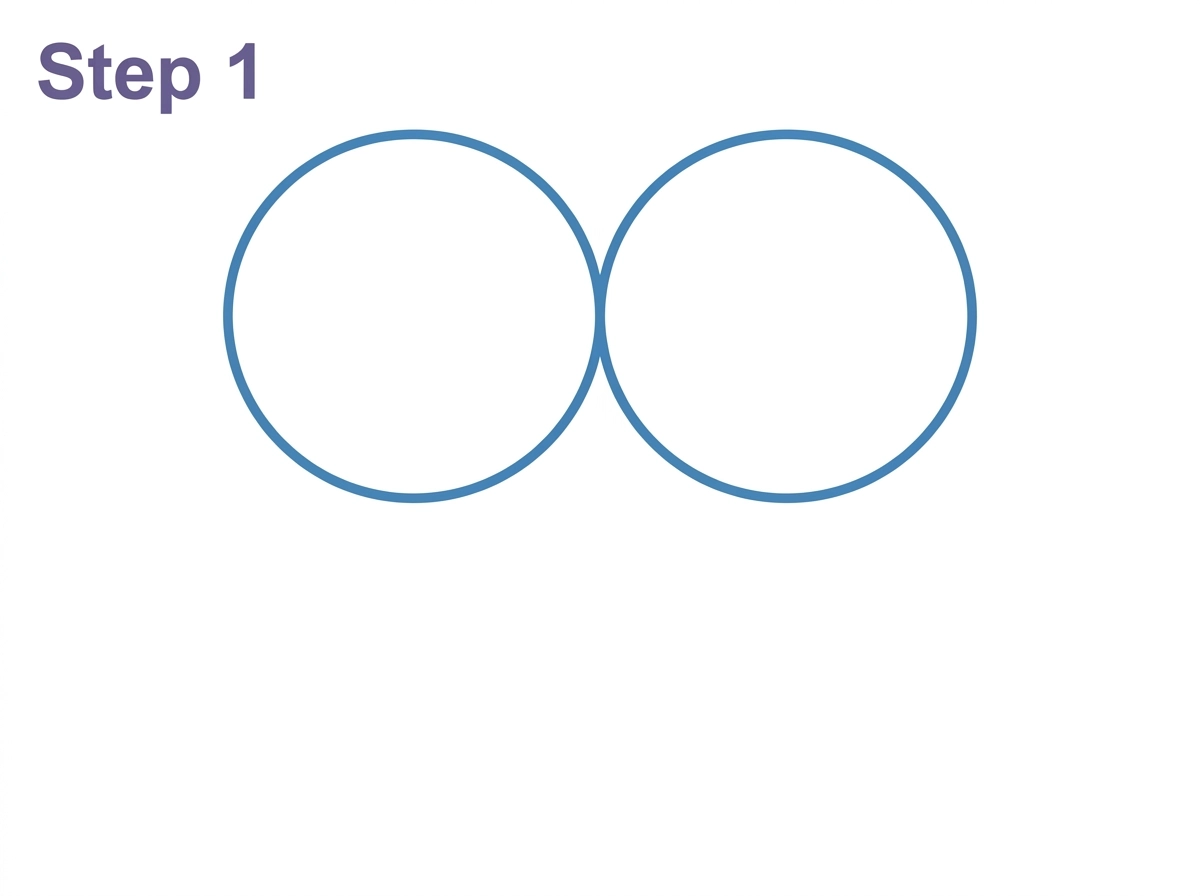
Leave plenty of empty space below the circles on the page. The lower half of the heart will extend down from the circles, so starting too low on the page can mean running out of room before the heart is finished.
Step 2 — Draw the Left Side of the Heart
Start at the lower left outer edge of the left circle. From that point, draw a long curved line going downward and inward toward the center of the page. This line should end below the two circles, coming close to the middle point at the bottom. This curve forms the left side of the heart.
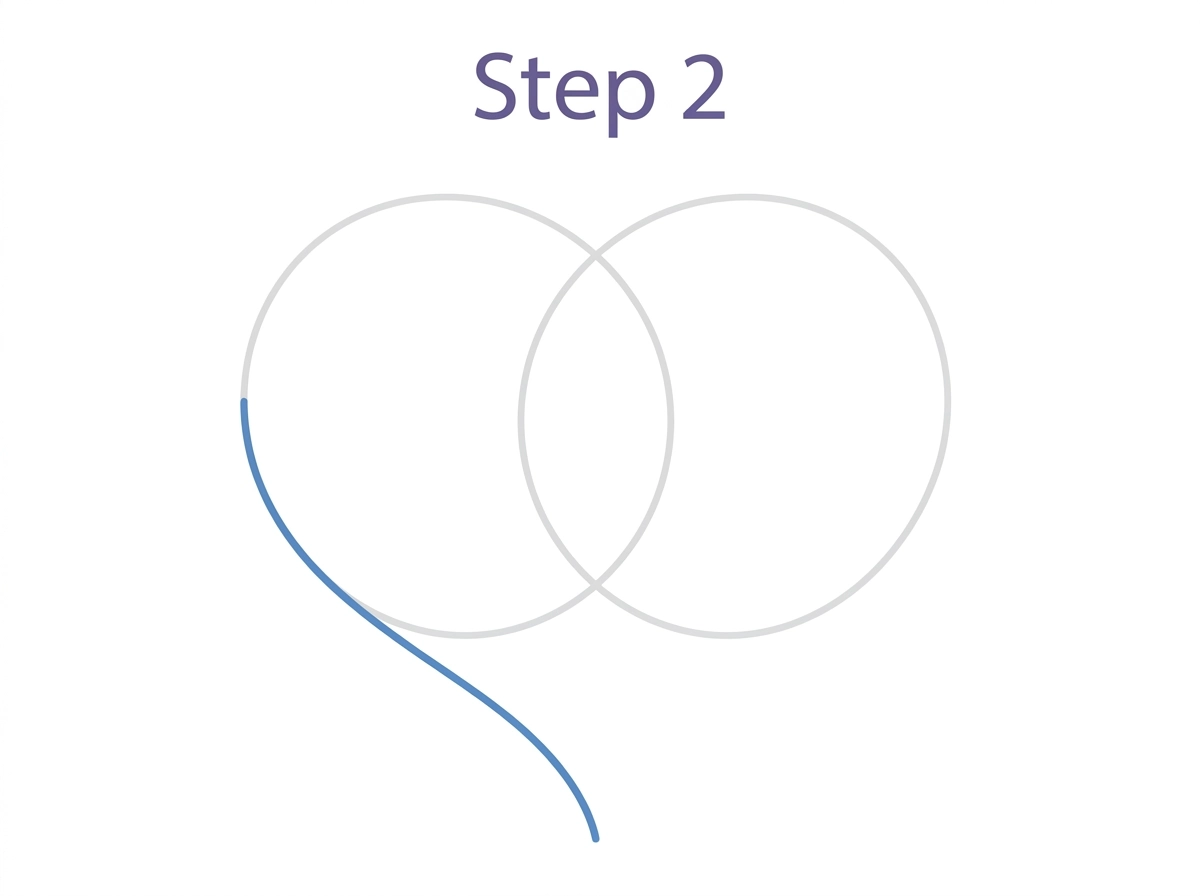
The curve should follow the lower arc of the left circle for a short distance and then sweep away from it as it heads toward the bottom point. A common mistake at this step is making the curve too straight. A heart’s sides have a gentle outward bow before they sweep inward to the point, so the line should curve outward slightly before coming back in.
Step 3 — Draw the Right Side of the Heart
Repeat the same process on the right side. Start at the lower right outer edge of the right circle and draw a long curved line going downward and inward to meet the same bottom point as the left side. The right side should mirror the left, though it does not need to be a perfect reflection. Slight differences between the two sides are completely normal in freehand drawing and give the heart a natural, handmade quality.
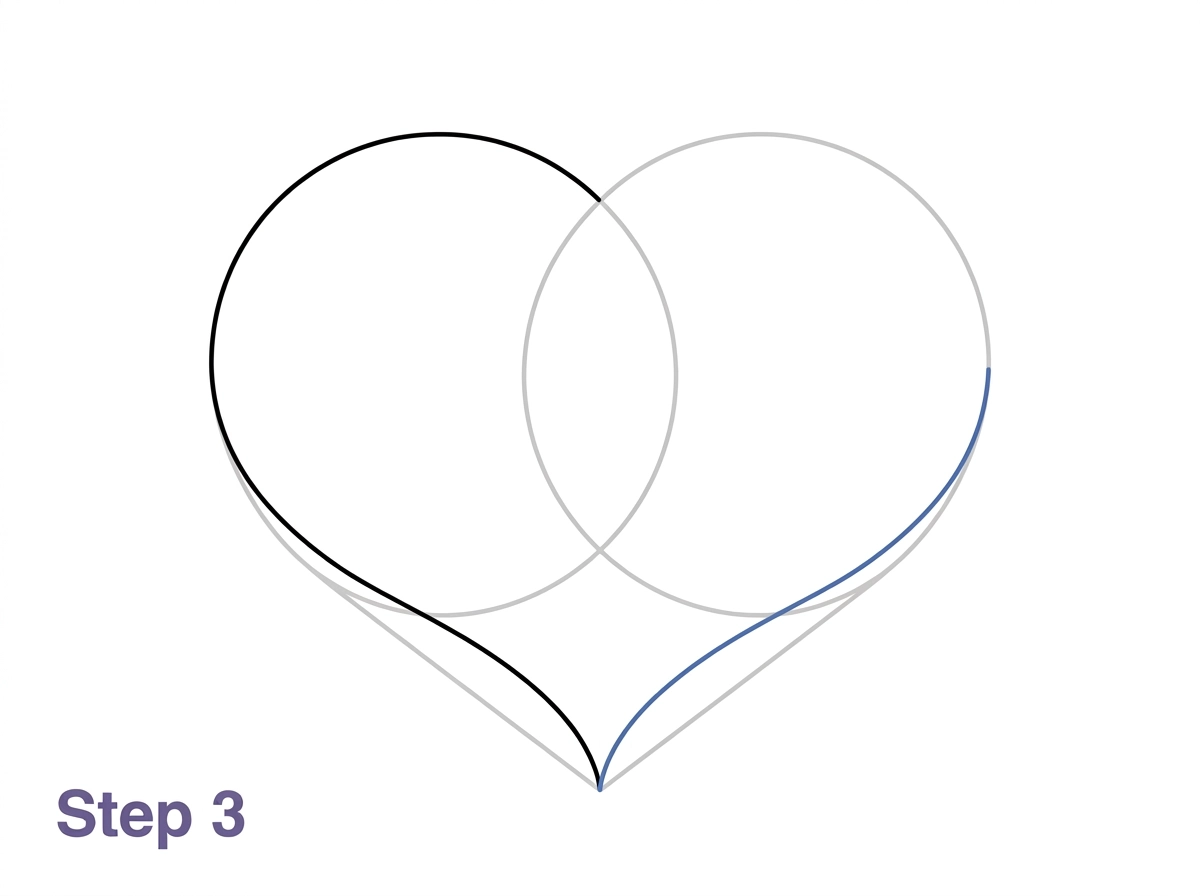
When both curved lines meet at the bottom point, the basic heart shape is in place. The guide circles are still visible at this stage, which is why a pencil rather than a pen was used.
Step 4 — Erase the Guidelines and Clean Up the Shape
Erase the inner parts of the guide circles that fall inside the heart shape, and erase any other pencil guidelines that are no longer needed. Keep the outer arcs of the circles at the top, because those form the two rounded humps of the heart, and keep the two curved lines at the bottom that were drawn in steps two and three.
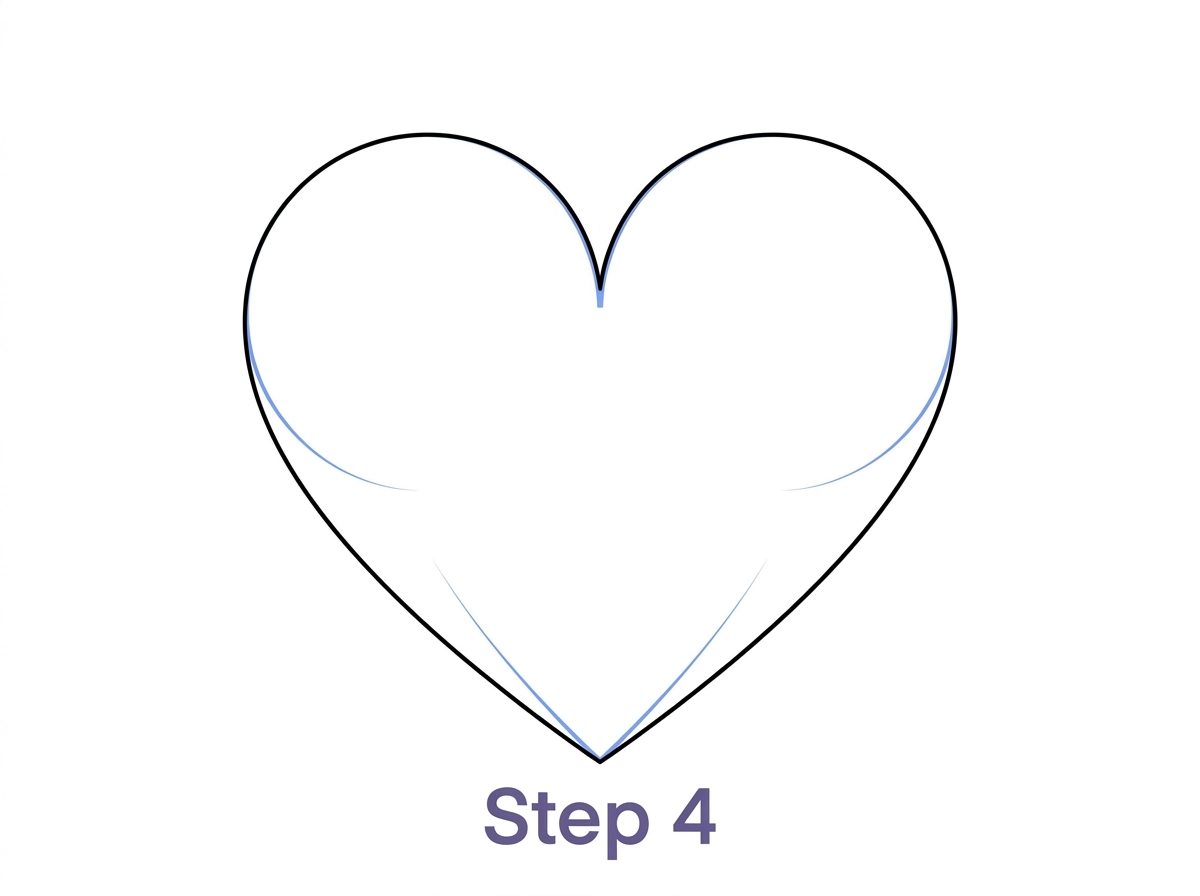
Once the erasing is done, a clean simple heart outline should remain. Check the shape at this point and make any small corrections needed. If one side looks slightly uneven, this is the easiest moment to adjust it before moving on.
Step 5 — Add a Shine Detail
To give the heart a more finished and three-dimensional appearance, add two small details inside the upper left area of the heart. Draw a small oval shape near the top left of the interior, and just below it draw a short curved vertical line. These two marks together create the impression of light reflecting off a glossy surface.
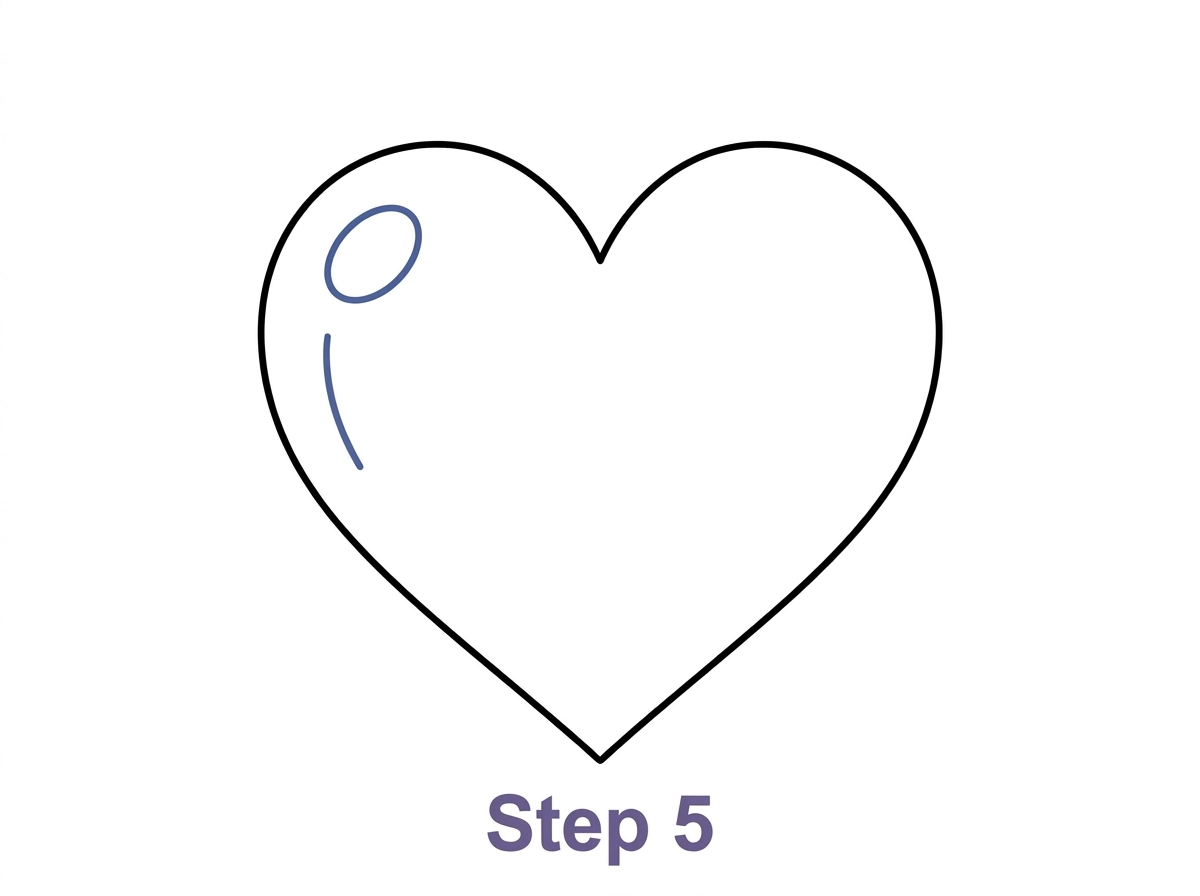
This detail is optional but it makes a significant difference to the finished look of the drawing. The shine marks are what make a simple heart outline look like a solid three-dimensional object rather than a flat shape. They appear in many heart drawing styles from cartoon hearts to realistic hearts and in emoji designs.
Step 6 — Color the Heart
The heart outline is now complete. Color it in using whichever colors appeal to you. Red and pink are the most traditional choices for love hearts and valentine hearts. But hearts can be any color at all.
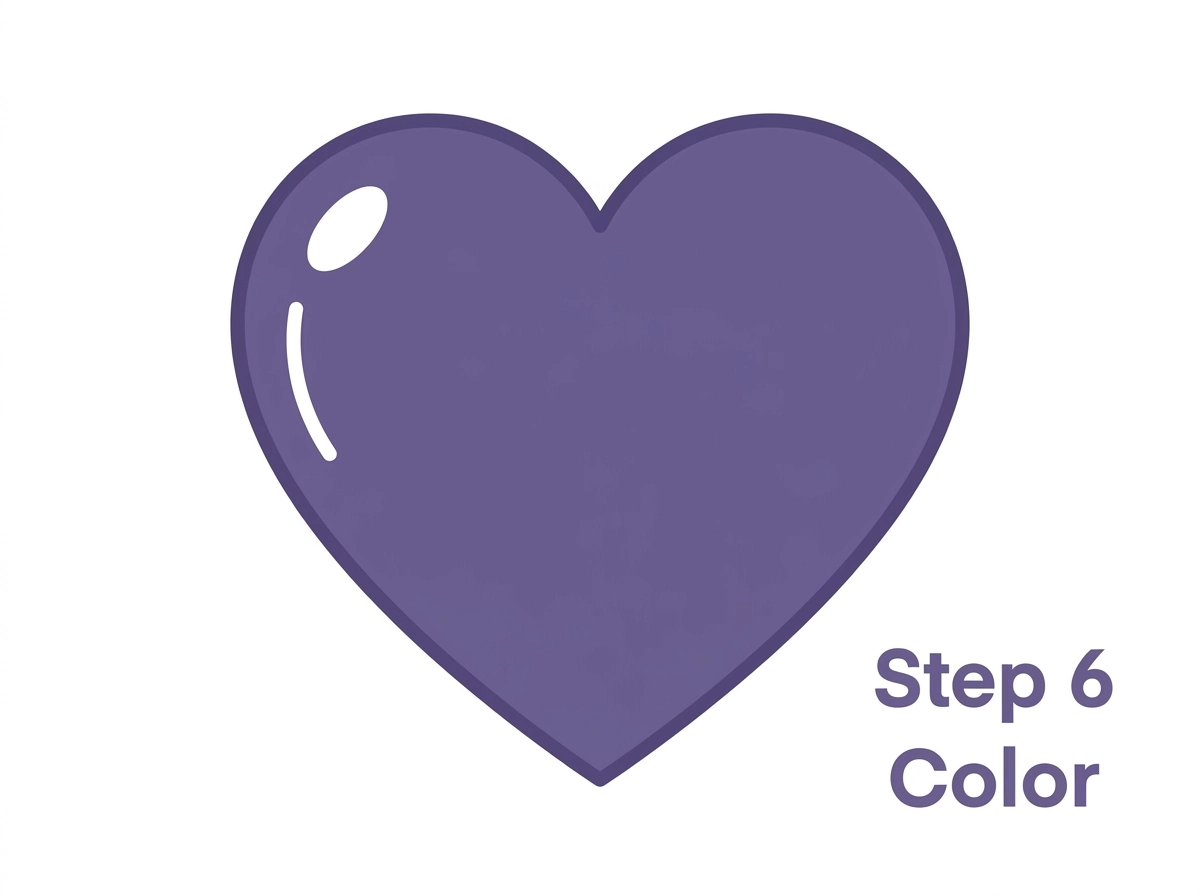
The example above uses a purple color to fill the heart, with the shine marks from step five left as white against the colored fill. This gives the heart the glossy appearance that the shine marks were designed to create. Notice how the darker outline around the edge of the heart separates it from the white background and gives the whole shape more visual weight.
Once the basic coloring is done, there are many ways to develop the drawing further. A rainbow heart uses bands of color across the fill. A gradient heart moves from a lighter shade at the top to a deeper shade at the bottom. A patterned heart fills the interior with stripes, polka dots or a checkerboard.
Other Heart Styles to Try
Once the basic method is comfortable, there are several variations worth exploring.
A broken heart uses the same circle method for the upper half but adds a jagged lightning bolt crack running from the top center down through the bottom point. The crack separates the heart into two halves that are slightly pulled apart. This style appears frequently in drawings about loss and heartbreak and in certain tattoo designs.
A heart with wings adds two symmetrical wing shapes to the sides of the basic heart outline. The wings can be simple rounded forms or more detailed feathered designs. This style is popular in memorial artwork, in tattoo designs and in certain decorative illustration styles.
A 3D heart is achieved by adding shading and a cast shadow below the basic heart shape. The left side of the heart is left lighter to suggest where light hits it, and the right side is made darker to suggest shadow. A soft ellipse shadow below and to one side of the heart suggests it is floating above the surface. This version is more challenging but the basic outline from this tutorial is the correct starting point.
A cute heart or kawaii heart adds a simple face to the basic shape, two round eyes, small rosy circular cheeks and a small curved smile. Children enjoy this version because it makes the heart into a character rather than just a shape.
A heart with a ribbon or bow wraps a decorative ribbon around the base of the heart with a bow at the top. This style appears frequently in gift and valentine designs.
A candy heart, the conversation heart familiar from Valentine’s Day, has slightly squarer proportions than a standard heart and a flat edge at the top rather than a deep dip. The inside can then be filled with a short message in small letters.
Tips for Drawing a Better Heart
The most important factor in a good-looking heart is the symmetry between the two sides. The circle method used in this tutorial helps with this because the two guide circles establish the width and height of the upper humps before any of the final lines are drawn.
For a simple heart shape that looks genuinely symmetrical, fold the paper in half vertically after drawing one side and trace the outline through to the other side. Unfold the paper and you have a perfectly symmetrical heart outline. This trick works well for larger heart shapes where even small differences between the two sides are noticeable.
Drawing slowly and lifting the pencil to check the curve before committing to it helps with the lower curved sides. The tendency when drawing quickly is to make the curves too angular. A heart’s sides should have a smooth continuous curve rather than any corners or sudden changes of direction.
For a larger heart shape, drawing the two guide circles larger and positioning them higher on the page gives more room for the lower curved sides to develop naturally before they meet at the point.
How to Draw a Human Heart
The human heart that pumps blood through the body looks nothing like the traditional heart symbol used in drawings and on valentine cards. The biological heart is asymmetrical, roughly cone-shaped and has several visible external structures including the aorta, pulmonary arteries and veins, and the two atria.
Drawing a realistic human heart or heart anatomy diagram is a more advanced drawing challenge than the decorative heart covered in this tutorial. It involves studying the actual shape of the organ from a medical illustration or biology textbook and replicating the curved external forms and major vessel openings. A simple heart diagram for biology begins with a rounded rectangular shape tilted slightly to one side, with the major vessels shown as tubes emerging from the top.
If you are learning how to draw a heart for biology class, a labeled heart diagram, or any scientific purpose, the starting shape and approach are significantly different from the decorative heart drawing method covered here.
Printable Heart Outline
A black and white heart outline made using the method in this tutorial is available as a free printable PDF below. Print it and use it as a coloring page or as a reference guide when practicing the drawing steps.
Related Free Printable Coloring Pages Collections
Looking for more engaging activities? Check out these free printable coloring pages fun for kids, useful for teachers, relaxing for adults, and inspiring for designers.