There is a particular kind of anticipation that comes with putting up a Christmas tree. It is partly the lights and partly the ornaments and partly the smell of pine if the tree is real, but mostly it is the moment when the whole thing is finished and you stand back and look at it. The Christmas tree as a subject for drawing carries all of that same accumulated feeling. It is one of the most searched how-to-draw subjects in December for the same reason that it is one of the most photographed subjects in December. It means something.
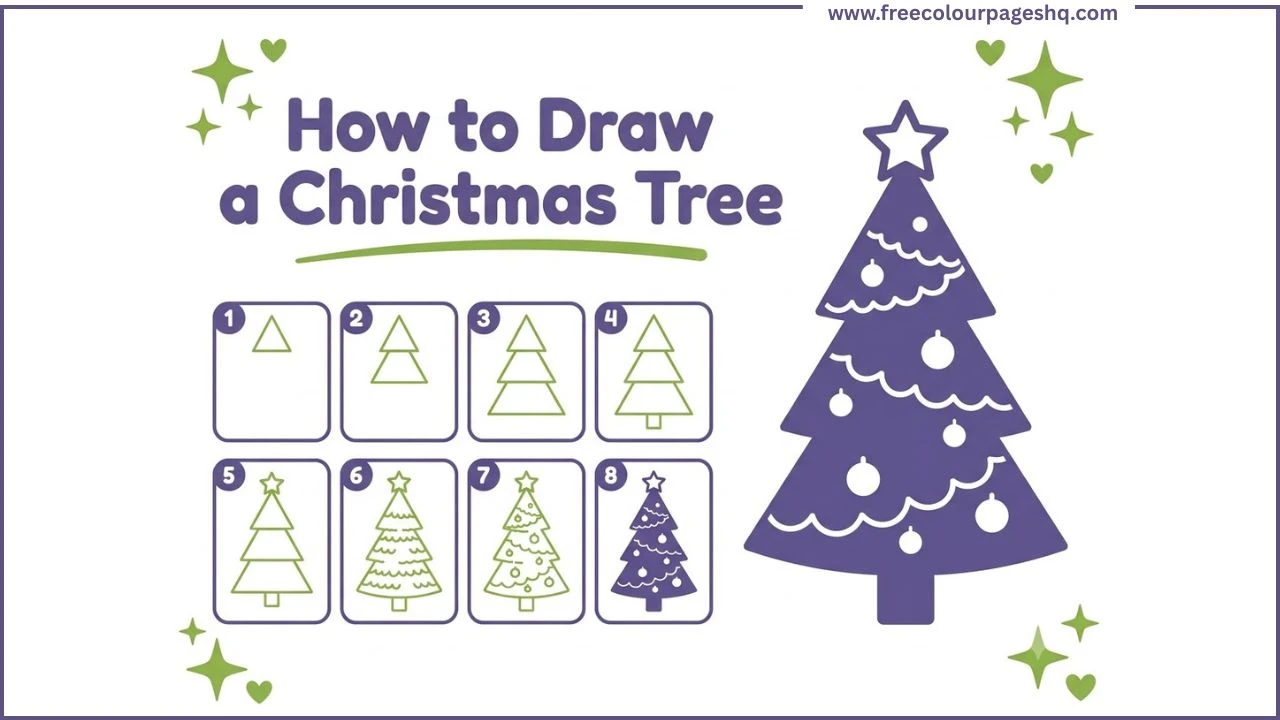
This tutorial shows how to draw a Christmas tree step by step in eight stages. The method uses three stacked triangle layers as the foundation, adds a trunk, a star, branch texture, decorations and finally colour. It works for complete beginners, for young children, for classroom activities and for anyone who wants a reliable Christmas tree drawing method they can use year after year. All you need is a pencil and something to colour with at the end.
What You Need
A pencil and eraser. Coloured pencils, crayons or markers for the finished tree. Green is the obvious colour choice but the finished drawing works in any colour scheme.
How to Draw a Christmas Tree Step by Step
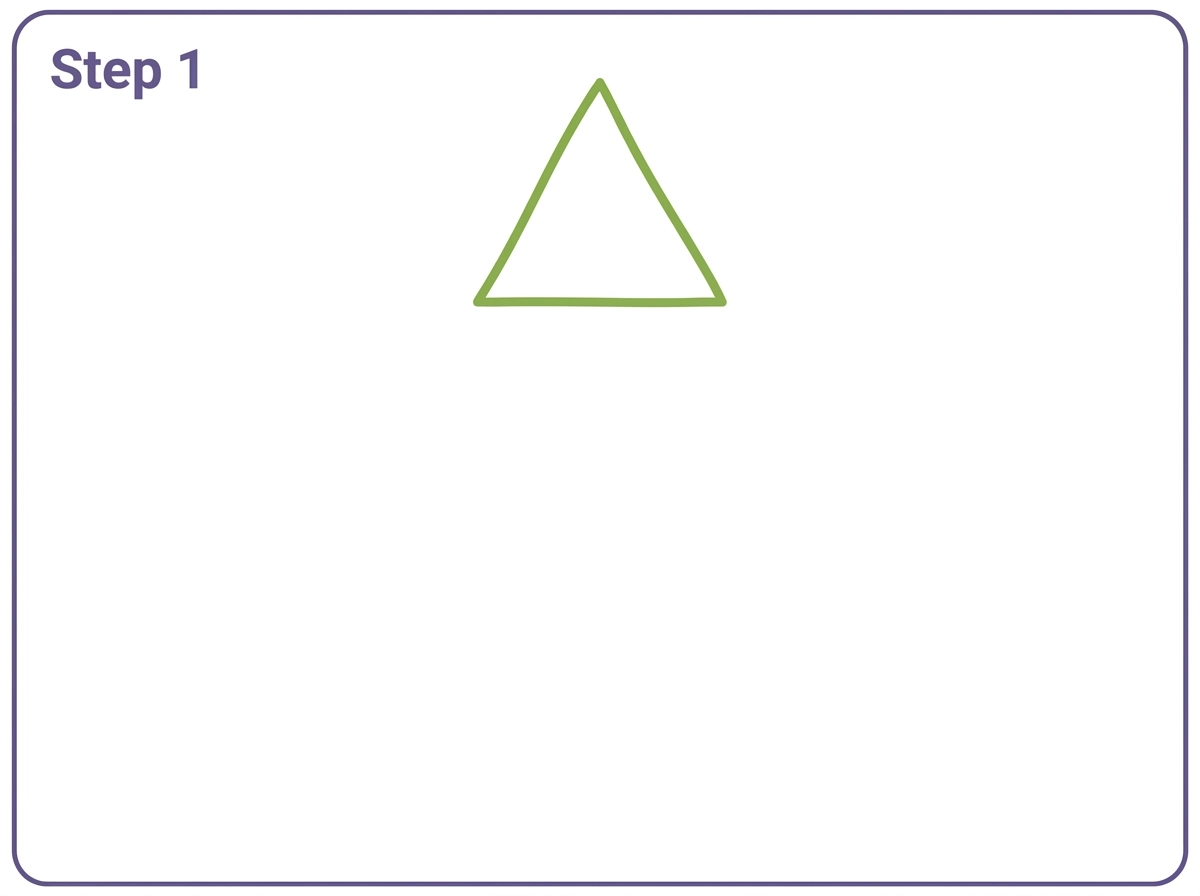
Step 1 — Draw the Small Top Triangle
Start near the upper center of the page. Draw a small triangle with gently slightly curved sides. The apex points upward and the base is a horizontal line. Position this triangle in the upper third of the page, leaving space below for the two larger layers and the trunk.
This first triangle is the topmost layer of the Christmas tree. Draw the sides with a very slight outward curve rather than perfectly straight lines, which gives the layer a softer, more natural quality than a rigid geometric triangle.
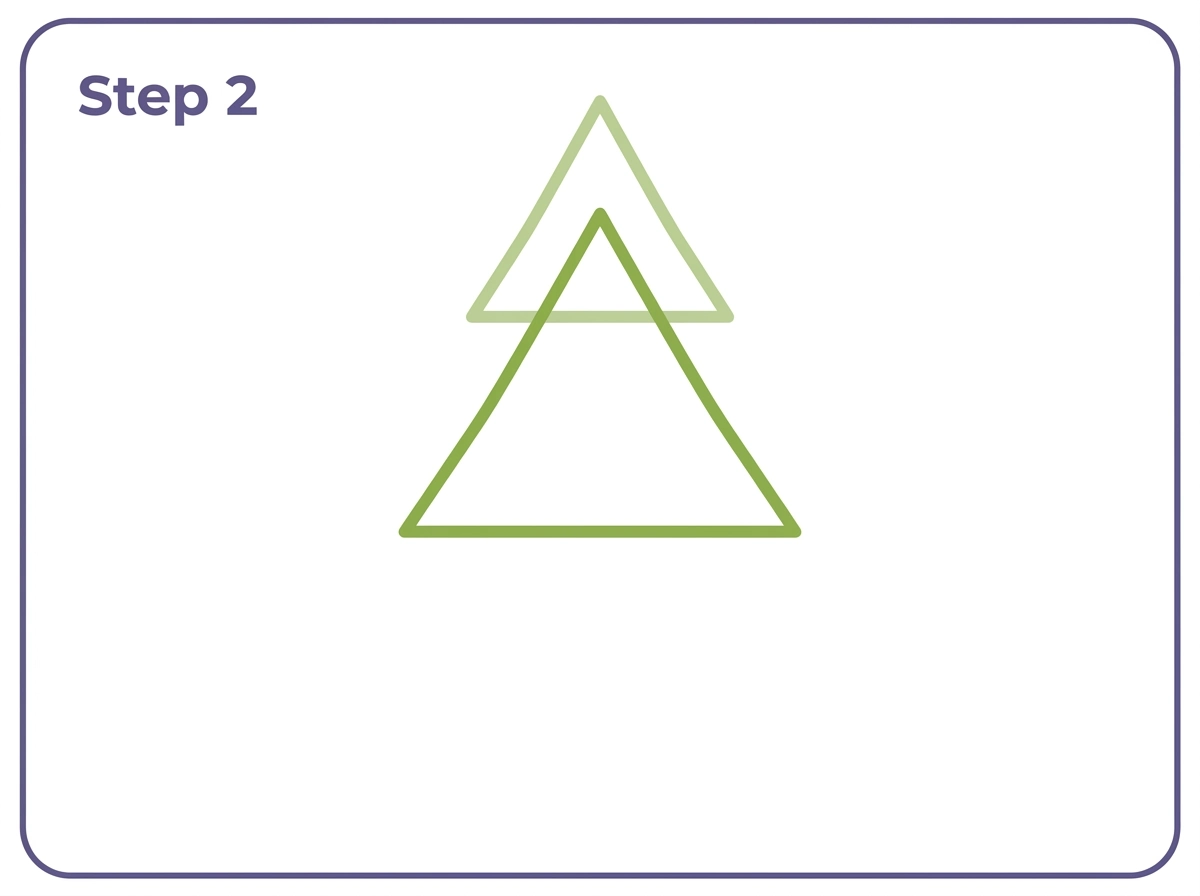
Step 2 — Draw the Medium Middle Triangle
Directly below the first triangle, draw a medium-sized triangle noticeably wider than the small top triangle. The apex of the medium triangle overlaps slightly behind the base of the top triangle. Its base is a horizontal line wider than the top triangle’s base.
The two stacked triangles already clearly read as a Christmas tree even at this early stage, which is part of what makes the layered triangle method so satisfying for beginners.
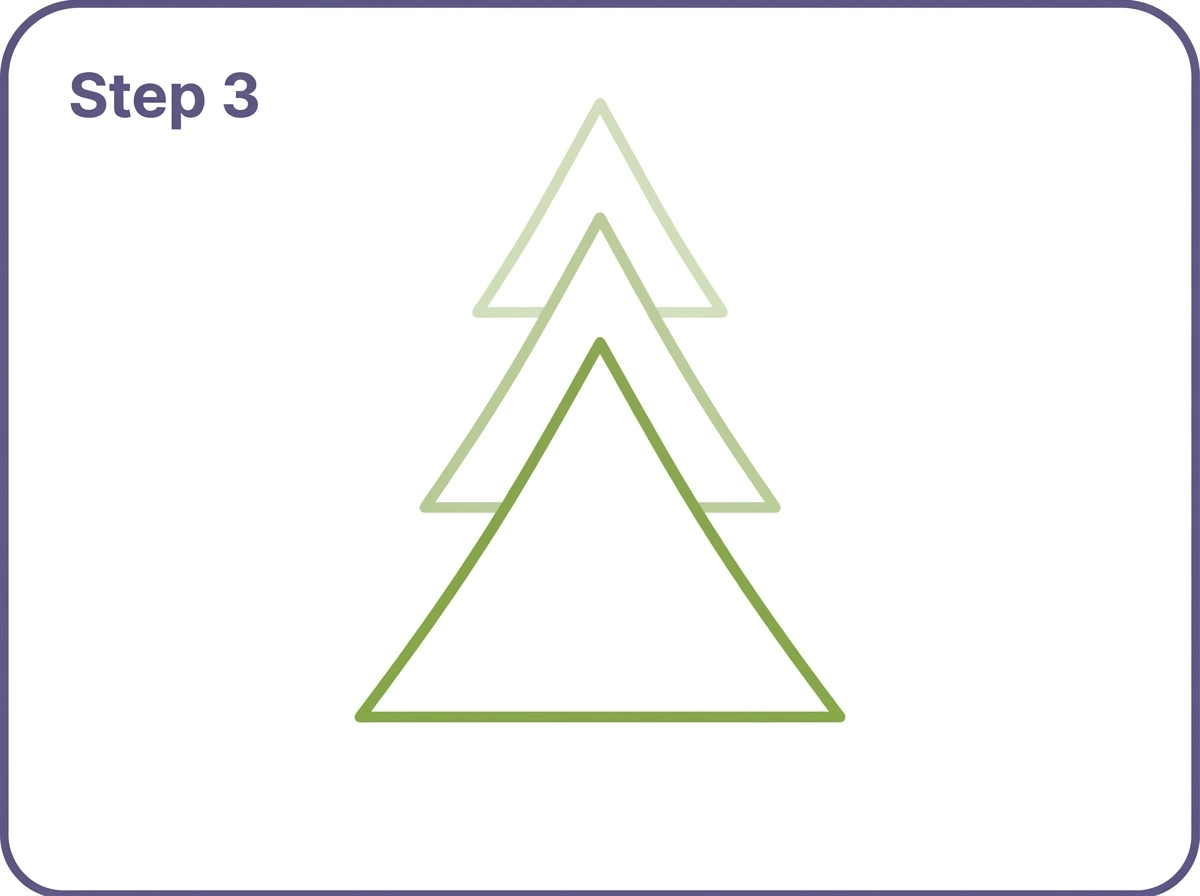
Step 3 — Draw the Large Bottom Triangle
Below the medium triangle, draw the largest triangle of the three. This bottom layer is significantly wider than the middle layer and its base is the widest horizontal line in the composition. Its apex overlaps slightly behind the base of the medium triangle.
All three stacked triangles together form the complete Christmas tree outline. The progressively wider layers create the characteristic pyramid shape of a decorated fir tree. Leave a small space below the large base for the trunk.
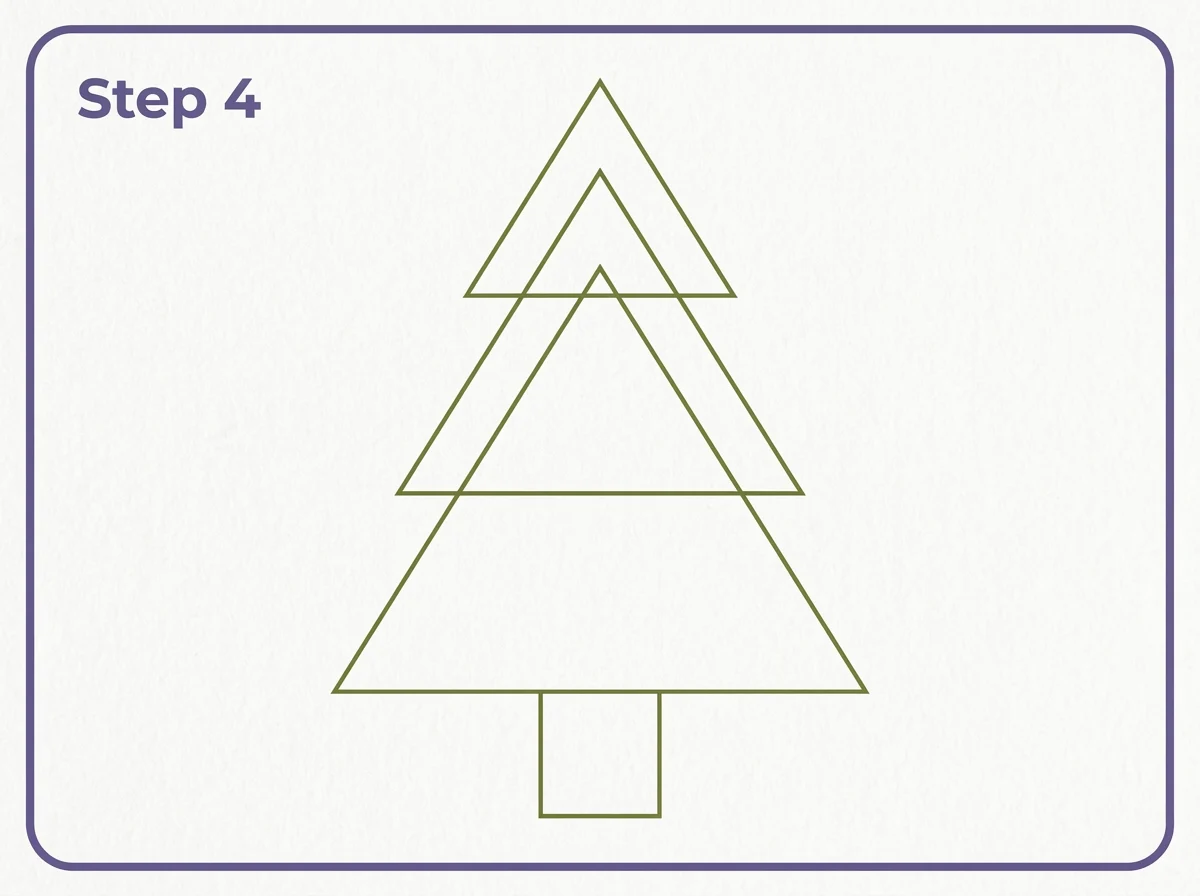
Step 4 — Add the Trunk
Below the center of the large bottom triangle base, draw a simple rectangular trunk. The trunk should be roughly one quarter as wide as the base of the bottom triangle and approximately the same height as the small top triangle. Center it precisely below the tree.
The trunk is a small element but an important one. Without it the tree looks like a floating geometric shape. With the trunk it becomes a tree that is standing in a specific location.
Step 5 — Draw the Star on Top
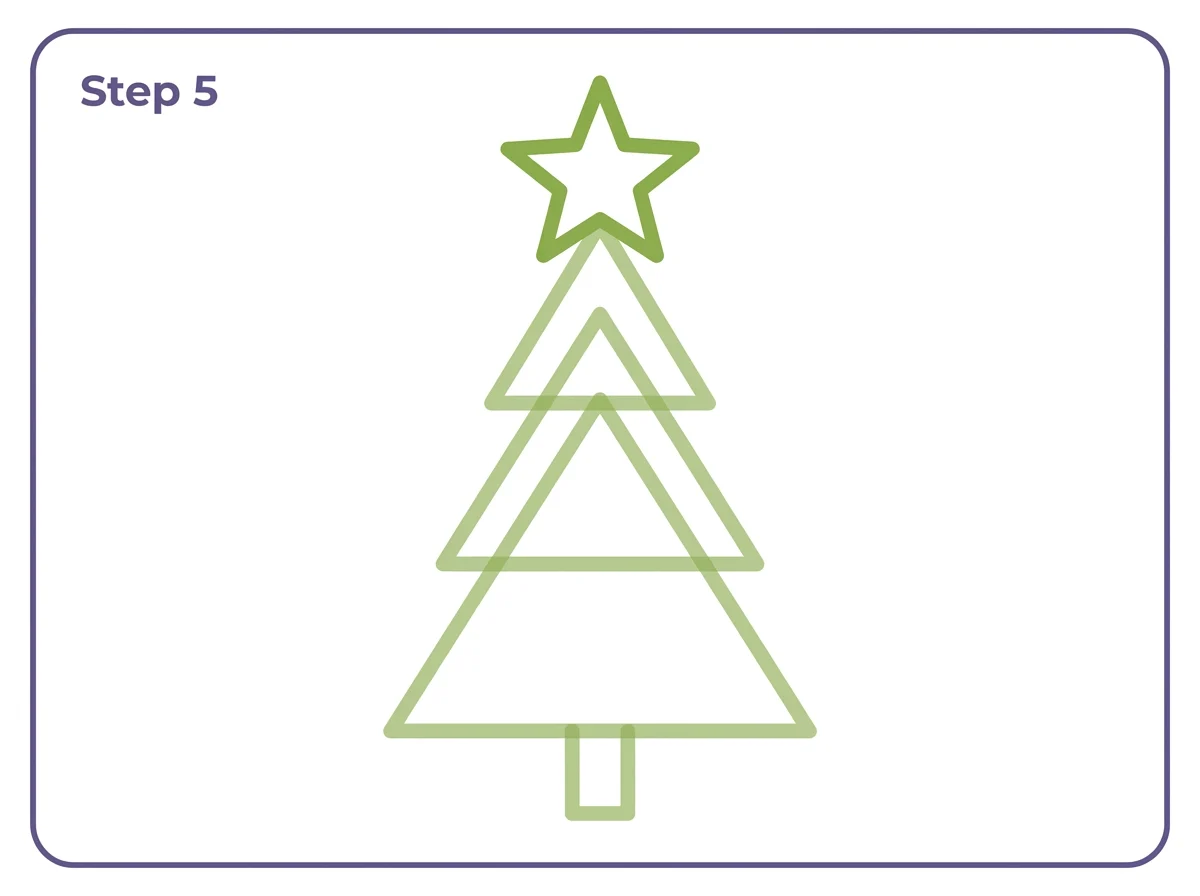
At the very top of the tree above the apex of the top triangle, draw a five-pointed star. The star should be clearly visible and proportionate to the tree without overwhelming it. The bottom point of the star sits just above or touching the tip of the top triangle.
For a simple star: draw two overlapping triangles to create a six-pointed star shape, or use five straight lines meeting at a center point and connecting their outer ends to form the classic five-pointed star. The star at the top of a Christmas tree is one of the most universally recognised holiday symbols.
Step 6 — Add Branch Texture
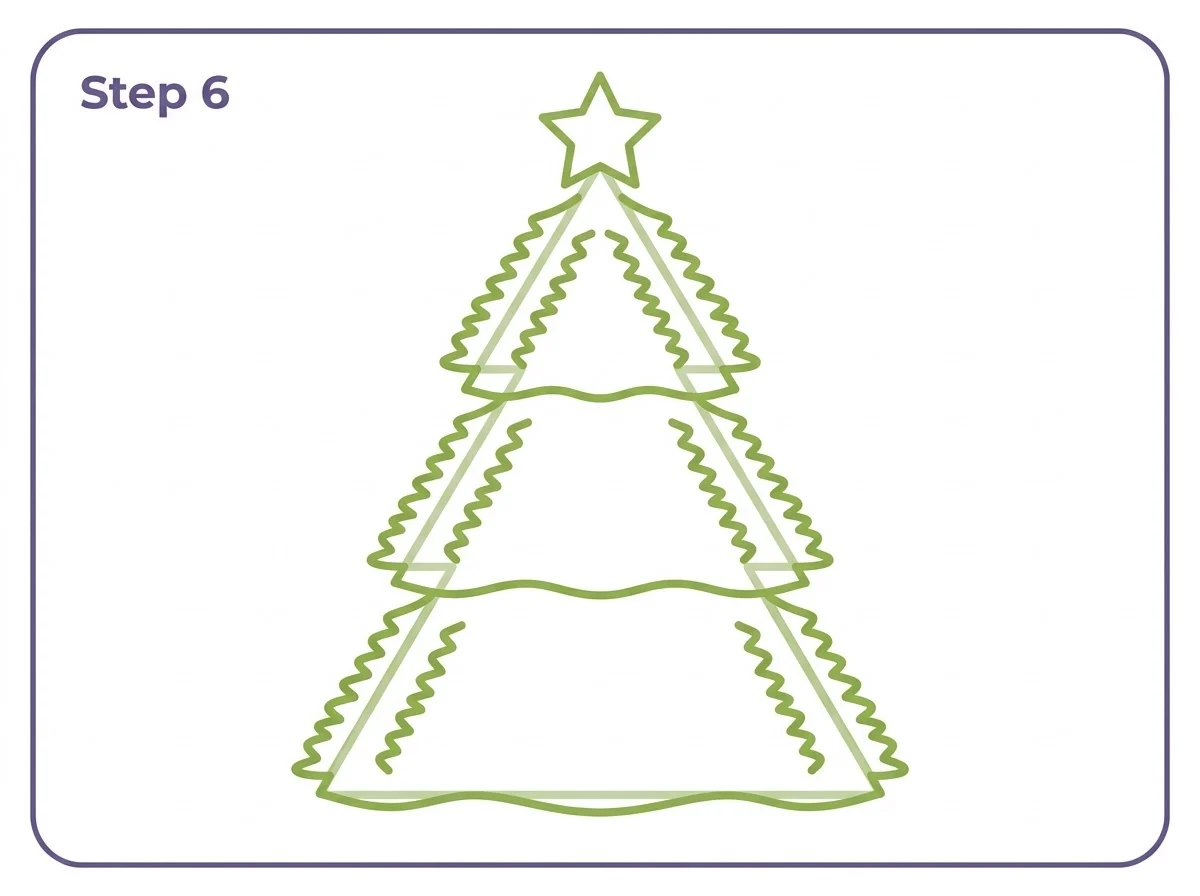
Along the sides of each triangle layer, add wavy or scalloped edge lines to suggest the natural branching texture of a fir tree. Each triangle layer now has small zigzag or gentle scallop shapes along its left and right edges, giving it a fluffy tree-branch quality rather than a plain geometric triangle appearance.
A horizontal slightly wavy line along the bottom edge of each layer separates the layers visually and adds the characteristic stepped appearance of a decorated Christmas tree.
Step 7 — Add Decorations
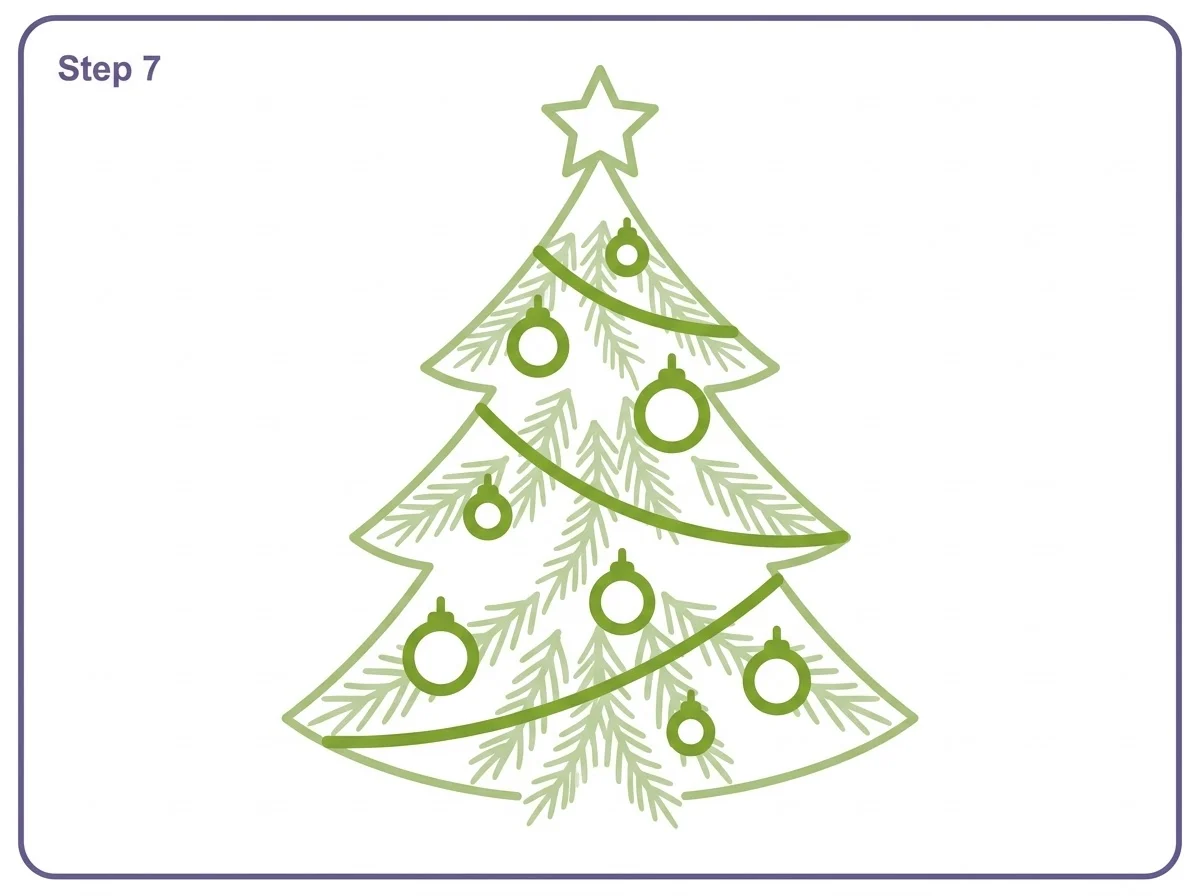
Inside the tree, add ornaments and garland to transform the plain triangle outline into a decorated Christmas tree. Draw four or five small circles scattered across the tree layers representing hanging baubles. Add a small hook or cap shape at the top of each bauble circle.
Draw one or two wavy diagonal lines running across the tree layers from side to side representing garland or tinsel draped between the branches. A few small star or dot shapes between the ornaments suggest string lights. For a more elaborately decorated tree, add a candy cane shape using a J curve on one side of the tree, a small bell shape with a bow, and small ribbon loops.
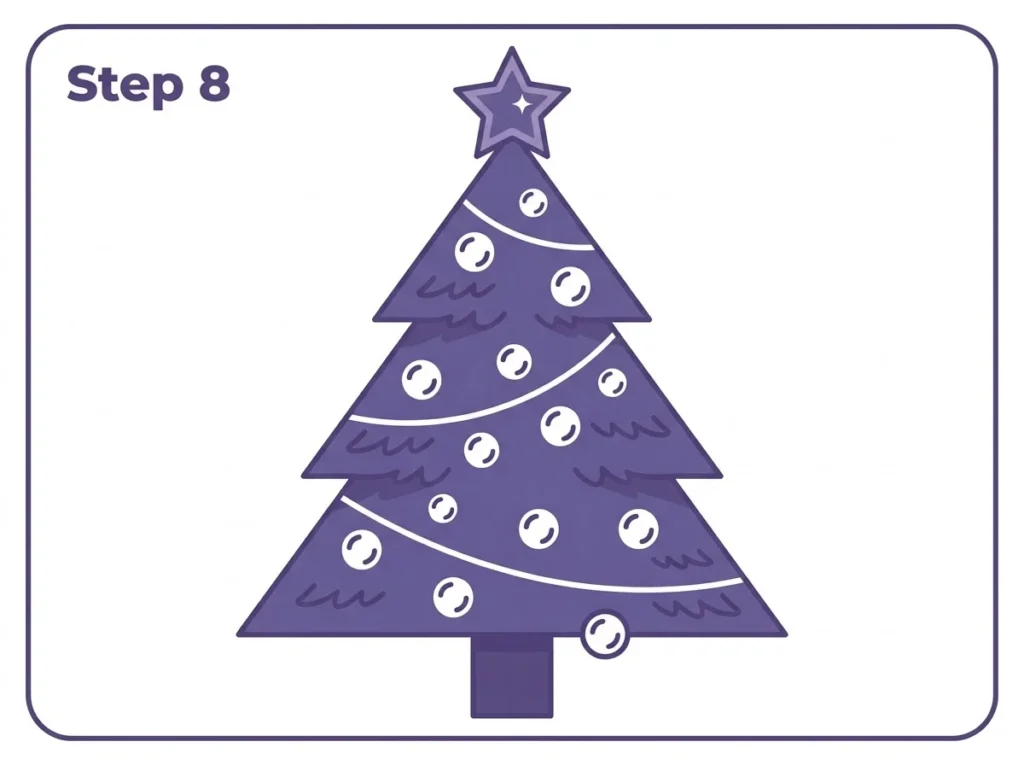
Step 8 — Colour the Tree
The Christmas tree is now fully drawn. Green is the traditional and most recognisable colour for the tree body, with darker green for shadow areas and slightly lighter green for the areas that catch the light. The classic ornament colouring uses red, gold, blue and silver in combination. The star at the top is typically gold or yellow. The trunk is a warm brown.
For a more creative approach, a pink or white Christmas tree with pastel ornaments is a distinctive and increasingly popular alternative to the traditional green. An entirely purple or blue tree has a striking visual quality that works particularly well in a coloring page context.
A Brief History of the Christmas Tree
The Christmas tree tradition is generally traced to sixteenth century Germany, where people brought decorated trees indoors as symbols of life during the cold winter months. The practice spread across Europe when Prince Albert of Saxe-Coburg and Gotha, the German-born husband of Queen Victoria, introduced the tradition to the British royal family in the 1840s. A widely published engraving of the royal family gathered around a decorated tree at Windsor Castle made the Christmas tree fashionable across Britain and subsequently across the British Empire and the United States.
The trees used for Christmas trees are most commonly fir, pine and spruce species, all of which are evergreen. The evergreen quality of these trees, retaining their leaves through winter when most other trees are bare, gave them symbolic significance in many Northern European cultures long before the specifically Christmas tradition developed.
The first Christmas trees were decorated with candles, dried fruits, paper flowers, nuts and sweets. Glass ornaments were first made in Germany in the nineteenth century. Electric Christmas tree lights were invented in 1882, just three years after Edison developed the practical electric light bulb.
How to Draw a Christmas Tree for Kids
A simple Christmas tree easy enough for young children reduces the eight-step tutorial above to its most essential elements. A single large triangle with bumpy edges. A small rectangle trunk below. A star at the top. Three circles on the tree face representing ornaments. This five-element version is achievable by children aged four and above in under five minutes and produces an immediately recognisable result.
For preschool and kindergarten age children, an even simpler version uses just the outline triangle and trunk without any internal decorations. The child then colours and decorates the tree interior themselves, which makes the drawing session an open-ended creative activity rather than a step-following exercise.
How to Draw a Realistic Christmas Tree
A realistic Christmas tree drawing moves away from the stacked triangle method toward observation of actual tree branch structure. Real Christmas trees have a central trunk from which branches grow outward and slightly downward, each branch further subdivided into smaller branchlets and then individual needles. The overall profile is roughly triangular but with significant irregularity.
For a simple realistic Christmas tree easy for beginners: Start with a light vertical center line for the trunk. From this line draw pairs of branches angling downward and outward, each pair slightly longer than the one above it. Add sub-branches along each main branch, also angling slightly downward. Use short feathery pencil strokes for the needle texture at the tips of the smallest branches.
How to Draw Christmas Tree Decorations
The ornaments and decorations on a Christmas tree can be as simple or as elaborate as the drawer wants. The simplest ornament is a plain circle with a small cap and hook at the top. For a three-dimensional-looking bauble, add a small curved highlight line in the upper left area of the circle, which suggests the curved reflective surface of a glass ornament.
Candy canes are drawn as a J-shape with diagonal stripe lines across the shaft. Bells are drawn as wide inverted teardrop shapes with a small oval clapper hanging below. Bows are drawn as two mirror-image wing shapes on either side of a small central rectangle.
String lights are some of the most satisfying ornaments to draw on a Christmas tree. Draw a wavy line across one of the tree layers to represent the wire. Along this wire draw small teardrop or bulb shapes hanging downward at regular intervals, each bulb connected to the wire by a tiny line.
How to Draw a Christmas Tree with Presents
A Christmas tree with presents beneath it is one of the most searched Christmas drawing variations. Draw the completed Christmas tree first. Then below the trunk, draw a flat ground line suggesting the floor. On this ground line arrange three to five present boxes of different sizes. Each present is a rectangle or square shape with a bow on top. The bow is formed from two wing shapes and a center knot. Vary the heights and widths of the boxes so no two presents look identical.
How to Draw a Christmas Tree Star
The star at the top of the Christmas tree is one of the most commonly attempted elements in Christmas drawing. The easiest method for young children is to draw a wide X and then add a vertical line through the center before connecting the outer points with straight lines. This produces a roughly symmetrical five-pointed star without requiring precise geometric construction.
A more symmetrical star can be drawn by lightly marking five evenly spaced points in a circle before connecting every other point with a straight line. Erasing the circle guide afterward leaves a clean five-pointed star. A dimensional star adds an extra line parallel to each outer edge, slightly inside the star shape, suggesting a raised three-dimensional star topper.
How to Draw a Cute Christmas Tree
A cute Christmas tree uses the same stacked triangle structure as the main tutorial but with additional character details that give the tree a face and personality. Draw a simple smiley face on the front of the center triangle layer, two round eyes and a curved smile. Add small blush circles on the sides of the face for rosy cheeks. Miniaturise the overall tree proportions slightly, making it rounder and more compact, and draw the star at the top slightly oversized.
A kawaii Christmas tree takes these adjustments further. Very large eyes with sparkle highlights, an extremely small smile, rosy cheeks that take up significant area of the face, and a compact round body. This style is popular with older children and teenagers who enjoy the kawaii aesthetic.
Colouring Guide for Christmas Trees
The traditional Christmas tree colouring uses at least two greens. A medium forest green as the main body colour and a slightly darker green for the areas that fall in shadow, particularly the underside of each layer and the areas between ornaments. A very light sage green or almost yellow-green for the tips of branches where the most light hits produces a dimensional result.
The ornaments on a traditional Christmas tree use red, gold, blue and green as the primary palette. Silver and white are used for metallic ornaments. The star is most commonly gold or yellow. A touch of white or light yellow at the center of the star, with the gold concentrated at the points, suggests the star glowing with its own light.
Fun Facts About Christmas Trees for Kids
The tallest Christmas tree ever cut was a Douglas fir measuring 67.4 meters tall, harvested in 1950 in Washington State. This is approximately the height of a twenty-story building.
In the United States approximately 25 to 30 million real Christmas trees are sold each year. For every tree harvested, two or three new seedlings are planted in its place, making Christmas tree farming a continuously replanted agricultural industry.
In Germany, where the Christmas tree tradition began, it was traditional to put up the tree on Christmas Eve and leave it decorated until January 6th, the Feast of the Epiphany. The first artificial Christmas trees were made in Germany in the nineteenth century from goose feathers dyed green.
FAQ
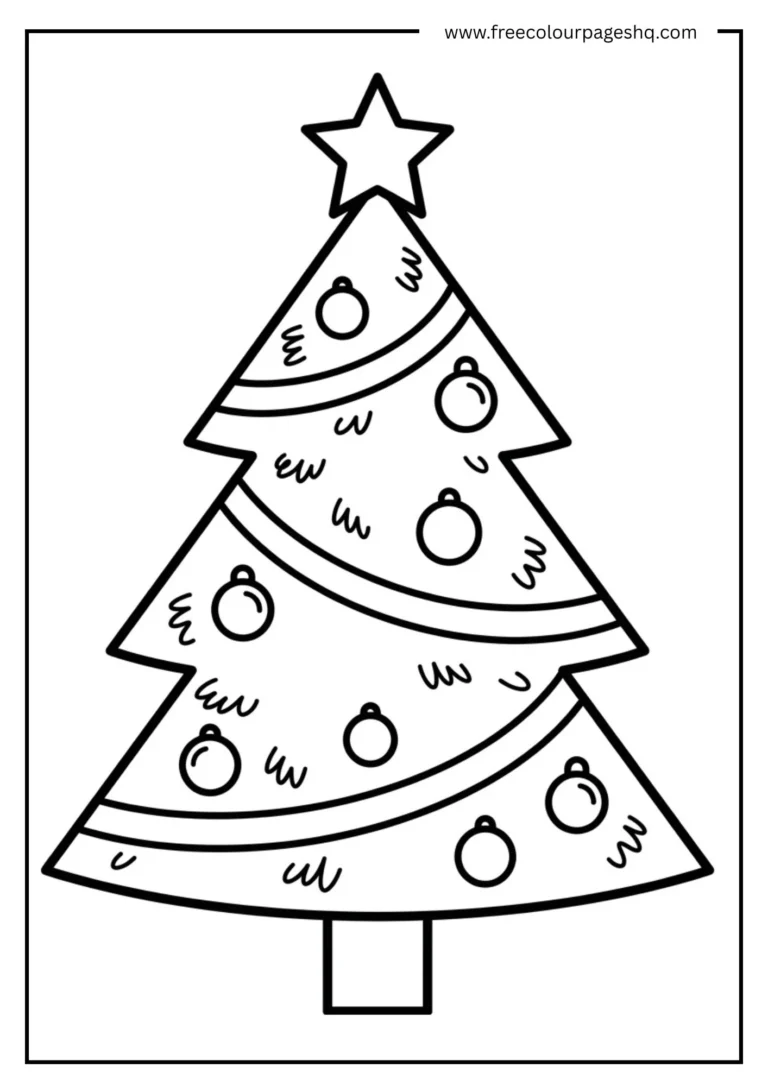
What is the easiest way to draw a Christmas tree? Draw three stacked triangles that get progressively wider from top to bottom. Add a small rectangular trunk below the widest triangle. Place a five-pointed star above the top triangle. Add branch texture to the triangle edges and three or four circular ornaments on the face. This eight-step method produces a recognisable decorated Christmas tree for all ages and skill levels.
How do you draw a Christmas tree for kids? Draw one large triangle with slightly bumpy edges. Add a rectangle trunk below. Put a star at the top. Draw three circles on the tree face for ornaments. This simplified four-element version is achievable by children aged four and above in under five minutes.
How do you draw a Christmas tree star? Draw a wide X and add a vertical line through the center to create five direction markers. Connect the outer five points with straight lines. Erase the inner construction lines. A more symmetrical star is achieved by lightly marking five evenly spaced points in a circle before connecting every other point with a straight line.
How do you draw presents under a Christmas tree? Draw the completed Christmas tree first. Below the trunk, draw a flat ground line. Arrange three to five rectangular present boxes of different sizes on this ground line. Add a crossed ribbon and bow on top of each present, varying the sizes and ribbon colours so no two presents look identical.
How do you draw a realistic Christmas tree? Start with a vertical center trunk line. Draw pairs of branches angling downward and outward from the trunk, each pair slightly longer than the one above it. Add sub-branches along each main branch. Use short feathery pencil strokes for needle texture at the branch tips.
What colours do you use for a Christmas tree drawing? Traditional Christmas tree colouring uses medium forest green as the main body with slightly darker green for shadow areas and lighter sage green at branch tips. Ornaments use red, gold, blue and green in combination. The star is typically gold or yellow. The trunk is warm brown.